Wright Balance® Lessons Part 1
A Guide for the Wright Balance® Teaching Professional
The following should be covered in your first few lessons with your student. I generally schedule 1.5 hours to assess my students in their first lesson. The purpose of the Lessons overview is to provide a road map for you to follow using the Wright Balance® Stance Width Results.
When Wright Balance® was introduced to instructors years ago, the Stance Width application was all that was used. We have expanded to include Posture, Grip and connection at address by Core Region. We have also added external shoulder rotation, assessing Grip Power Spots and observed Sequencing in your student's swing to determine playing Core Region. We no longer use the strength test as a primary determinant of playing Core Region. Input from your student is also an important consideration.
Ask your student about lessons they have had in the past and what they feel they should be doing in their golf swing. Many will tell you they are trying to clear their hips at impact. When an Upper Core player works to clear their hips at impact, that is a formula for injury and errant shots.
Be certain to begin your first lesson inquiring about neck, shoulder, elbow, wrists, back, hip, knee and ankle health and injury/surgery history. Ask about surgeries and, in particular, back health. Back Pain is a common problem not always reported as it becomes something your students learn to deal with and sometimes will not report. Your students health history may play a significant role in what Core Region you determine is best for playing.
The following checklist is a guideline for your first few lessons with your students
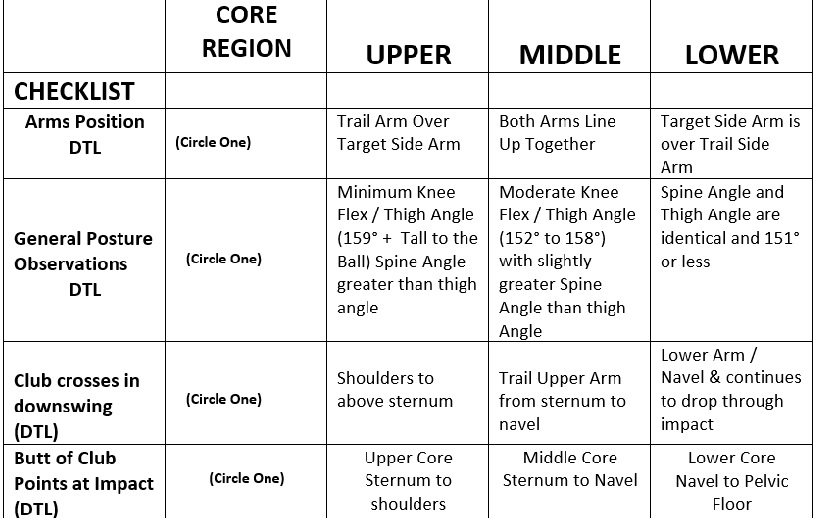
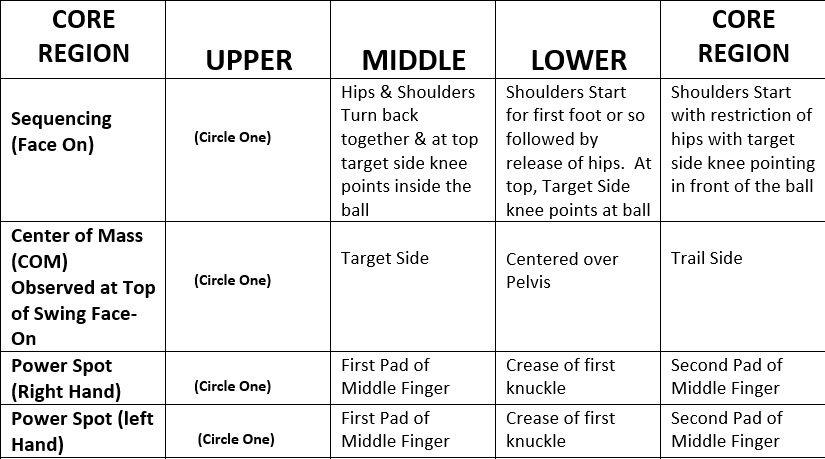
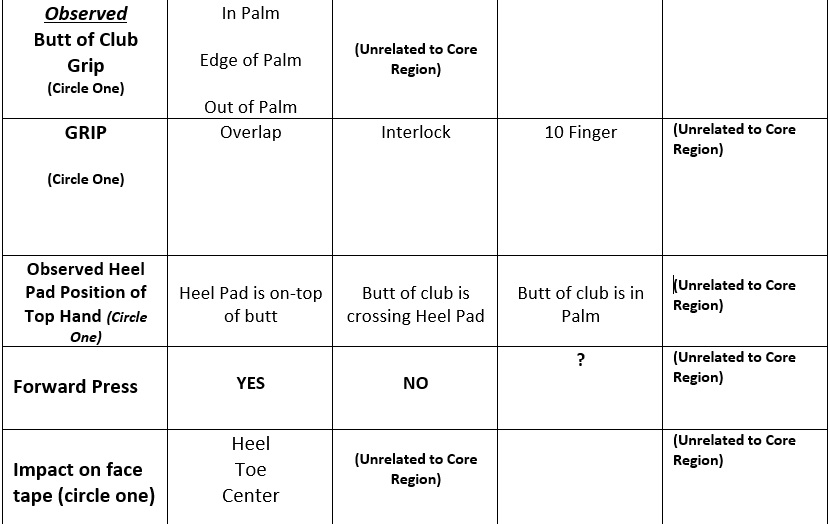
Below is a narrative of the use of this checklist.
-
Take your student to the Range with 10 -12 balls, a wedge and 8 iron.
-
Place face tape on the 8 iron and ask them to warm up with their wedge.
-
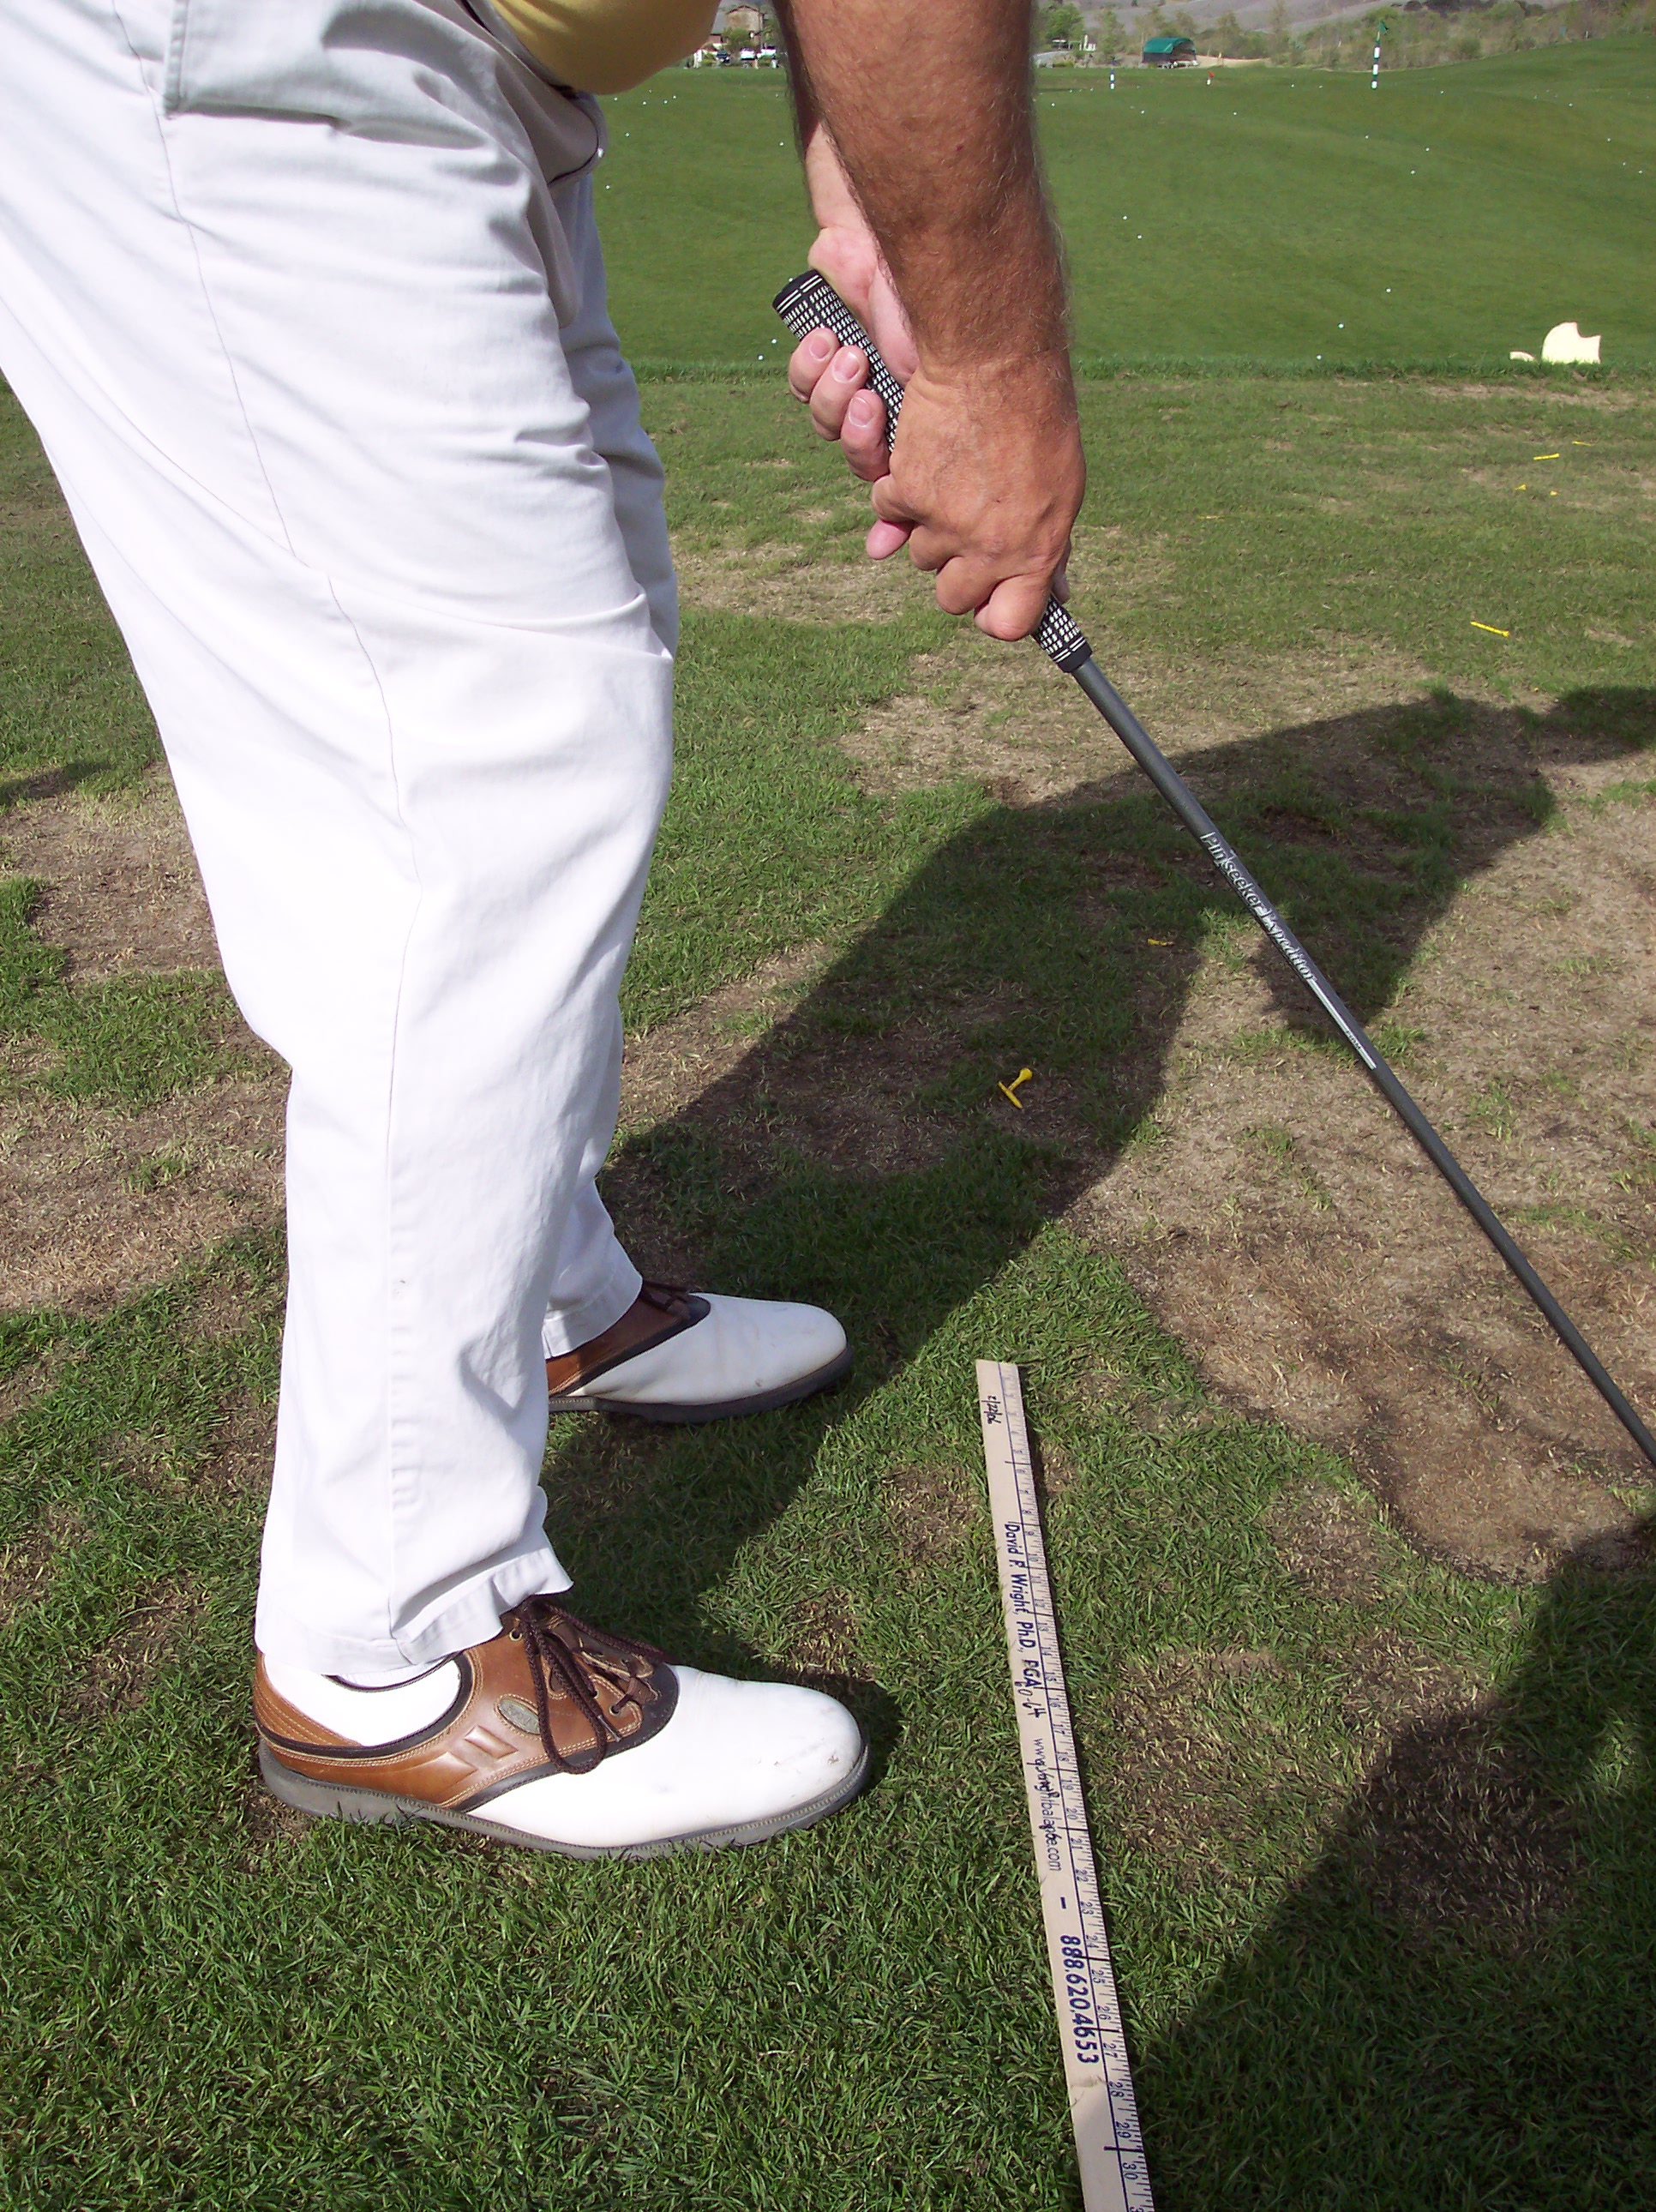
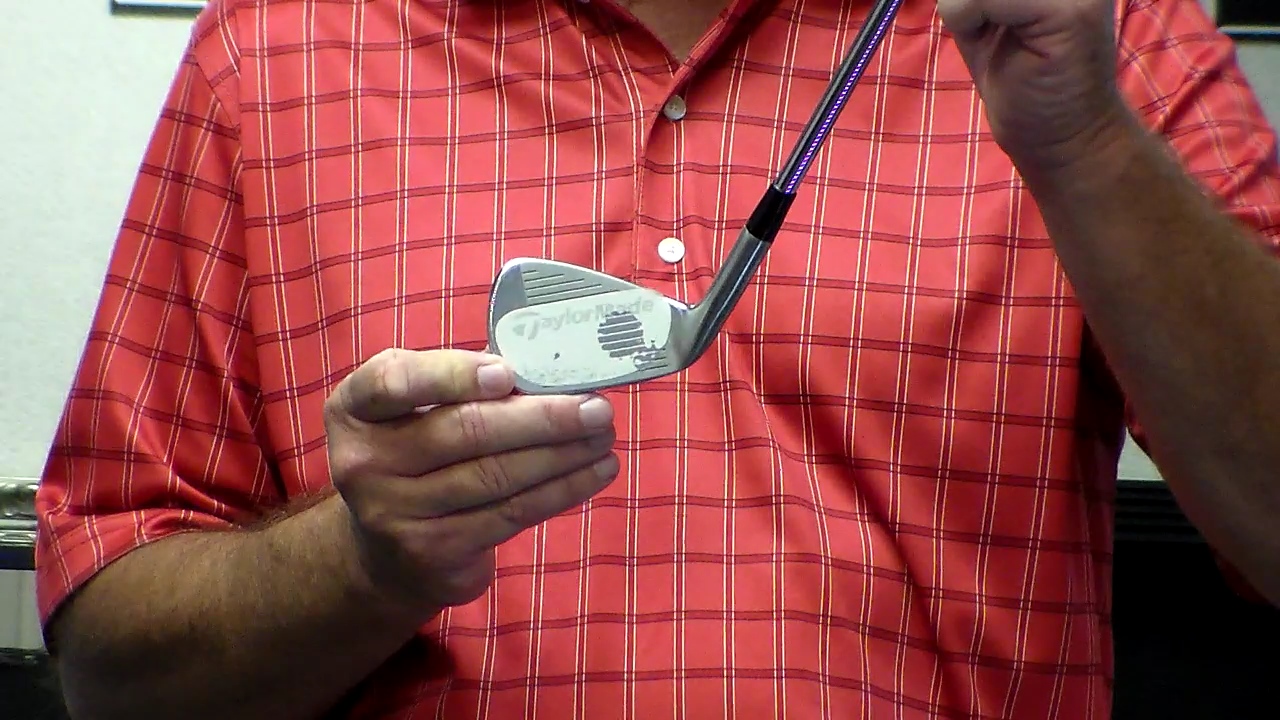
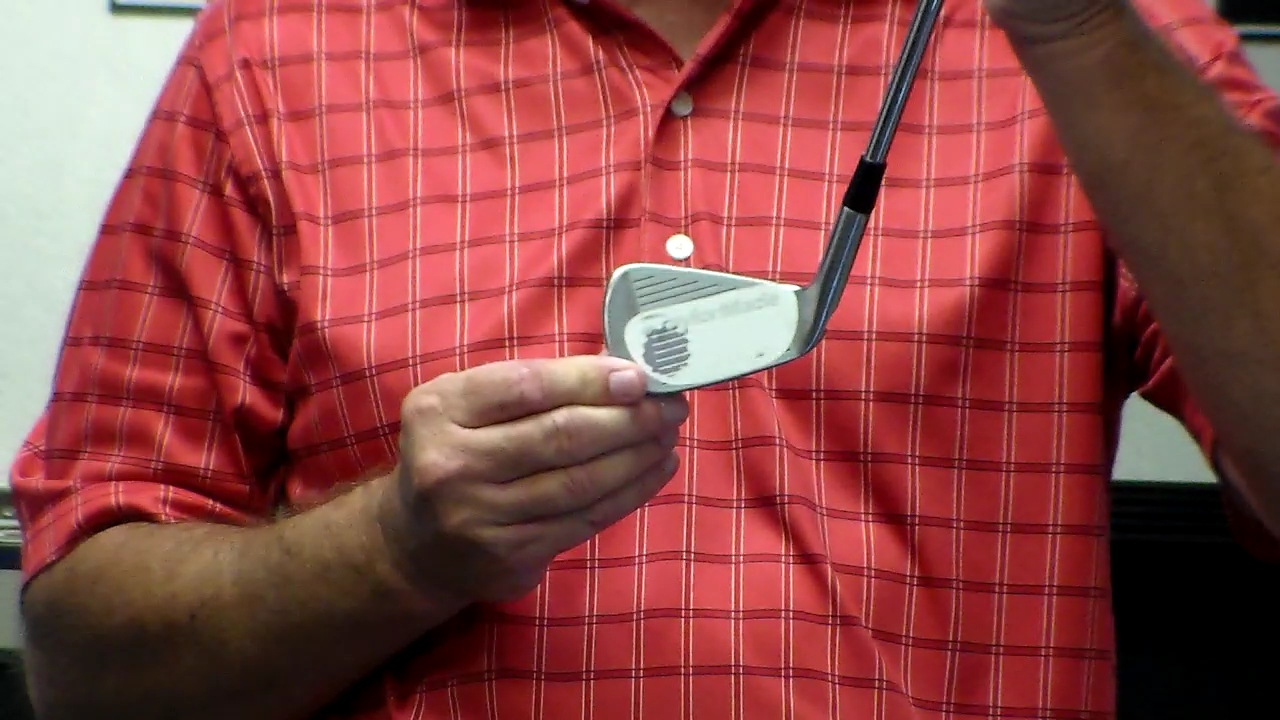
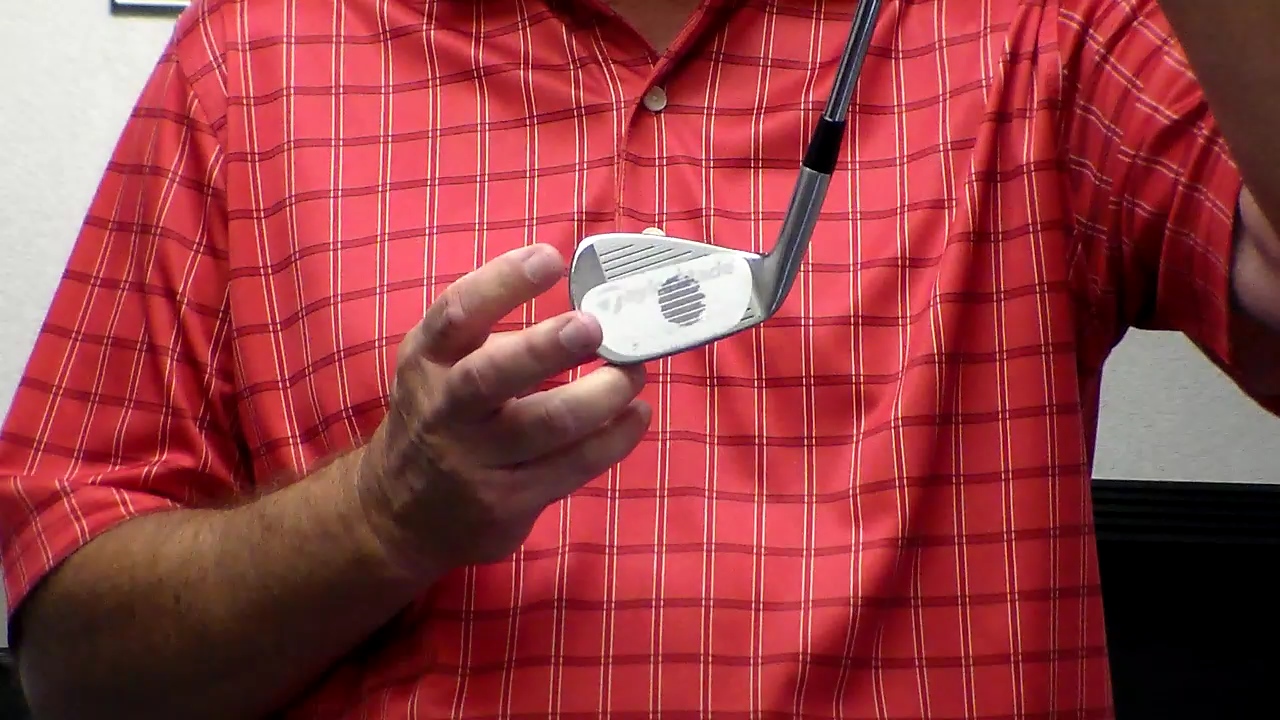
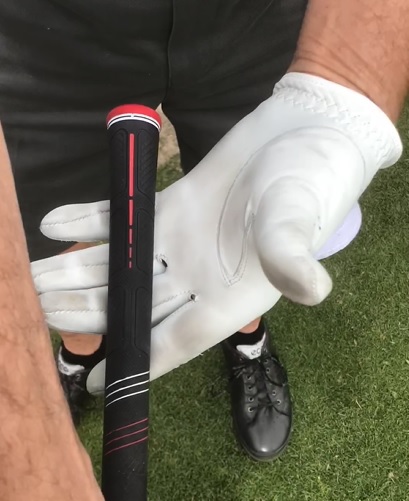
Check their Stance Width using a yardstick. If they have foot flare, show them how to raise the toes of their foot and pivot on their heel to square their feet to their stance line. Make a note of the Stance Width to check against the results you were emailed. Your student was emailed the same results you received for future reference. (Note: In the following photo that the butt of the club is at the edge of the palm of his hand. This observation demonstrates the need to "test" the potential impact on this player's balance and move the club out of the palm.)
- Note Clubface Address Position and ball at address: Heel, Center or Toe (You will need to change address position following setting Power Spots if address position is not on center of face.)
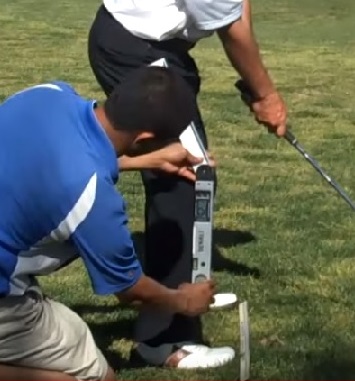
- Check Thigh Angle in Posture with a digital Protractor
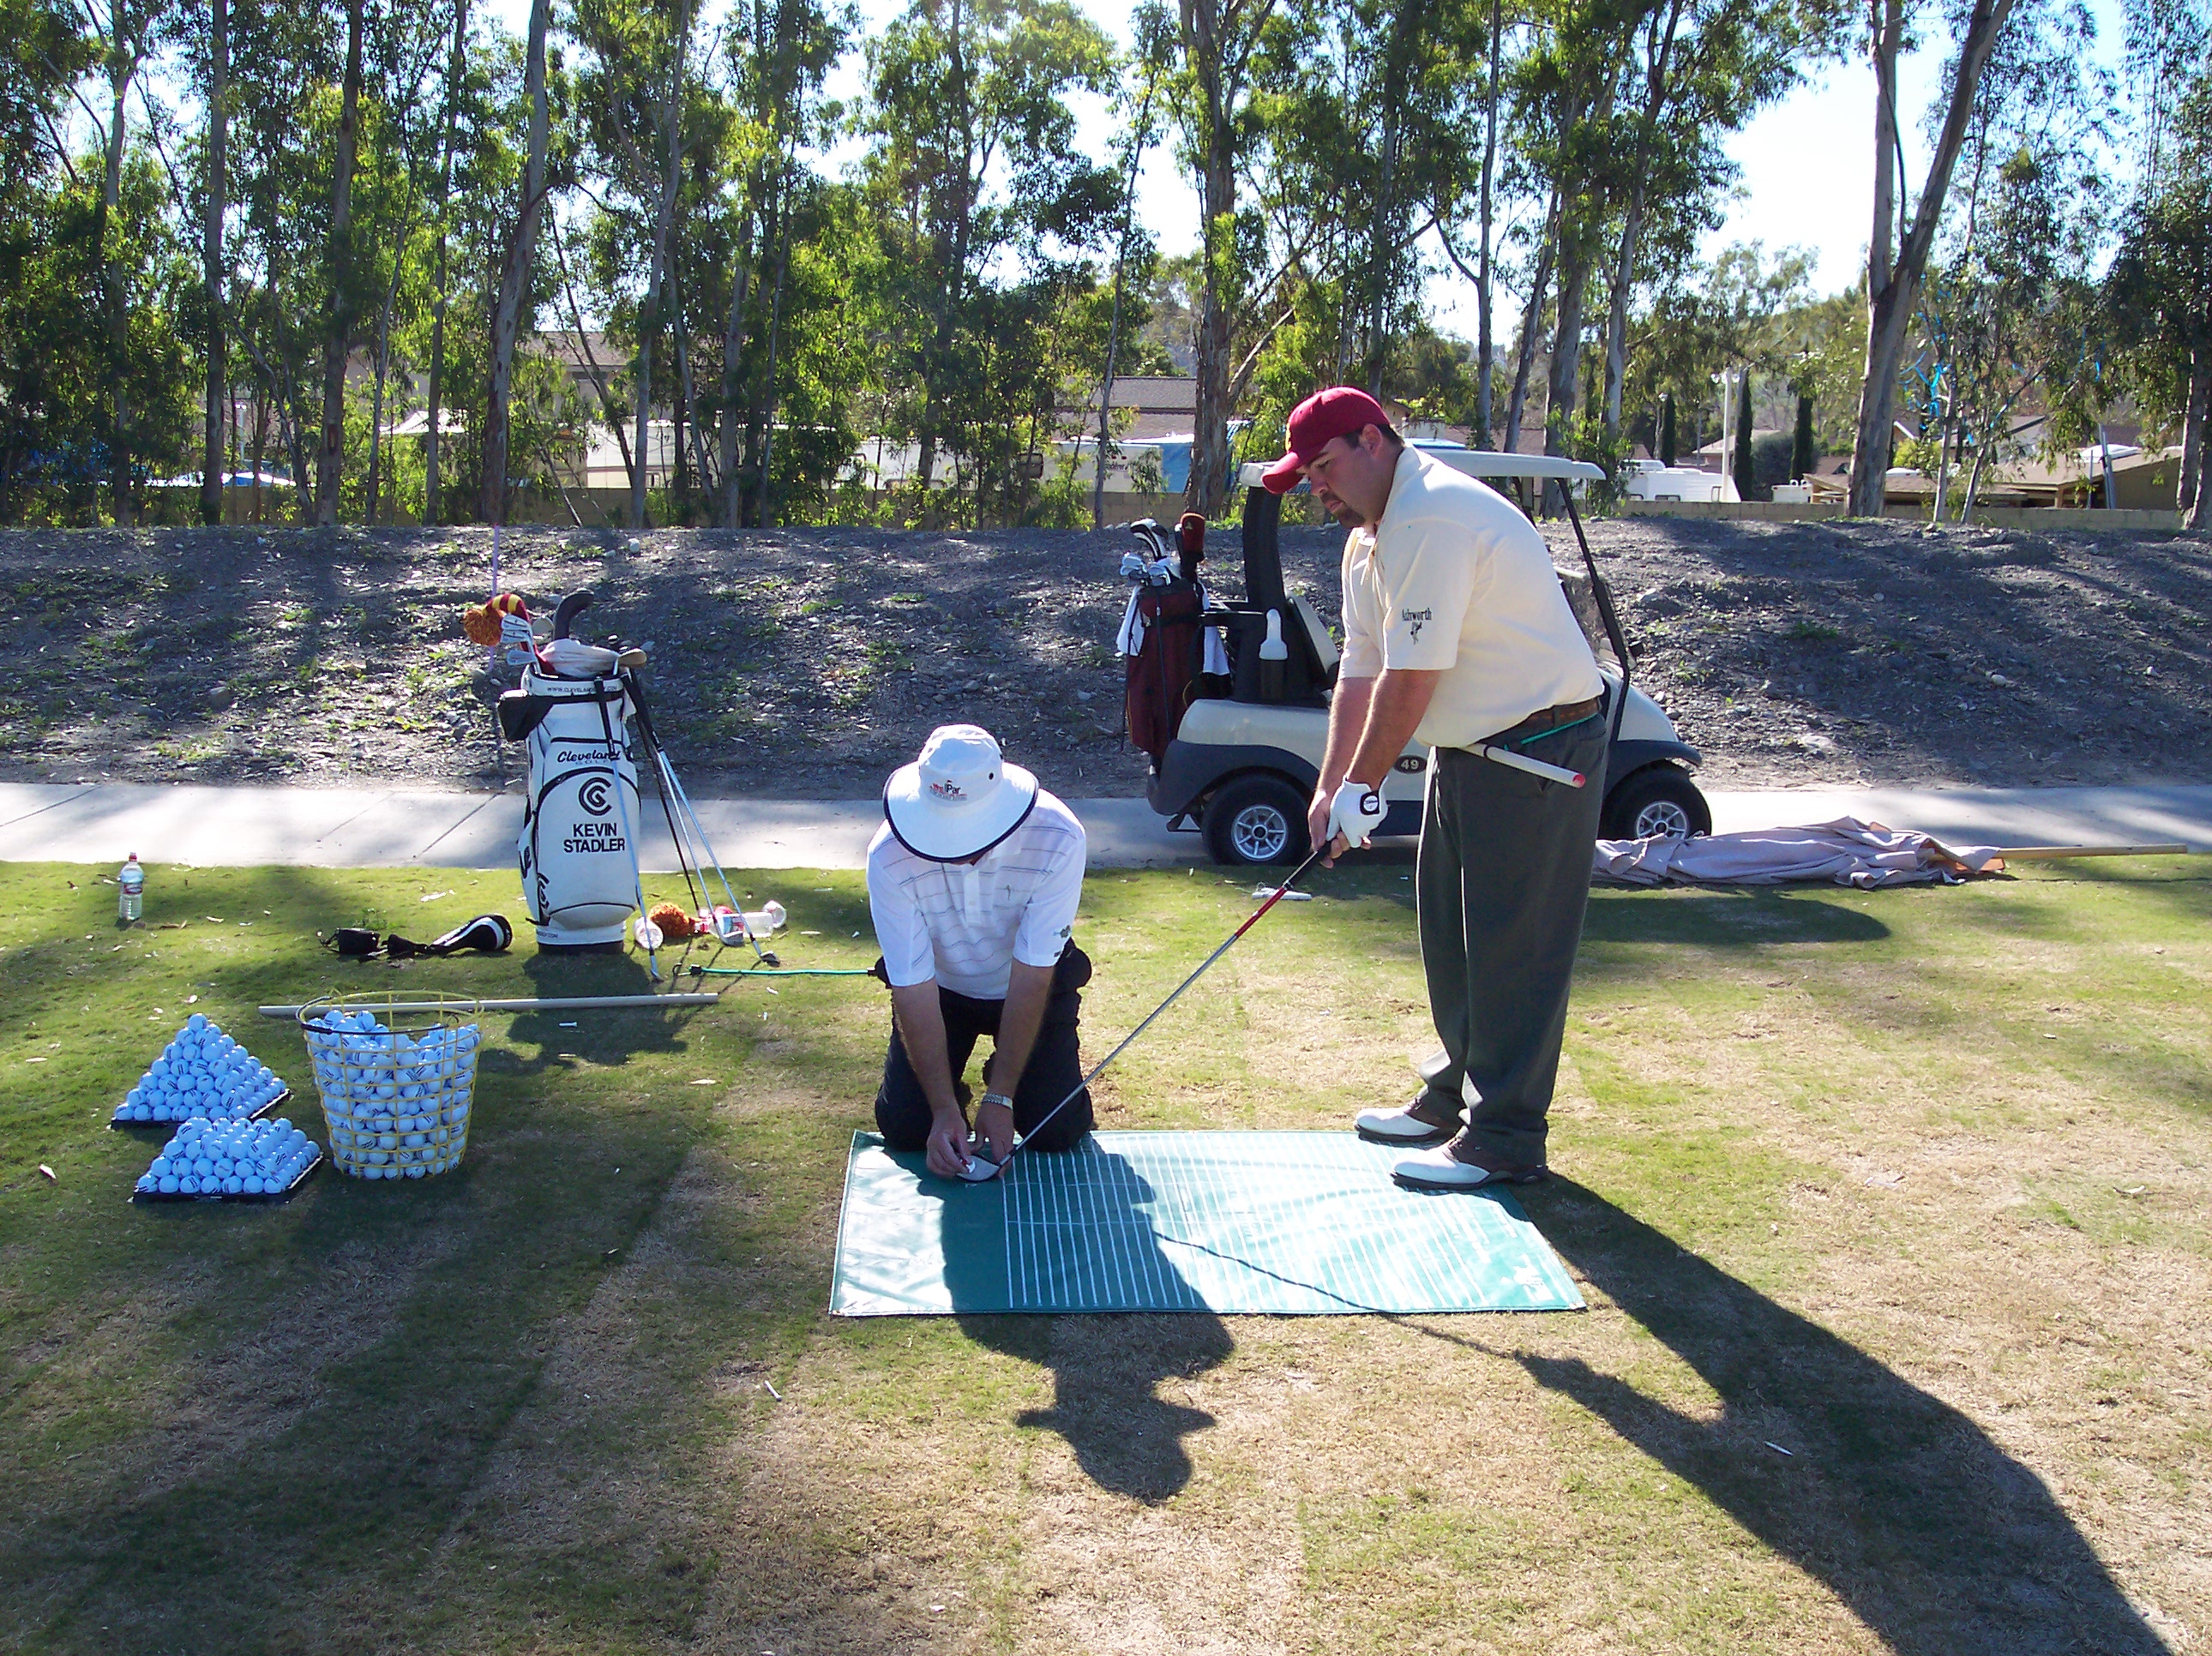
- Check impact on Clubface with face tape
 !
!
- Check left and right hand Power Spots: Set Shaft parallel to the ground & open right palm first. Grip the club on the shaft and show your student what you want them to do. Then, ask them to leave their fingers on the club as they open their right palm as shown in this illustration.
Then ask them to remove their right hand and open the palm of their left hand as you support the club at the shaft as shown below.
These photos were from the first lesson of one of my students. You can see that his Power Spots are both set on the crease of the first knuckle of his middle fingers, a Middle Core grip position. This was a first for me. Most players will have one Power Spot set but not both. His entire evaluation confirmed that he was a Middle Core player.
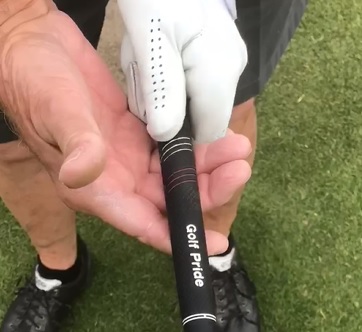
- Be sure to observe how your student grips the club at the butt. Note Glove wear and amount of heel pad on top of the Grip.

This photo is of Kevin Stadler's grip in 2012. In retrospect, I would say that Kevin's clubs were not long enough for him. He broke a bone in his hand in 2014. That hand injury is common in baseball when players place their little finger on the bottom hand below the knob on the bat.
We will visit club length testing in another EBook. This video demonstrates the impact of a gripping the butt of the club in the palm.
- Does your Student use an interlock or overlap Grip? Do they have a Trigger Finger? If so, do they have an overlap grip. The following video will guide you through the impact of a trigger finger or lack thereof on the Core as expressed in pelvic rotation.
-
Note the face wear on clubs in bag
-
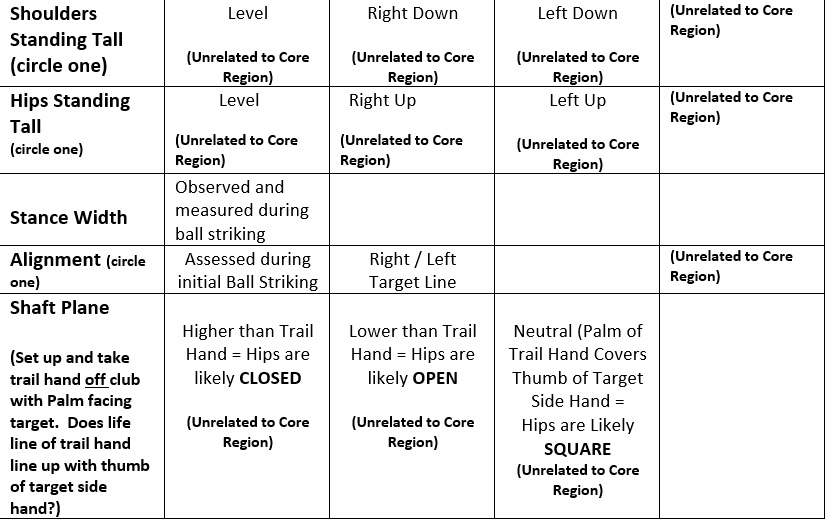
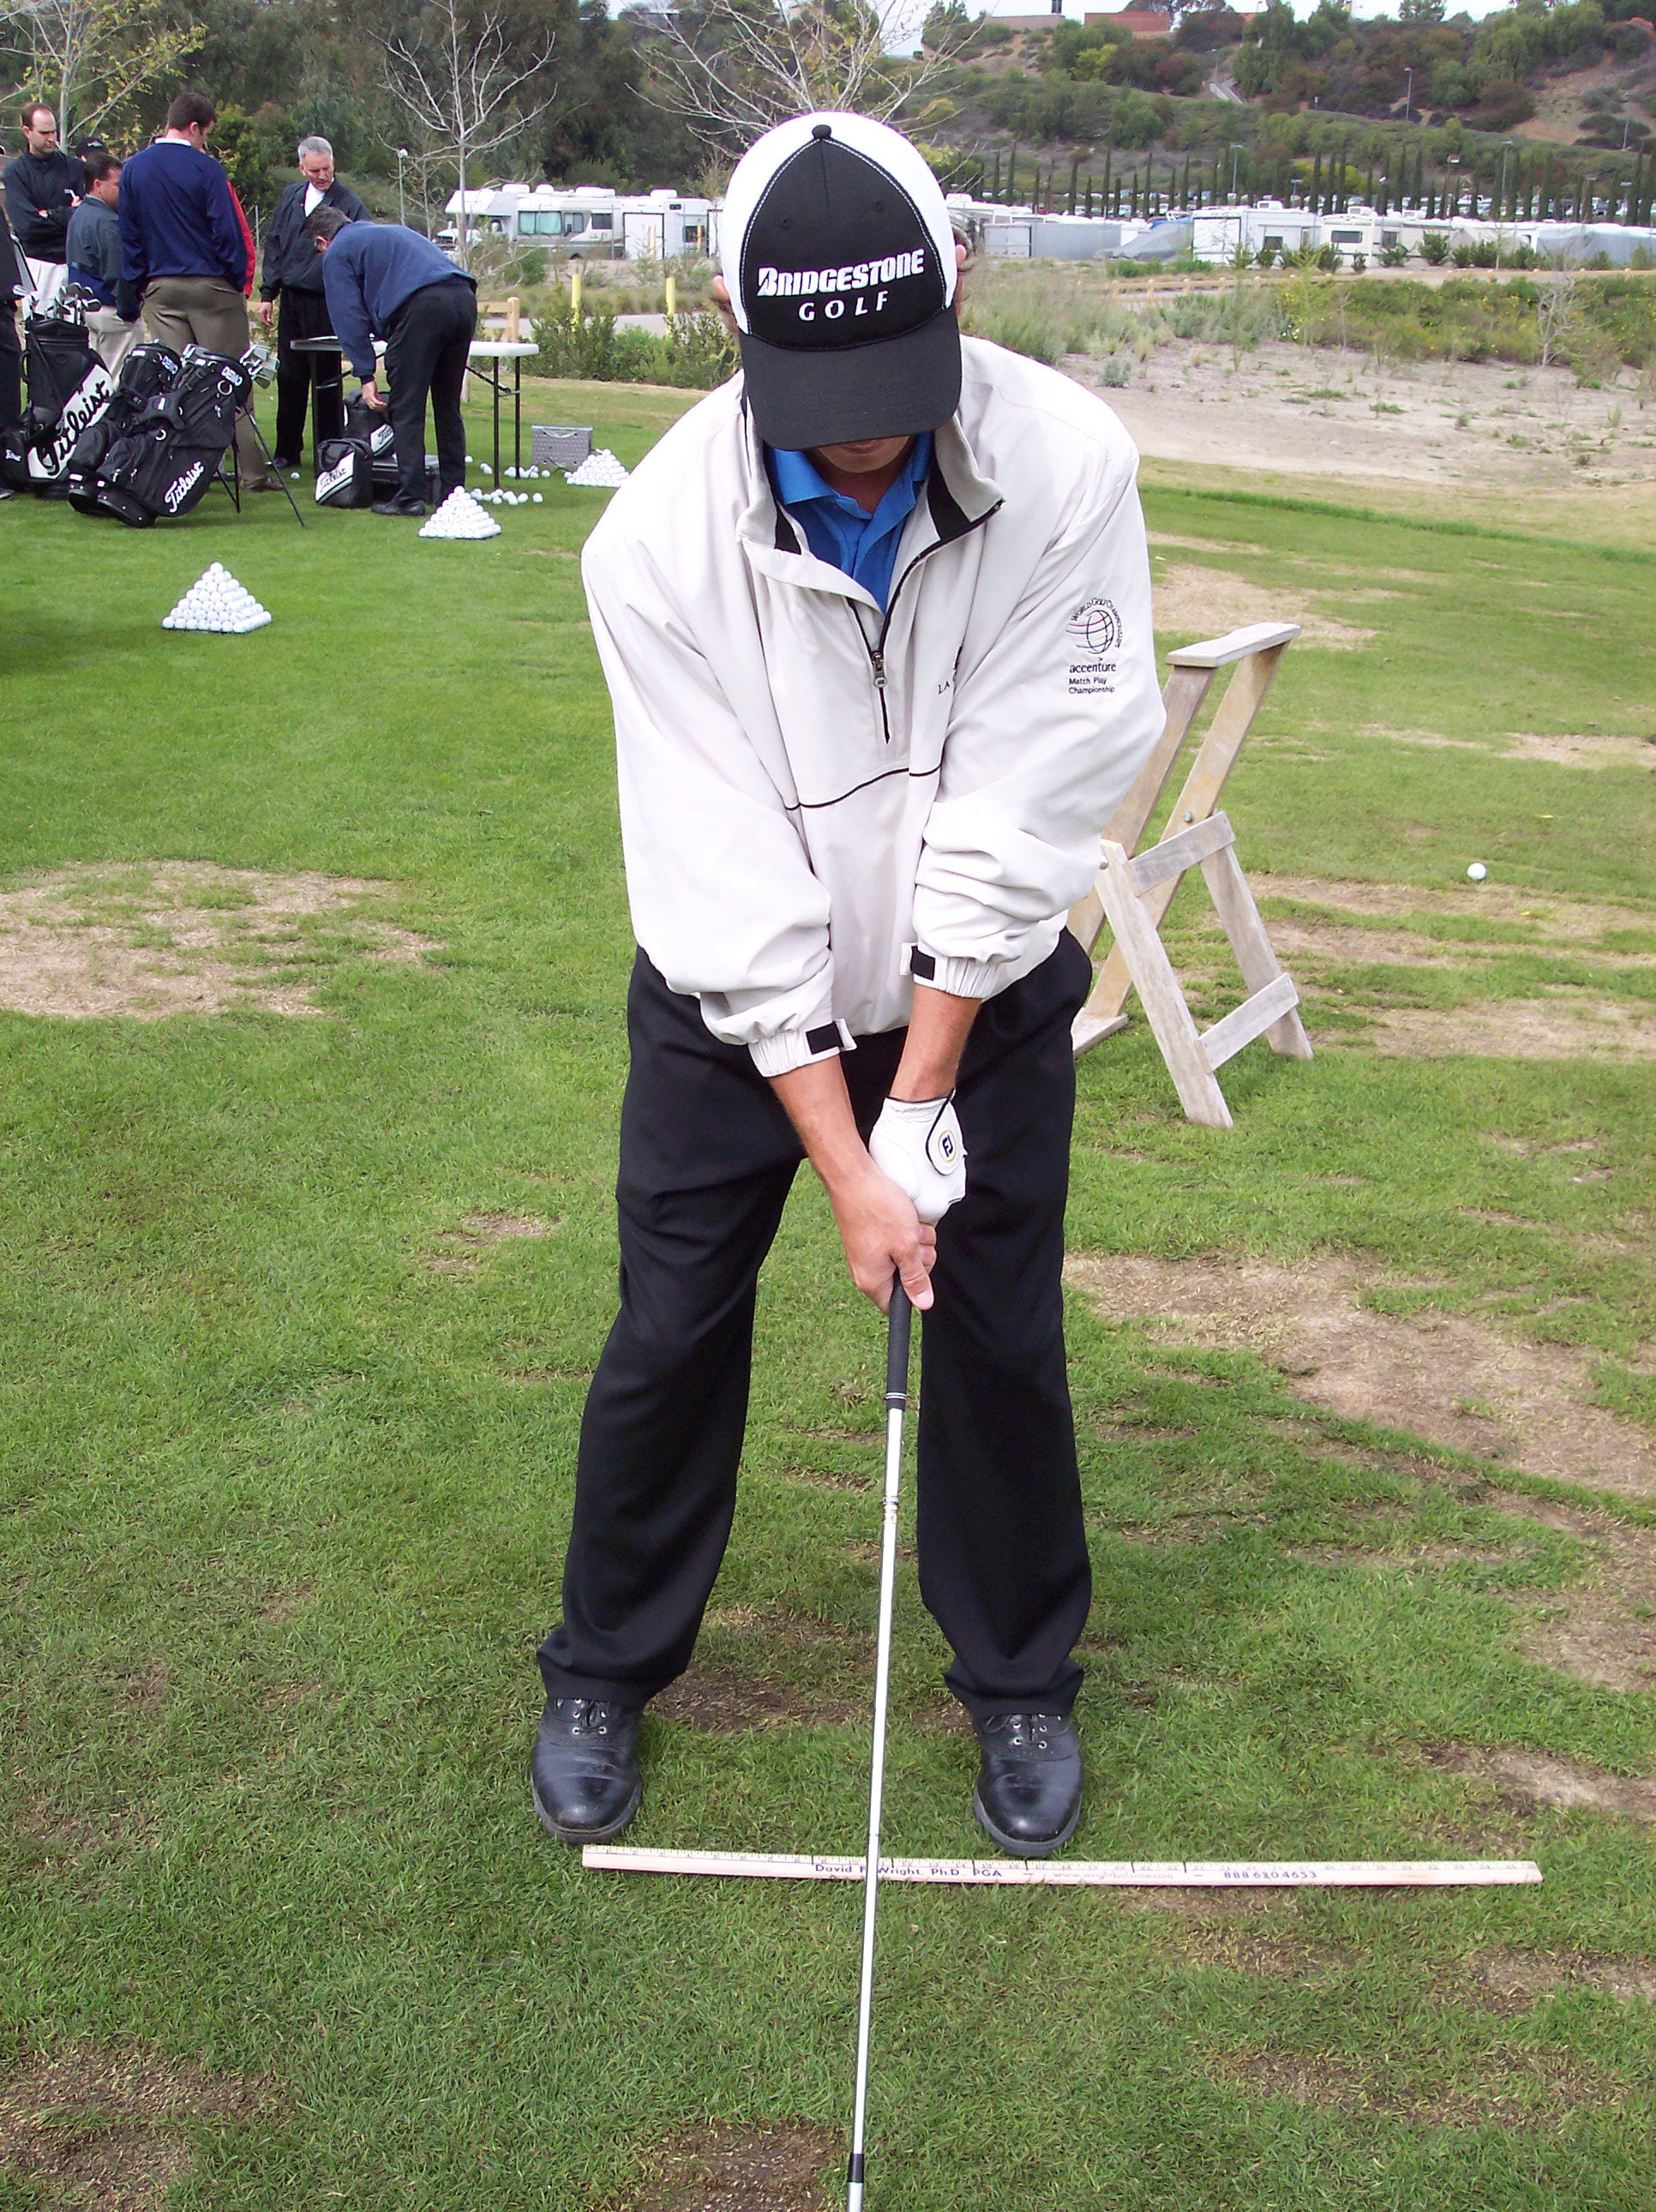
Put a bar and bungee on your student's hips at address and note whether their hips are open, closed or square to their stance line. Make a note of that observation. No need to discuss "WHY?" with your student other than to note the orientation of their hip line at address. (Note: Open closed or square hips are a result of stance width, posture set or grip and / or any combination of those three setup fundamentals. Attempting to square the hips at this point in the lesson is not productive. That will follow in subsequent lessons as a consequence of balance.
-
If you don't have the blue bar and bungee, note their "Knees". If their hips are open (right handed player), you will note that their right knee protrudes out further than the left and their weight appears more on their right side face-on at address. If their hips are closed, you will note that their left knee protrudes out further than their right and and their weight appears more on their left side face-on at address. If the knee line is square, make a note and acknowledge that their hips look square... a great beginning at address.
You can also use shaft plane as a determination of hip line. A high shaft plane generally equals a closed hip line. A Low shaft plane is generally indicative of an open hip line.
-
Video your student's swing and note:
a. Shaft lean at address
b. Swing sequence in backswing
c. Pivot Center Of Mass (COM) at top (Take club to top stop video and note COM)
d. Swing sequence through swing
e. Hip clearance down the line... when you stop the video of the Swing at Impact, note where shaft points (Lower, Upper or Middle Core)
f. Note Release of club... down the line; diagonal; or
exiting left quickly.
g. In downswing, note where shaft crosses shoulders, torso or hips

h. Note where the club points at impact

i. Mentally review Grip Power Spots. Do they match your students swing? -
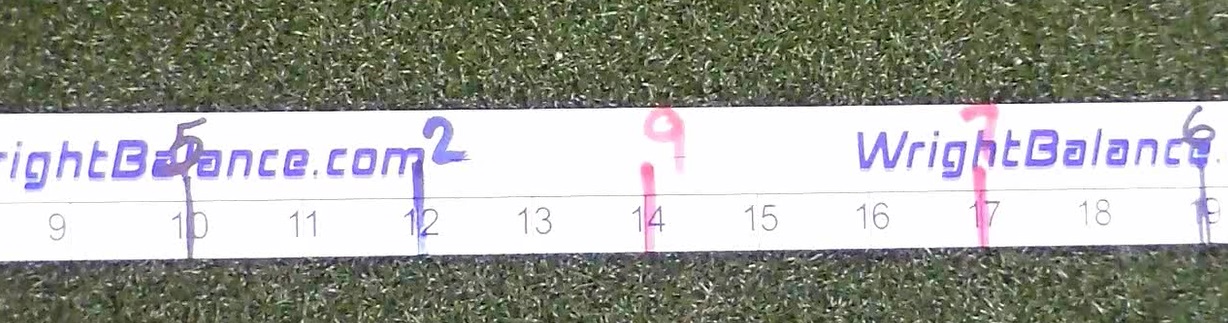
Do Body Measurements and put results for 9 Core Regions on a Yardstick.
-
If you are using a yardstick to measure your student's body, please be certain to "smooth down" the clothing your student is wearing to the edge of their arms when you are measuring.
I would advise you to number and color code the 9 Core Regions from the Emailed Results.
- VALIDATE the results by Posture Set by Core Regions 1 - 5 - 9. Discuss what this means to your students. Advise your student that whatever their Core Region, they will need to practice Posture and Stance Width.
This link will take you to the EBook: Validating Your Results:
https://instructions.wrightbalance.com/validating-your-results/
NOTE: Most of your students will think that the 3 Core Region Stance Widths are their playing Stance Widths. Be certain to advise them more than once that the 9 Stance Widths are simply for exercise and determining their Playing Core Region.
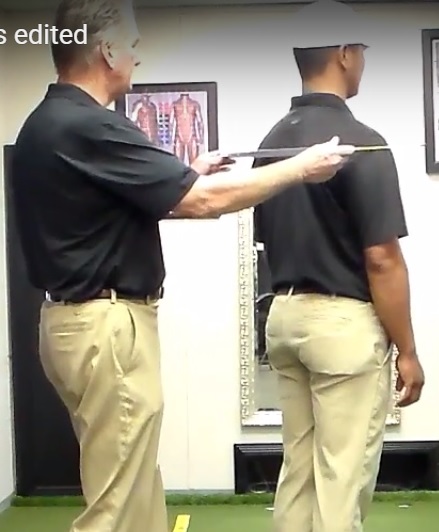
- Identify Playing Core Region by external / internal shoulder rotation. As a rule, your student's external shoulder rotation is the same as their Carrying (Power) Angle as shown here:
LPGA Legends Tour Player Laurie Rinker's dominant core region was tested as Middle Core. In this photo I am measuring her Carrying / Power Angle in a Middle Core Stance Width.

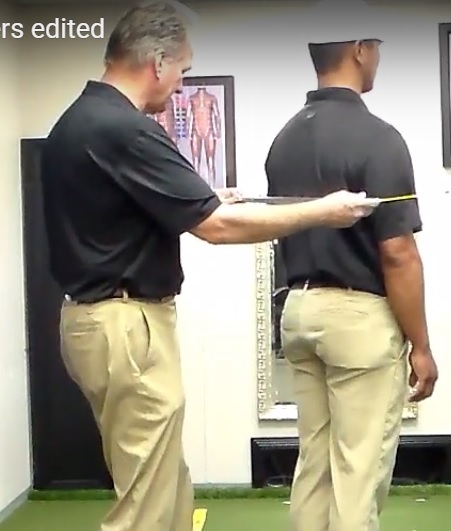
The photo below shows the difference in Laurie's Power angle at the top in her Middle Core Stance Width (left photo) and her Upper Core Stance Width (right photo). Note the changes in her trail arm angle at the top.

The photo below shows the subtle difference in the trail arm delivery in a Middle Core Stance Width (left photo) and an Upper Core Stance Width.

Laurie's trail arm elbow is more forward in the above left photo than the right. These subtle differences are important when determining your student's playing Core Region and their matching Grip, Stance Widths and Posture.
You will note that the ability of your student to seat their trail arm in a static position will determine their ability to play from a particular Core Region. This will be their trail arm / hand delivery to the ball.
]

Your student's external shoulder rotation determines their trail arm delivery as shown below. For example, in order for a player who is determined to be Lower Core, they must be able to seat their trail arm inside the trail hip for an "under" delivery to the ball as I am in this photo.

LPGA Tour Player Anne Marie Pali's dominant Core Region was "1", the pelvic floor. However, her external shoulder rotation was 157.5 degrees, a Middle Core measurement. She has always played as a Middle Core player. The measured dominant region is not necessarily the playing region.
Remember: The Power Angle changes by Core Region. Some players Carrying or Power Angle measures the same in all 3 Core Regions. It is more often the case that their will be 2 to 5 degrees between the Upper (most shallow), Middle and Lower Core Stance Widths when measuring the Carrying / Power Angle. That same angle will be the external shoulder rotation the majority of the time unless your student has had an injury or other structural problem.
Occasionally, a shoulder injury or structural issue will limit the external shoulder rotation and necessitate changing the playing Core Region.
-
Will this player do the Plank to Play? Will this player do the entire Wright Balance® Core 360 exercise program?
-
Does this player have Back, Knee, Hip, elbow, wrist or Shoulder Pain?
-
Put playing Core Region Stance Widths on a alignment stick or yardstick for practice at home as shown in the following illustration.

-
Demonstrate Plank to Play: Show changes in clubface in dominant Core Region Pre and Post Plank to Play
-
Show Power Spots and test at the top of their swing by pushing up on the butt of the club as shown here
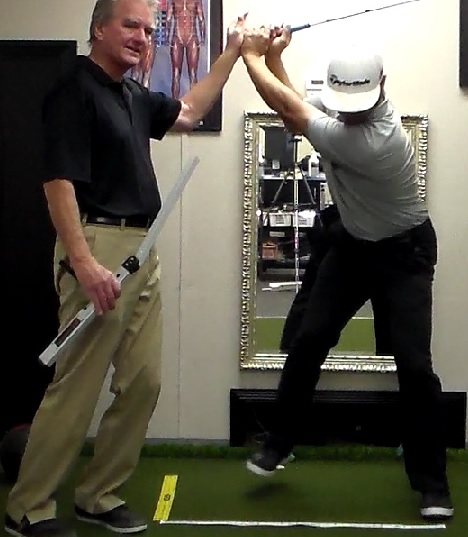
When you demonstrate the Power Leak vs Strength as shown above, do so by changing the Power Spot in one hand and then by changing Stance Width by 1 inch. Your student will quickly learn that there is no "menu" in their set up. They will understand that Power Spots change by Core Region and each Core Region has a series of Stance Widths that match the Grip Power Spots. Change a Power Spot in one hand or a Stance Width other than a width from their playing Core Region and the result is a Power Leak.
- Set up Plank to Play & Practice schedule for Stance Width & Grip Power Spots. Below is our most recent video of Plank to Play. Notice that this exercise program will balance the Core in your students playing lesson so that their hips and shoulders will be Level.
Demonstrate the changes in hip and shoulder height by comparing their hip and shoulder height in the stance widths of their playing Core Region where they did the exercise and a stance width from the non playing Core Regions.
Time to Schedule the next lesson
I would encourage you to send a Follow-up Email to your student. Copy and paste the note below if you wish:
"I hope this finds you well. This note is a summary of points I feel are important for you to review from our lesson. This is a link to Chapter (3, 4 or 5 depending on Core Region) and the (Upper, Middle, Lower) Core Characteristics.
(Send the appropriate Link below)
Chapter 3 (Elite Lower Core Players)
http://fliphtml5.com/azhq/lgmb
Chapter 4 (Elite Middle Core Players)
http://fliphtml5.com/azhq/zejo
Chapter 5 (Elite Upper Core Players)
http://fliphtml5.com/azhq/dtvr
Your grip power spot will set your arms and hands under your shoulders when your setup is correct. Please also be sure to start the club back as you EXHALE relaxing your shoulders. As you exhale relax your upper shoulders. This will result in a lighter grip pressure.
This is a summary EBook of the research, etc... much shorter than the on line EBook. Your swing positions will happen naturally out of set up and sequencing.
https://instructions.wrightbalance.com/wright-balance-overview-by-core-region/
Lastly, here is an EBook illustrating the grip positions of different Core Regions. You only need to concern yourself with the (Lower, Middle or Upper) Core Grip.
https://instructions.wrightbalance.com/how-to-set-test-the-grip-power-spots-by-core-region/
Sincere regards,"