Wright Balance®Core Optimization via Tensegrity Exercises
This Lesson Covers the use of the Wright Balance Express and Optimization prior to systematically building and balancing the Core Muscles. Before I begin Illustrations of that process, let's take a brief moment to discuss another important finding reported in the Journal of the American Medical Association (JAMA, 2020). This illustration shows survival rates as related to walking.

Once you have your Core Balanced in strength and flexibility, perepheral pain diminishes and mobility increases. That mobility is important to use.
Our Core Muscles are the supporting structure of our Skeletal System and responsible for all movement. Whether that is kneeling in the garden...
Insert Garden Photo here
...shooting a basketball...

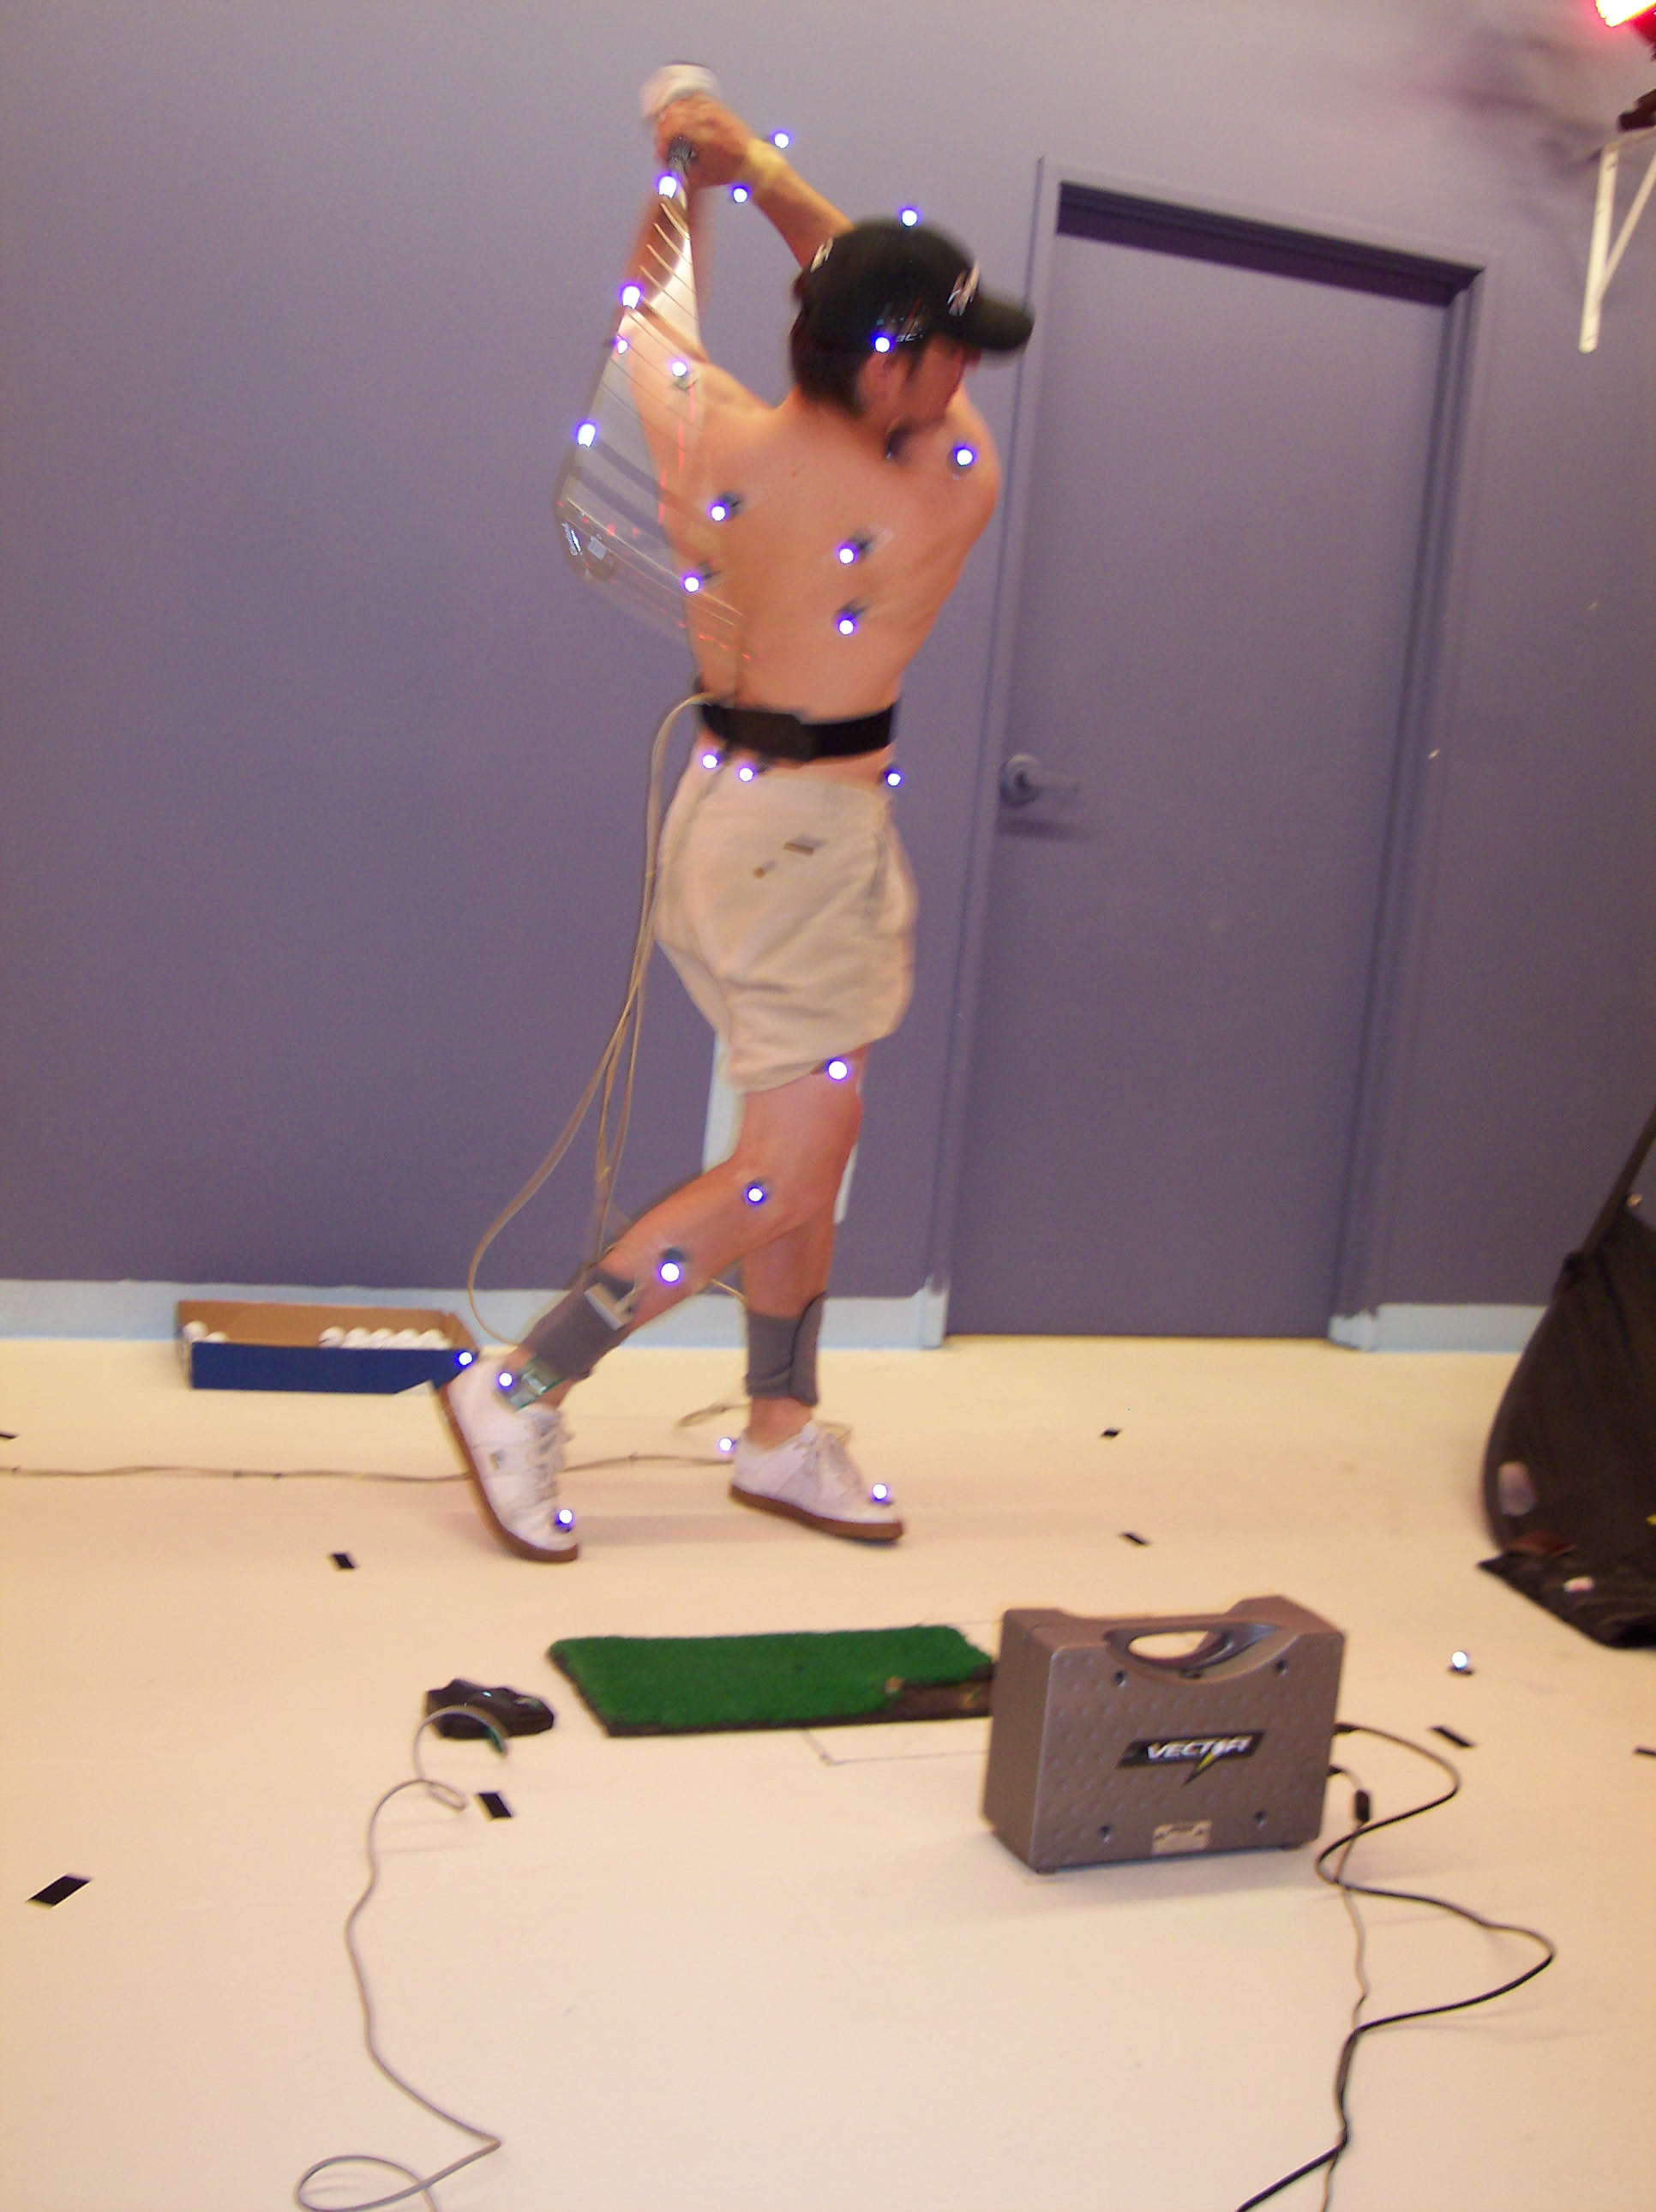
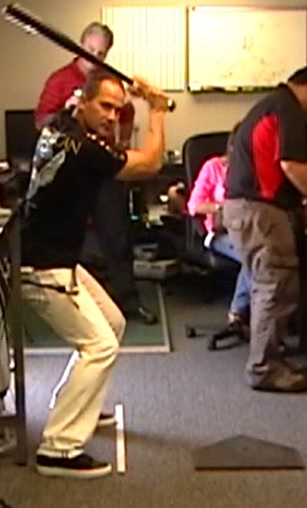
...swinging a golf club...
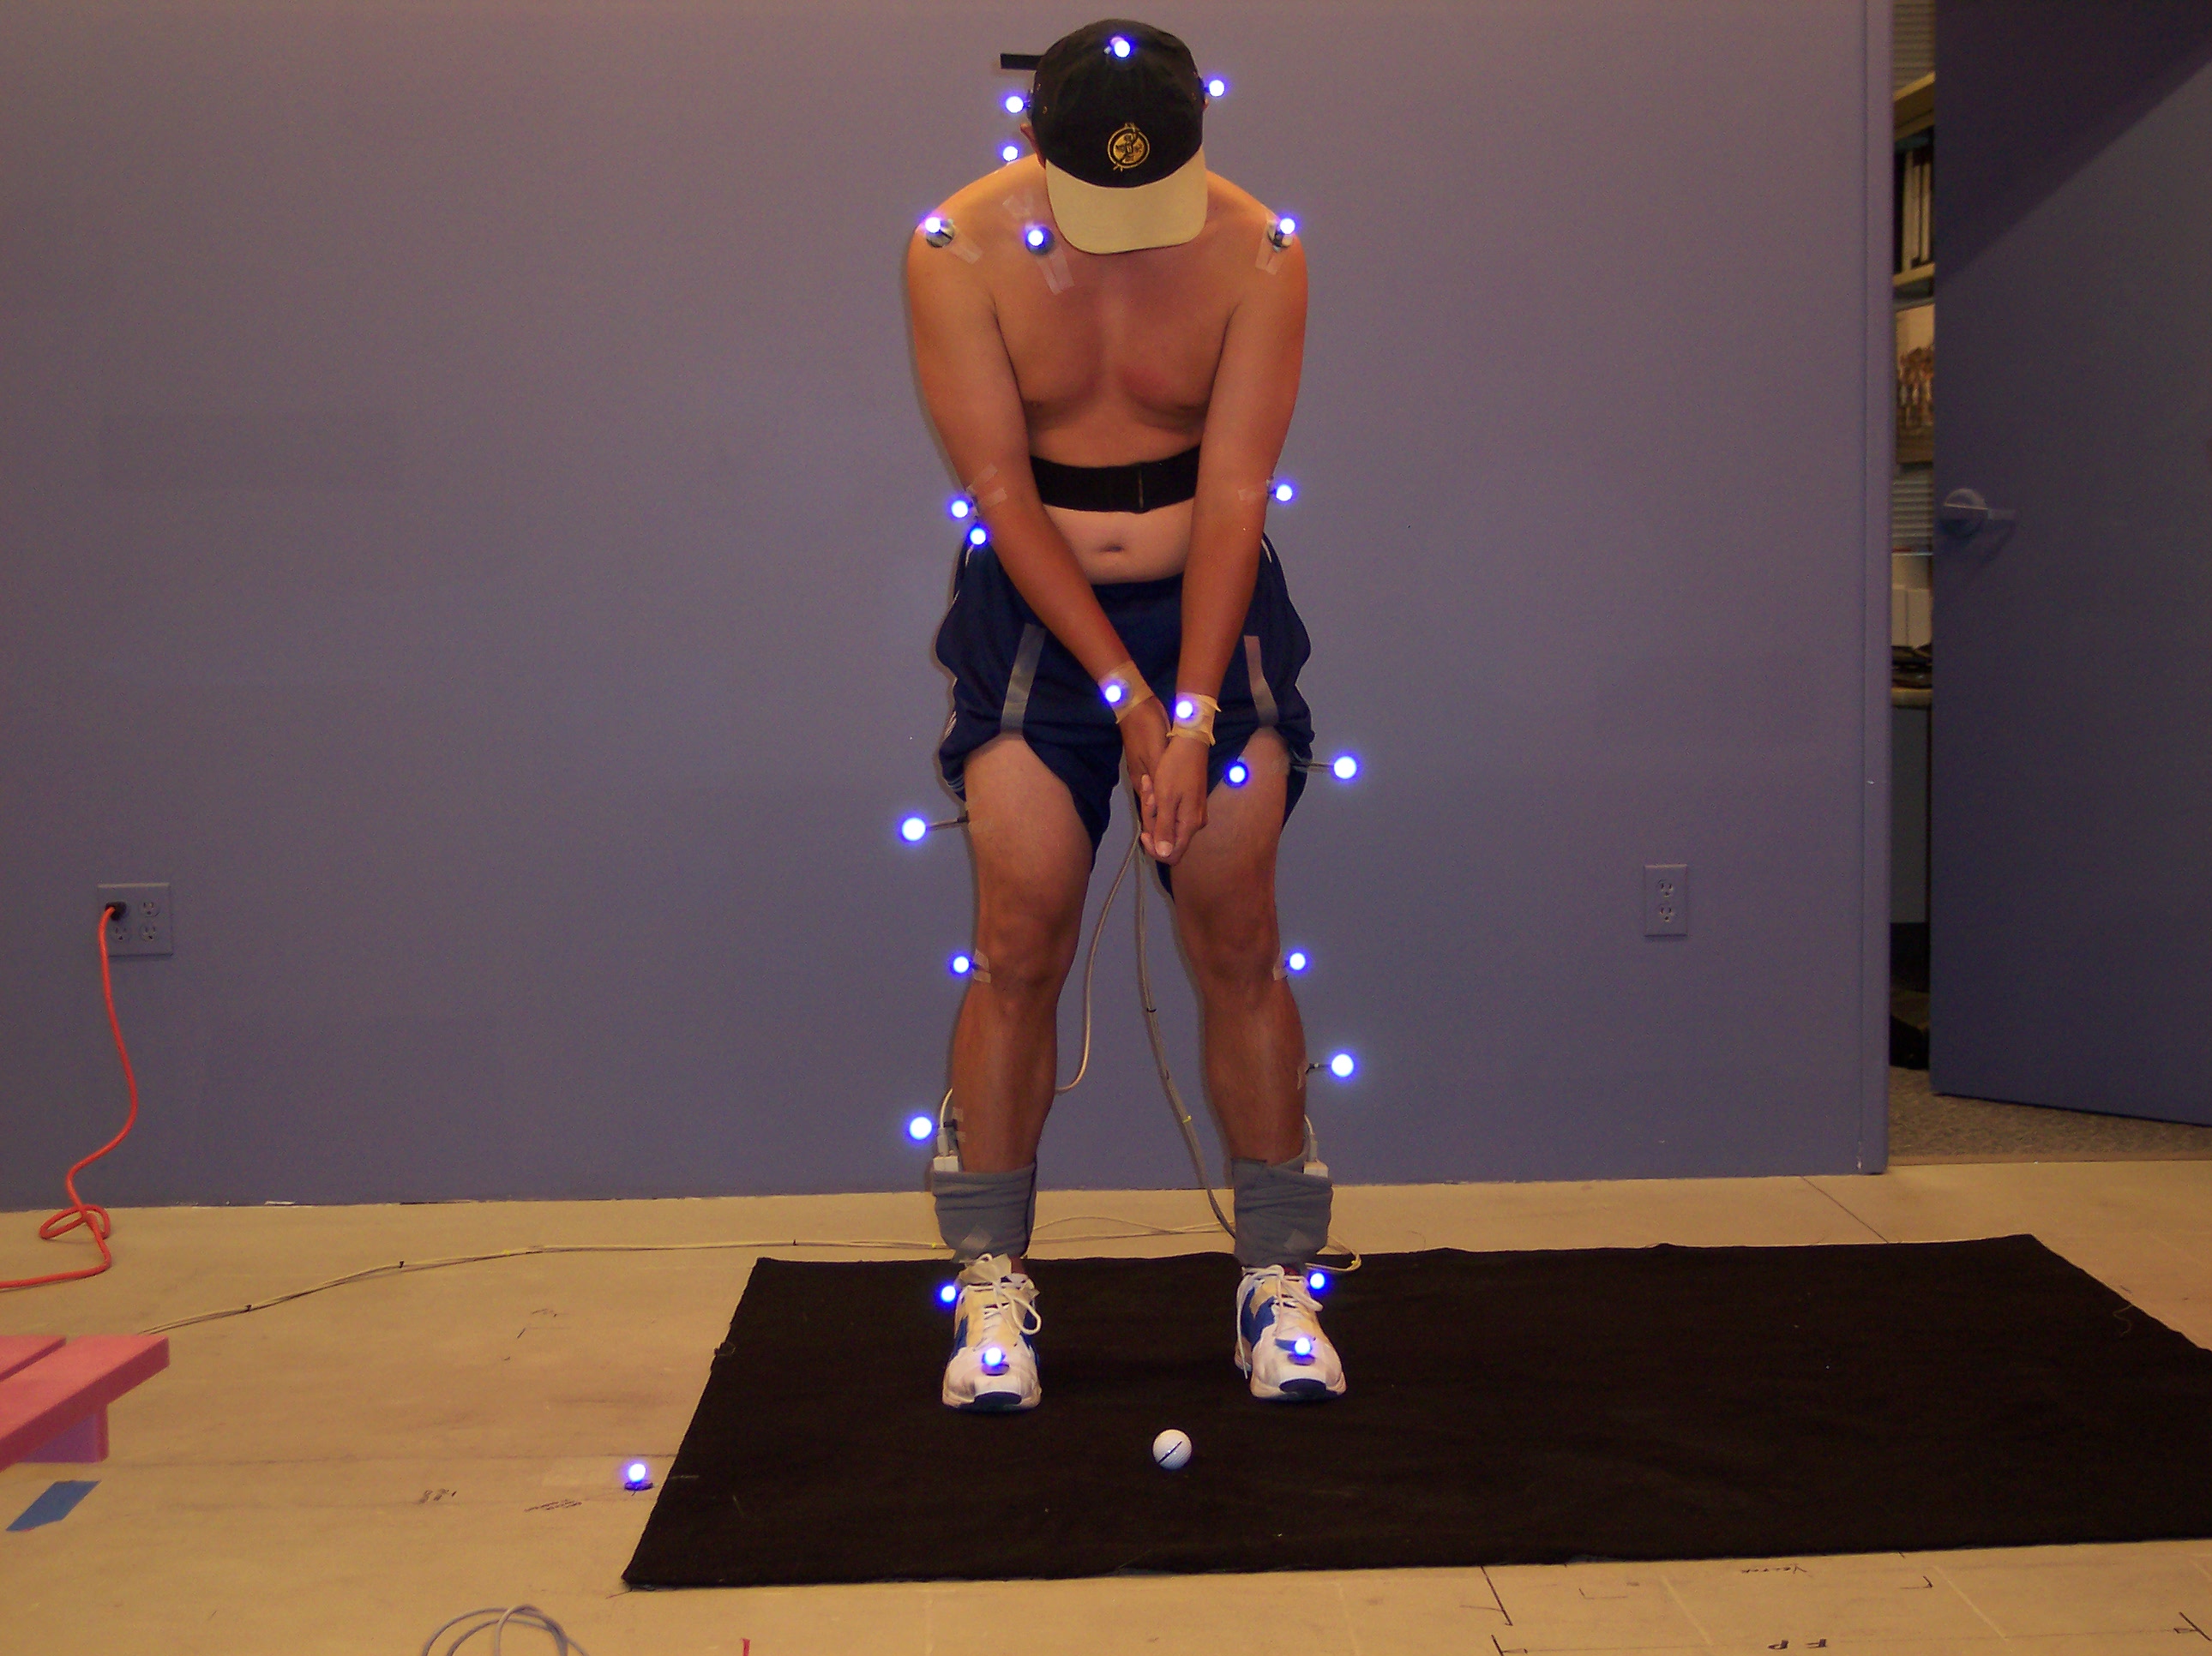
...making a putt...
...exploding off starting blocks...
...shooting a free throw...
...receiving a tennis serve...
...getting out of bed...
...getting off the floor...
Core Symmetry is a "state" of the body where there is Absolute Balance on the front of the Core, on the Sides of the Core and on the back of the Core. When this state of Symmetry is present, we are able to apply maximum force to the ground and recruit maximum Power with the least stress on the Skeletal System and experience the best balance. Thus, the potential for injury is minimized with optimal perfomance.
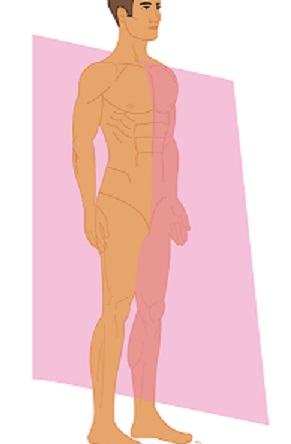
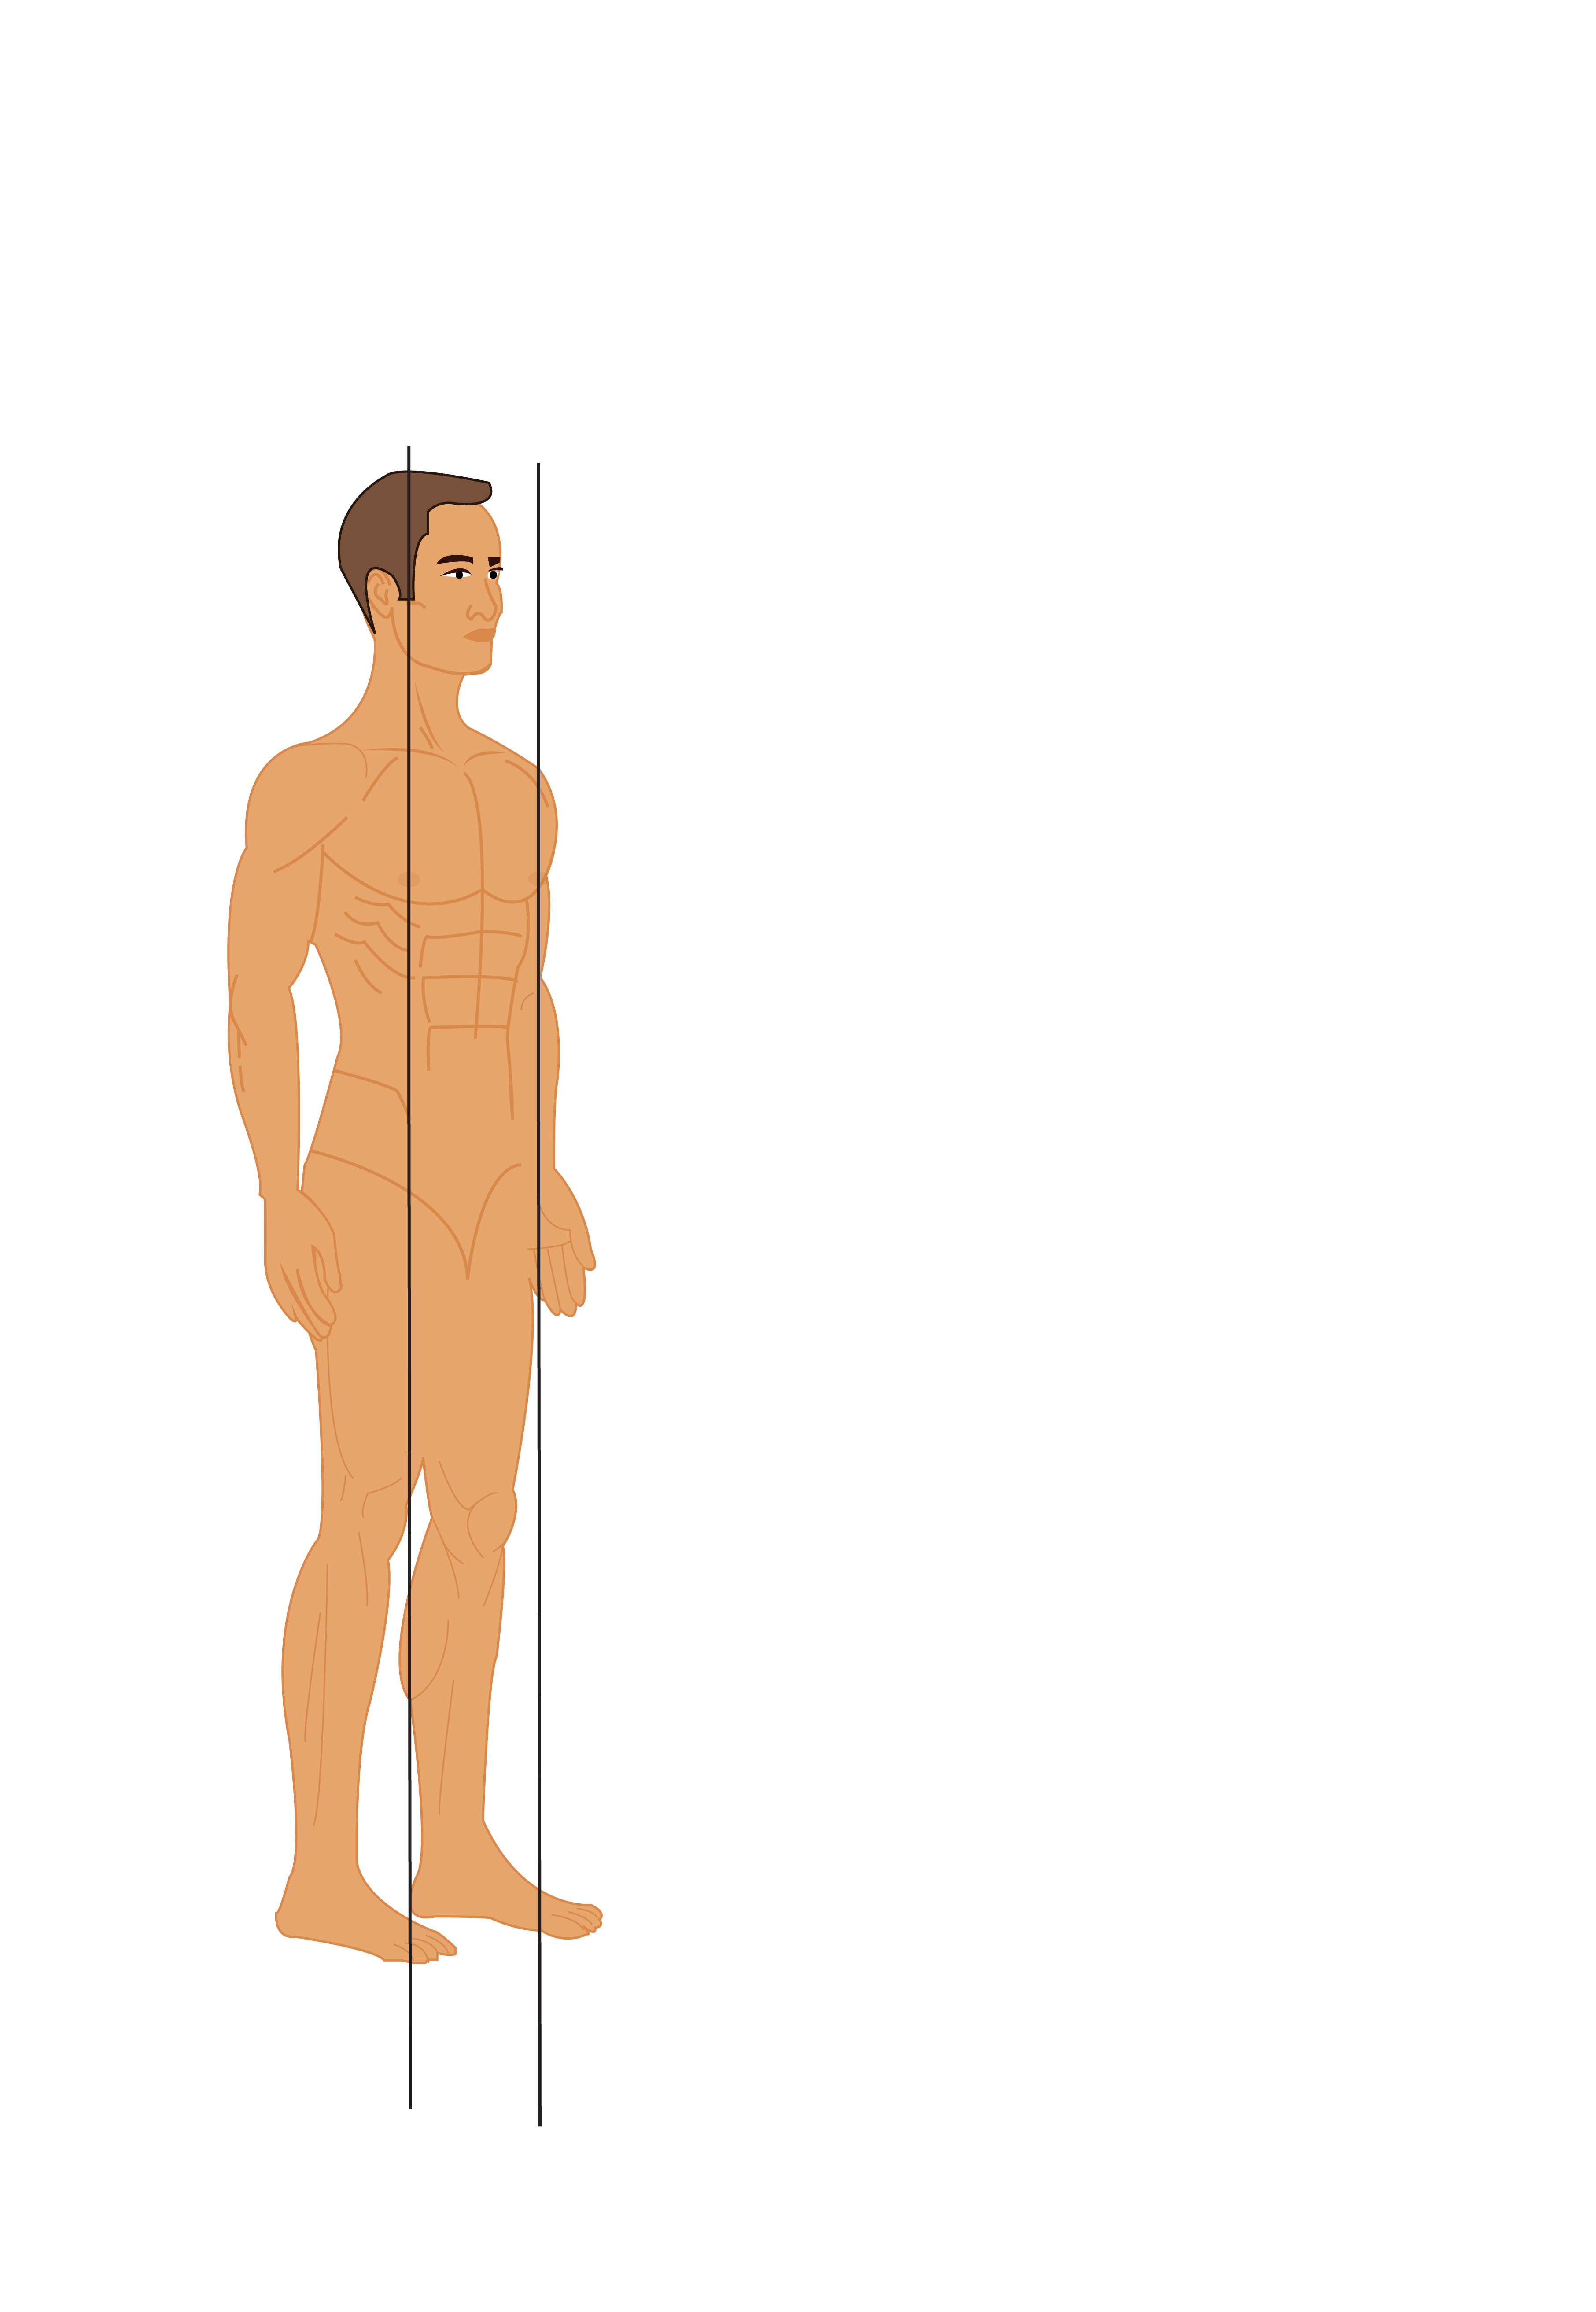
What is Wright Balance® Core Optimization? If you look in a mirror you will notice that one shoulder is lower than the other. If you place your thumbs on your hips, you will notice that one hip is higher than the other, generally on the same side that your shoulder is lower. Add knee flex and you will notice that one knee extends out further than the other indicating a rotation of your pelvis. If you place your hands on your hips and take a step forward you will notice that your hips rotate left or right. If you attempt to move laterally, you will notice restriction on one side. If you start to squat, you will notice a rotation of your pelvis as you squat. All of these factors represent "drag" as you attempt movement.
Notice any body stiffness and aches and pains. Note the changes post the Wright Balance® Core Optimization Exercises. Peripheral Back Pain is often resolved with the Wright Balance® Core Optimization Exercises.
All of these restrictions are eliminated through a 4 minute Wright Balance® Core Optimization Exercises. The results of the Wright Balance® Core Optimization will last 8 to 12 hours the first day and 12 to 24 hours after 3 or 4 days of the exercises. No matter what your profession, the Wright Balance® Core Optimization will increase performance, decrease pain and increase mobility and overall balance.
What Does Core Symmetry Look Like?
Here are a few of many examples of Symmetry as part of Absolute Balance.
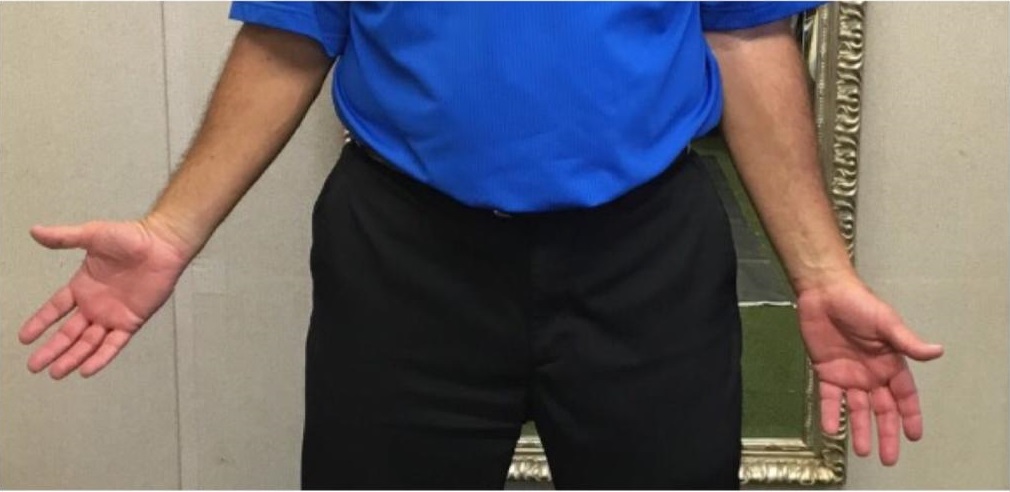
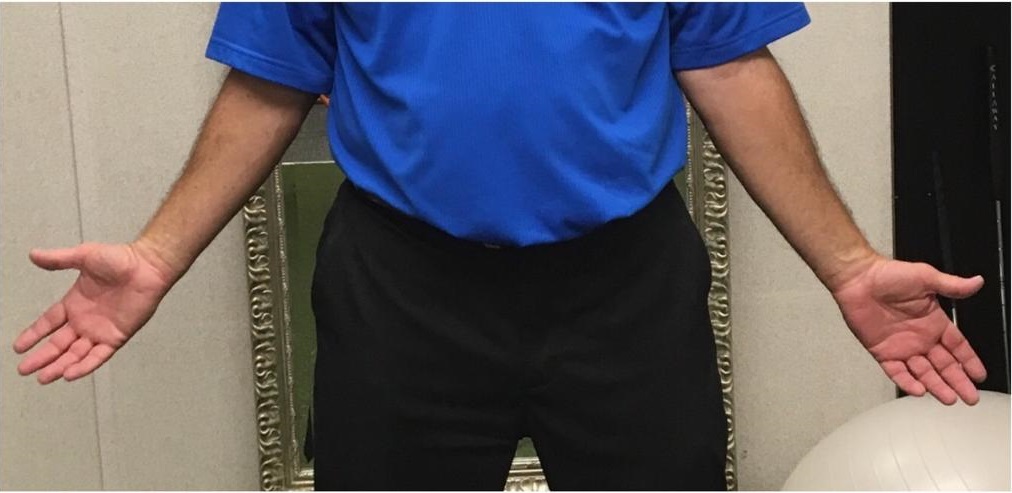
Your hands will hang exactly the same...
...compared to an Out of Balance position of the hands:

Your hip line is square in every Stance Width:

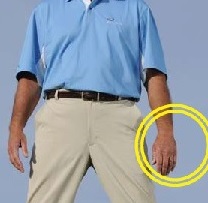
Your "Carrying or Power Angle" is identical...

...versus a "Carrying or Power Angle" that is not the same on both sides:
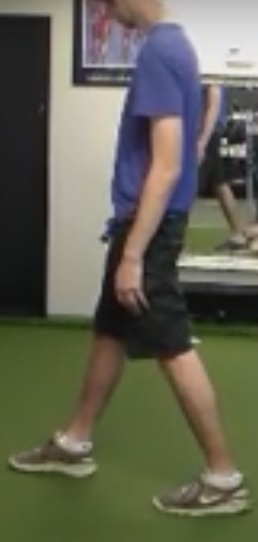
When you walk, run or do "Lunges" during exercise or any foward movement there is no pelvic rotation...
vs a rotation of the pelvis when there is any forward movement as illustrated below.

Core Asymmetry occurs at any age...
...and the correction of Core Asymmetry is as simple as a set of exercises, regardless of age.
Planes of Motion
Wright Balance® has identified 81 Regions of the Core on Vertical and Horizontal Planes on the front of the body (Coronal Plane) and 81 Regions of the Core on Vertical and Horizontal Planes on the back (also the Coronal Plane) for a total of 162 individual "Core Cells".
Core Symmetry is the net result of a targeted Wright Balance® Core Optimization Exercise Program. The Horizontal Plane is divided into 9 Regions as shown in this illustration, front and back.
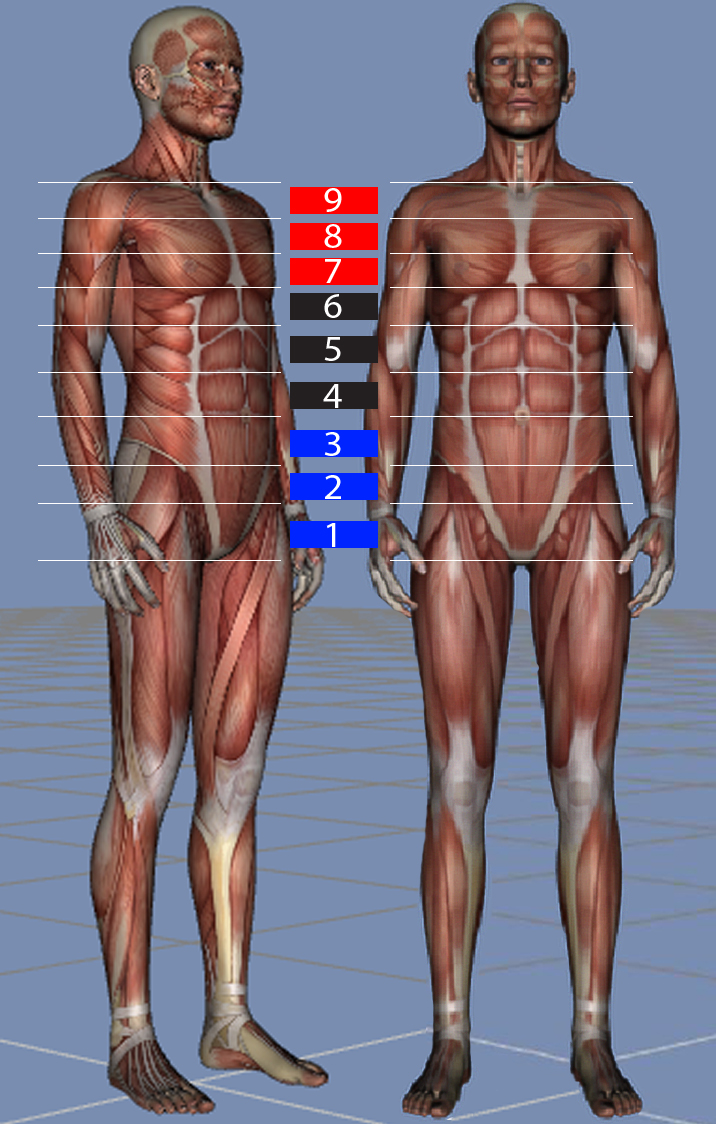
The Vertical Plane is divided into 9 Core Regions on one half of the body (Sagittal Plane) and 9 Vertical Core Regions on the other half of the body, also front and back.
It is my belief that, regardless of activity, Core Symmetry (Absolute Balance) should be created before embarking on any training that requires motion from swinging a golf club, to running to lifting a box in your garage. Core Asymmetry sets the stage for injury, regardless of activity.
In this EBook I will describe a model of Core Symmetry vs Asymmetry based upon "Planes of the Body". I will present a model of tension in the "soft tissue" of the Core that directly impacts the skeletal system creating Asymmetry of the Core. Imbalances in the Planes of the Body lead to diminished performance, a loss of strength and mobility, soreness, pain and stiffness and increased injury potential.
Lastly, I will provide a description of a Targeted Exercise Program (Wright Balance® Core 360) to create Core Symmetry and Balance the entire Core. These targeted exercises require measurements by a Wright Balance® Professional and the use of the 9 Core Region Stance Widths from the results of these measurements.
Let's get started.
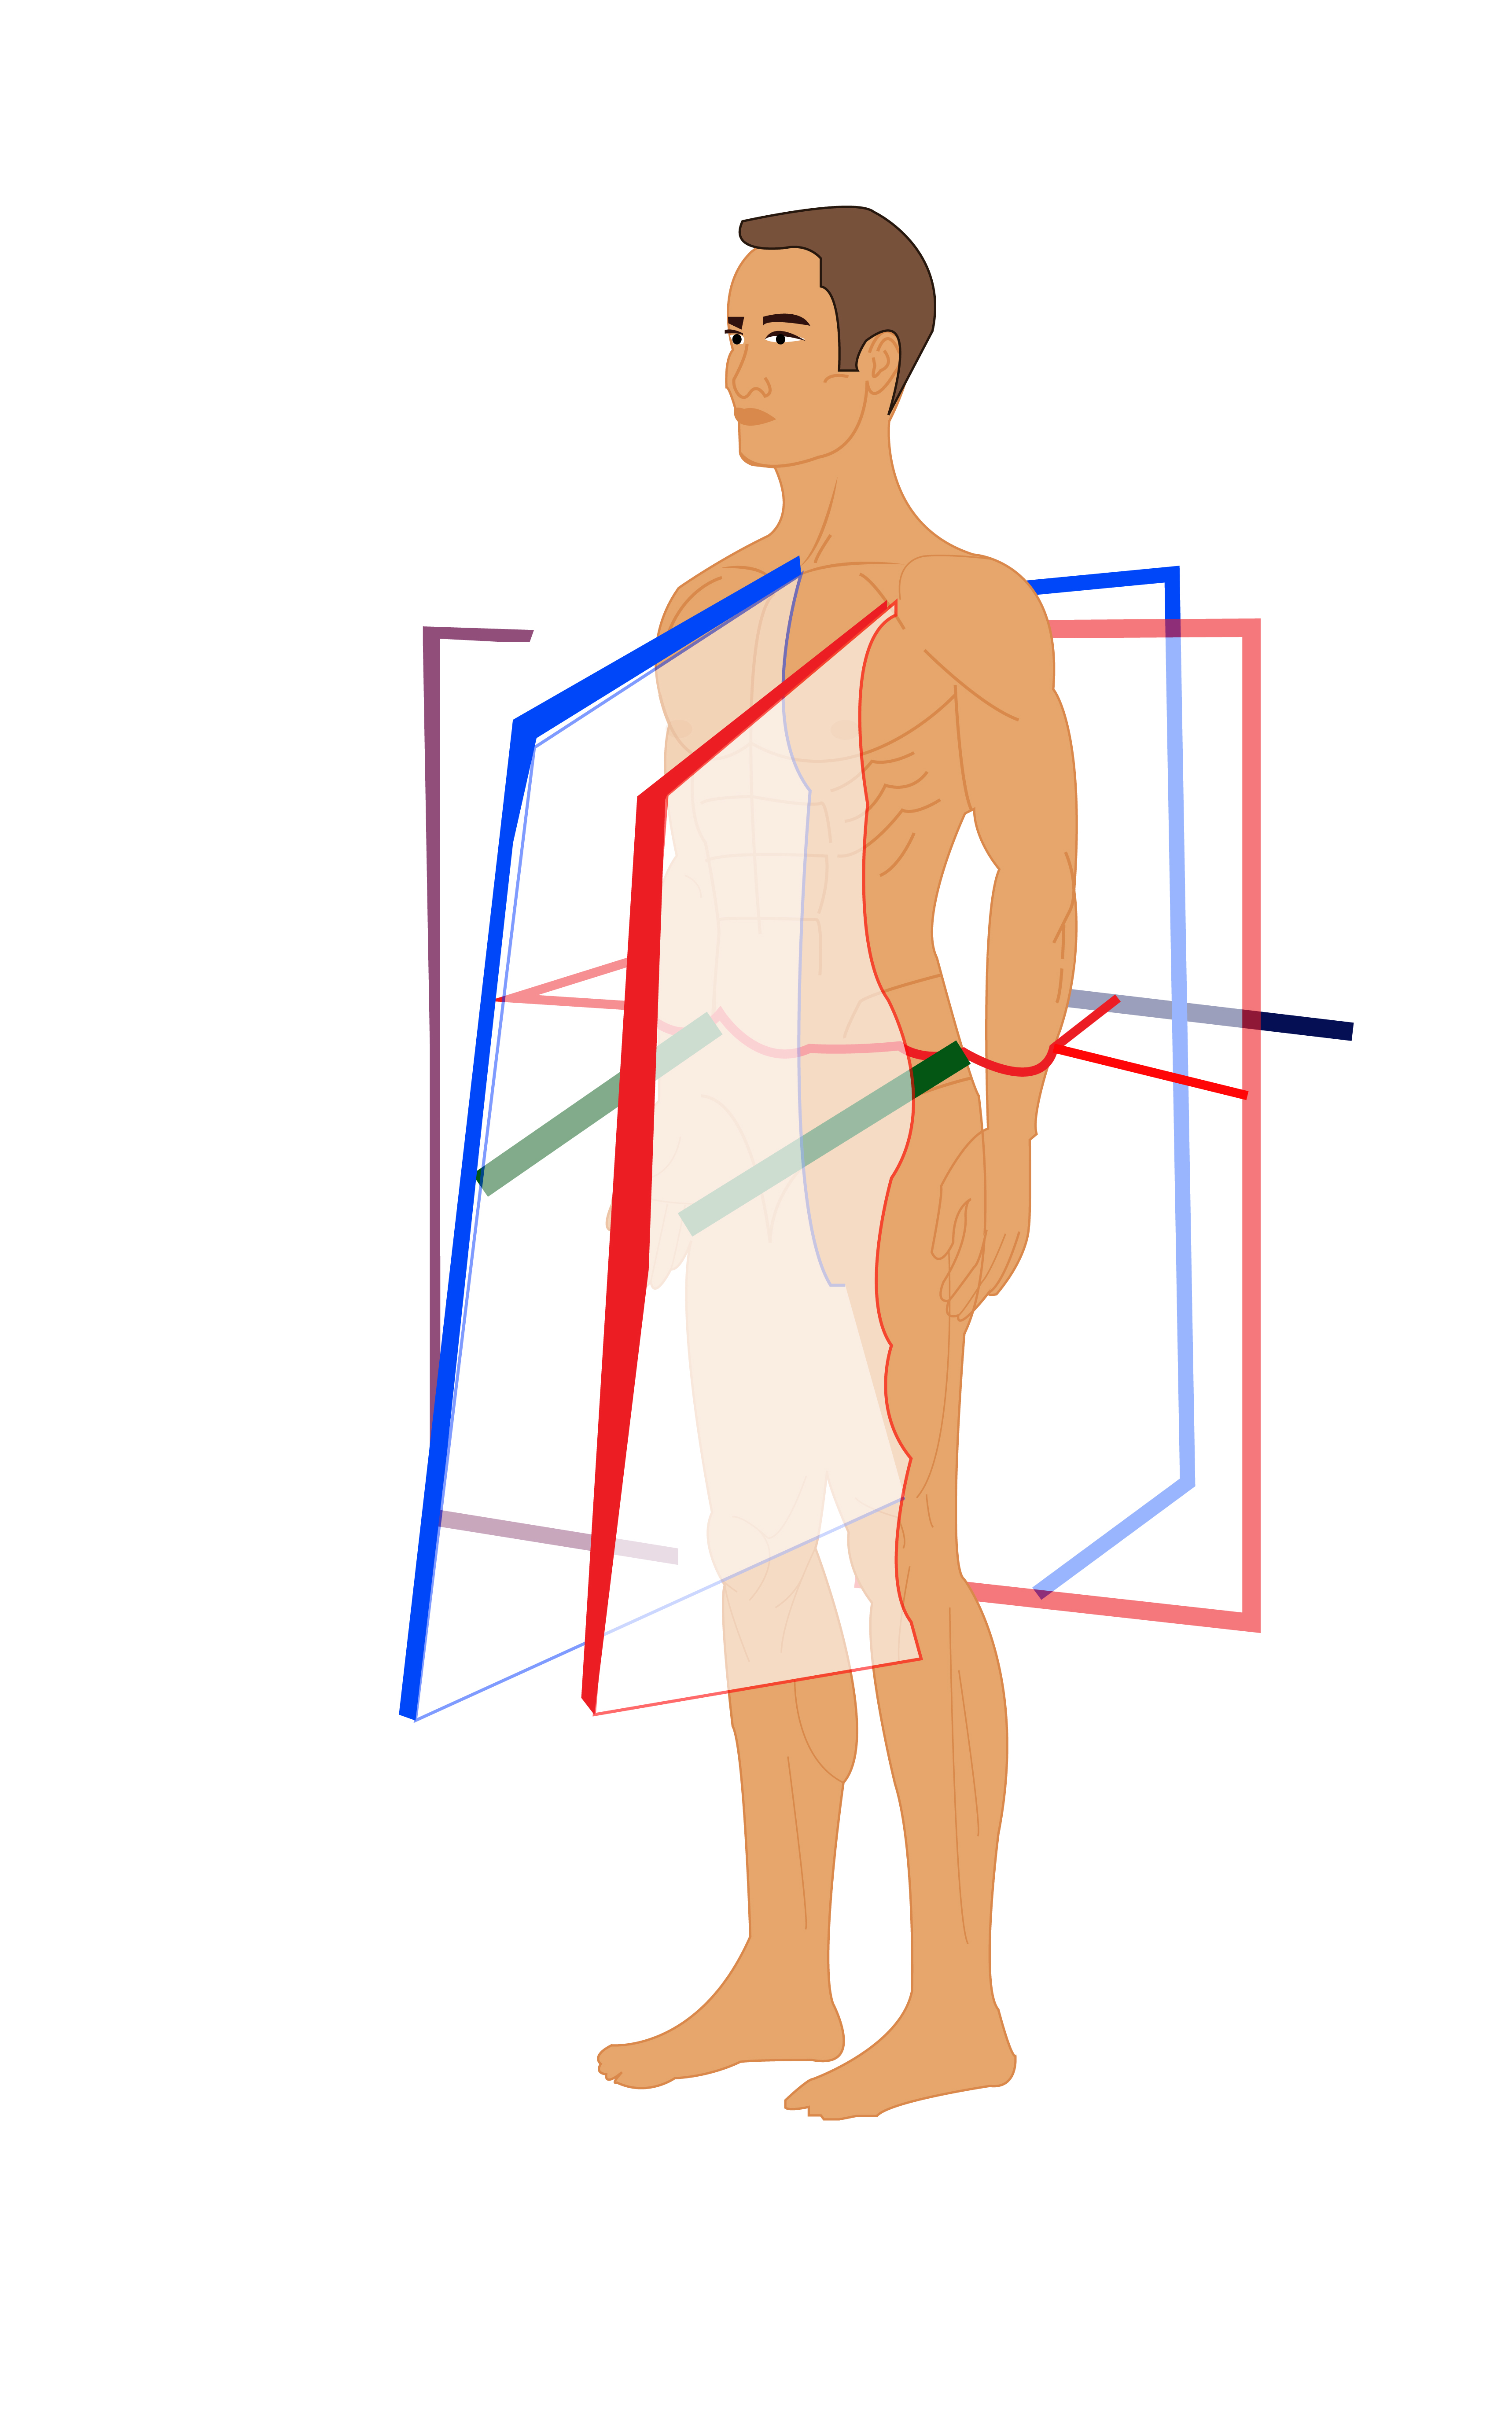
There are 3 Planes of Motion:
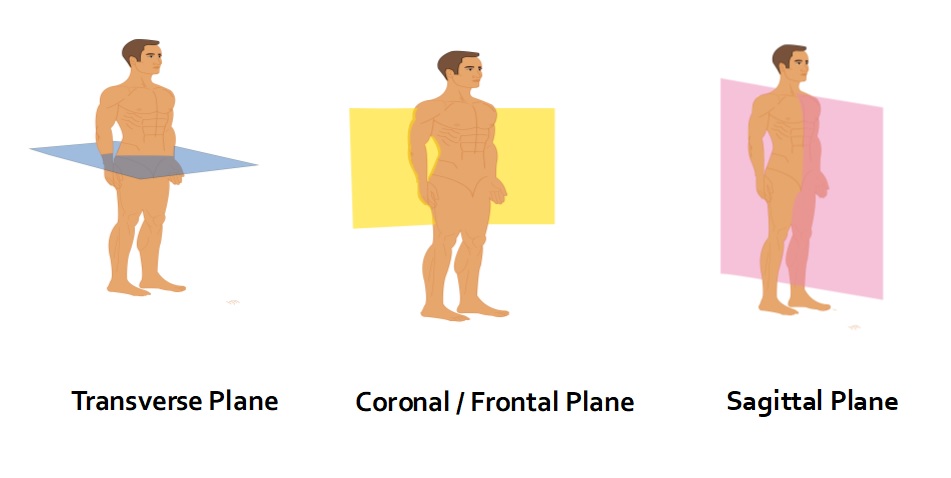
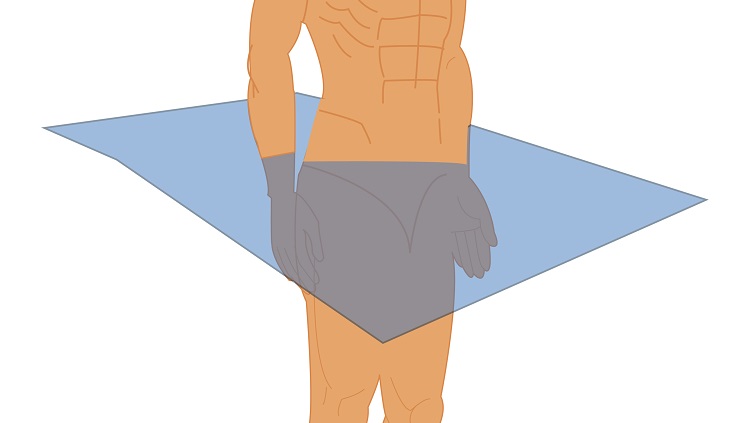
The Transverse Plane divides the body into the Upper & Lower Half.
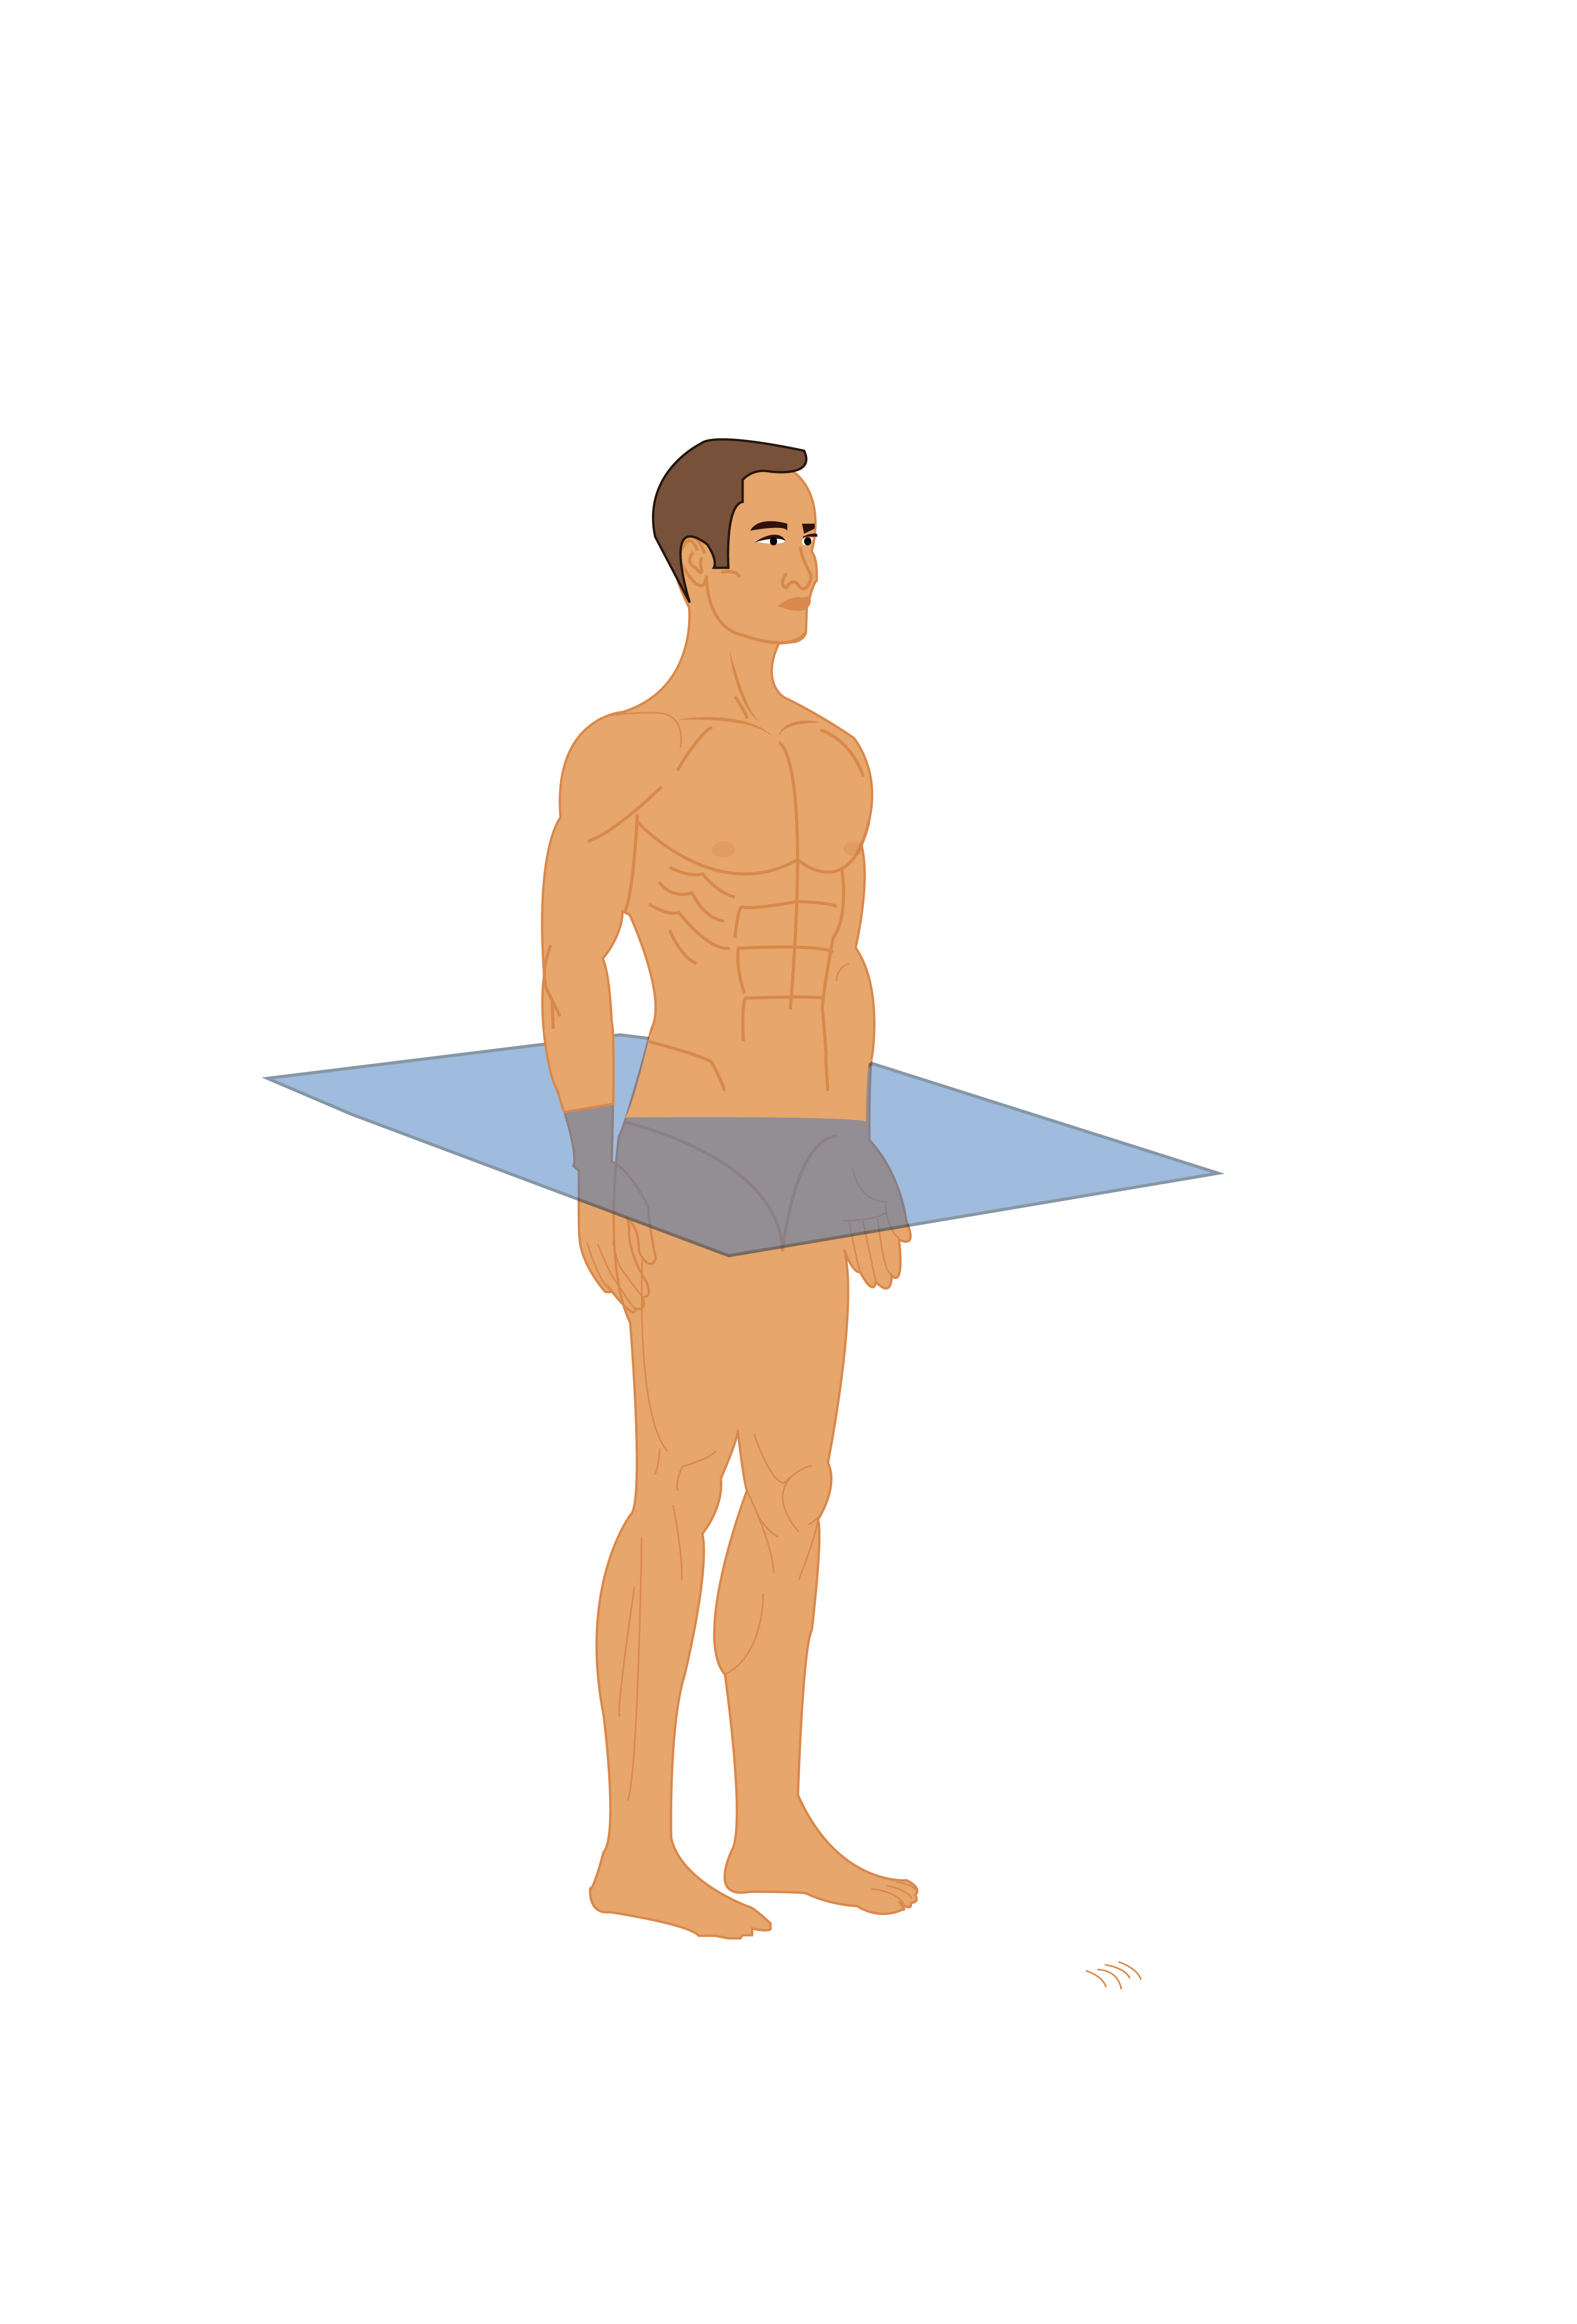
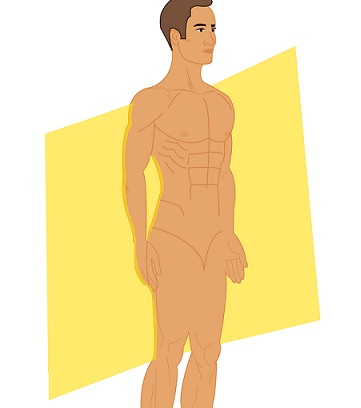
The Coronal / Frontal Plane divides the body into front and back.
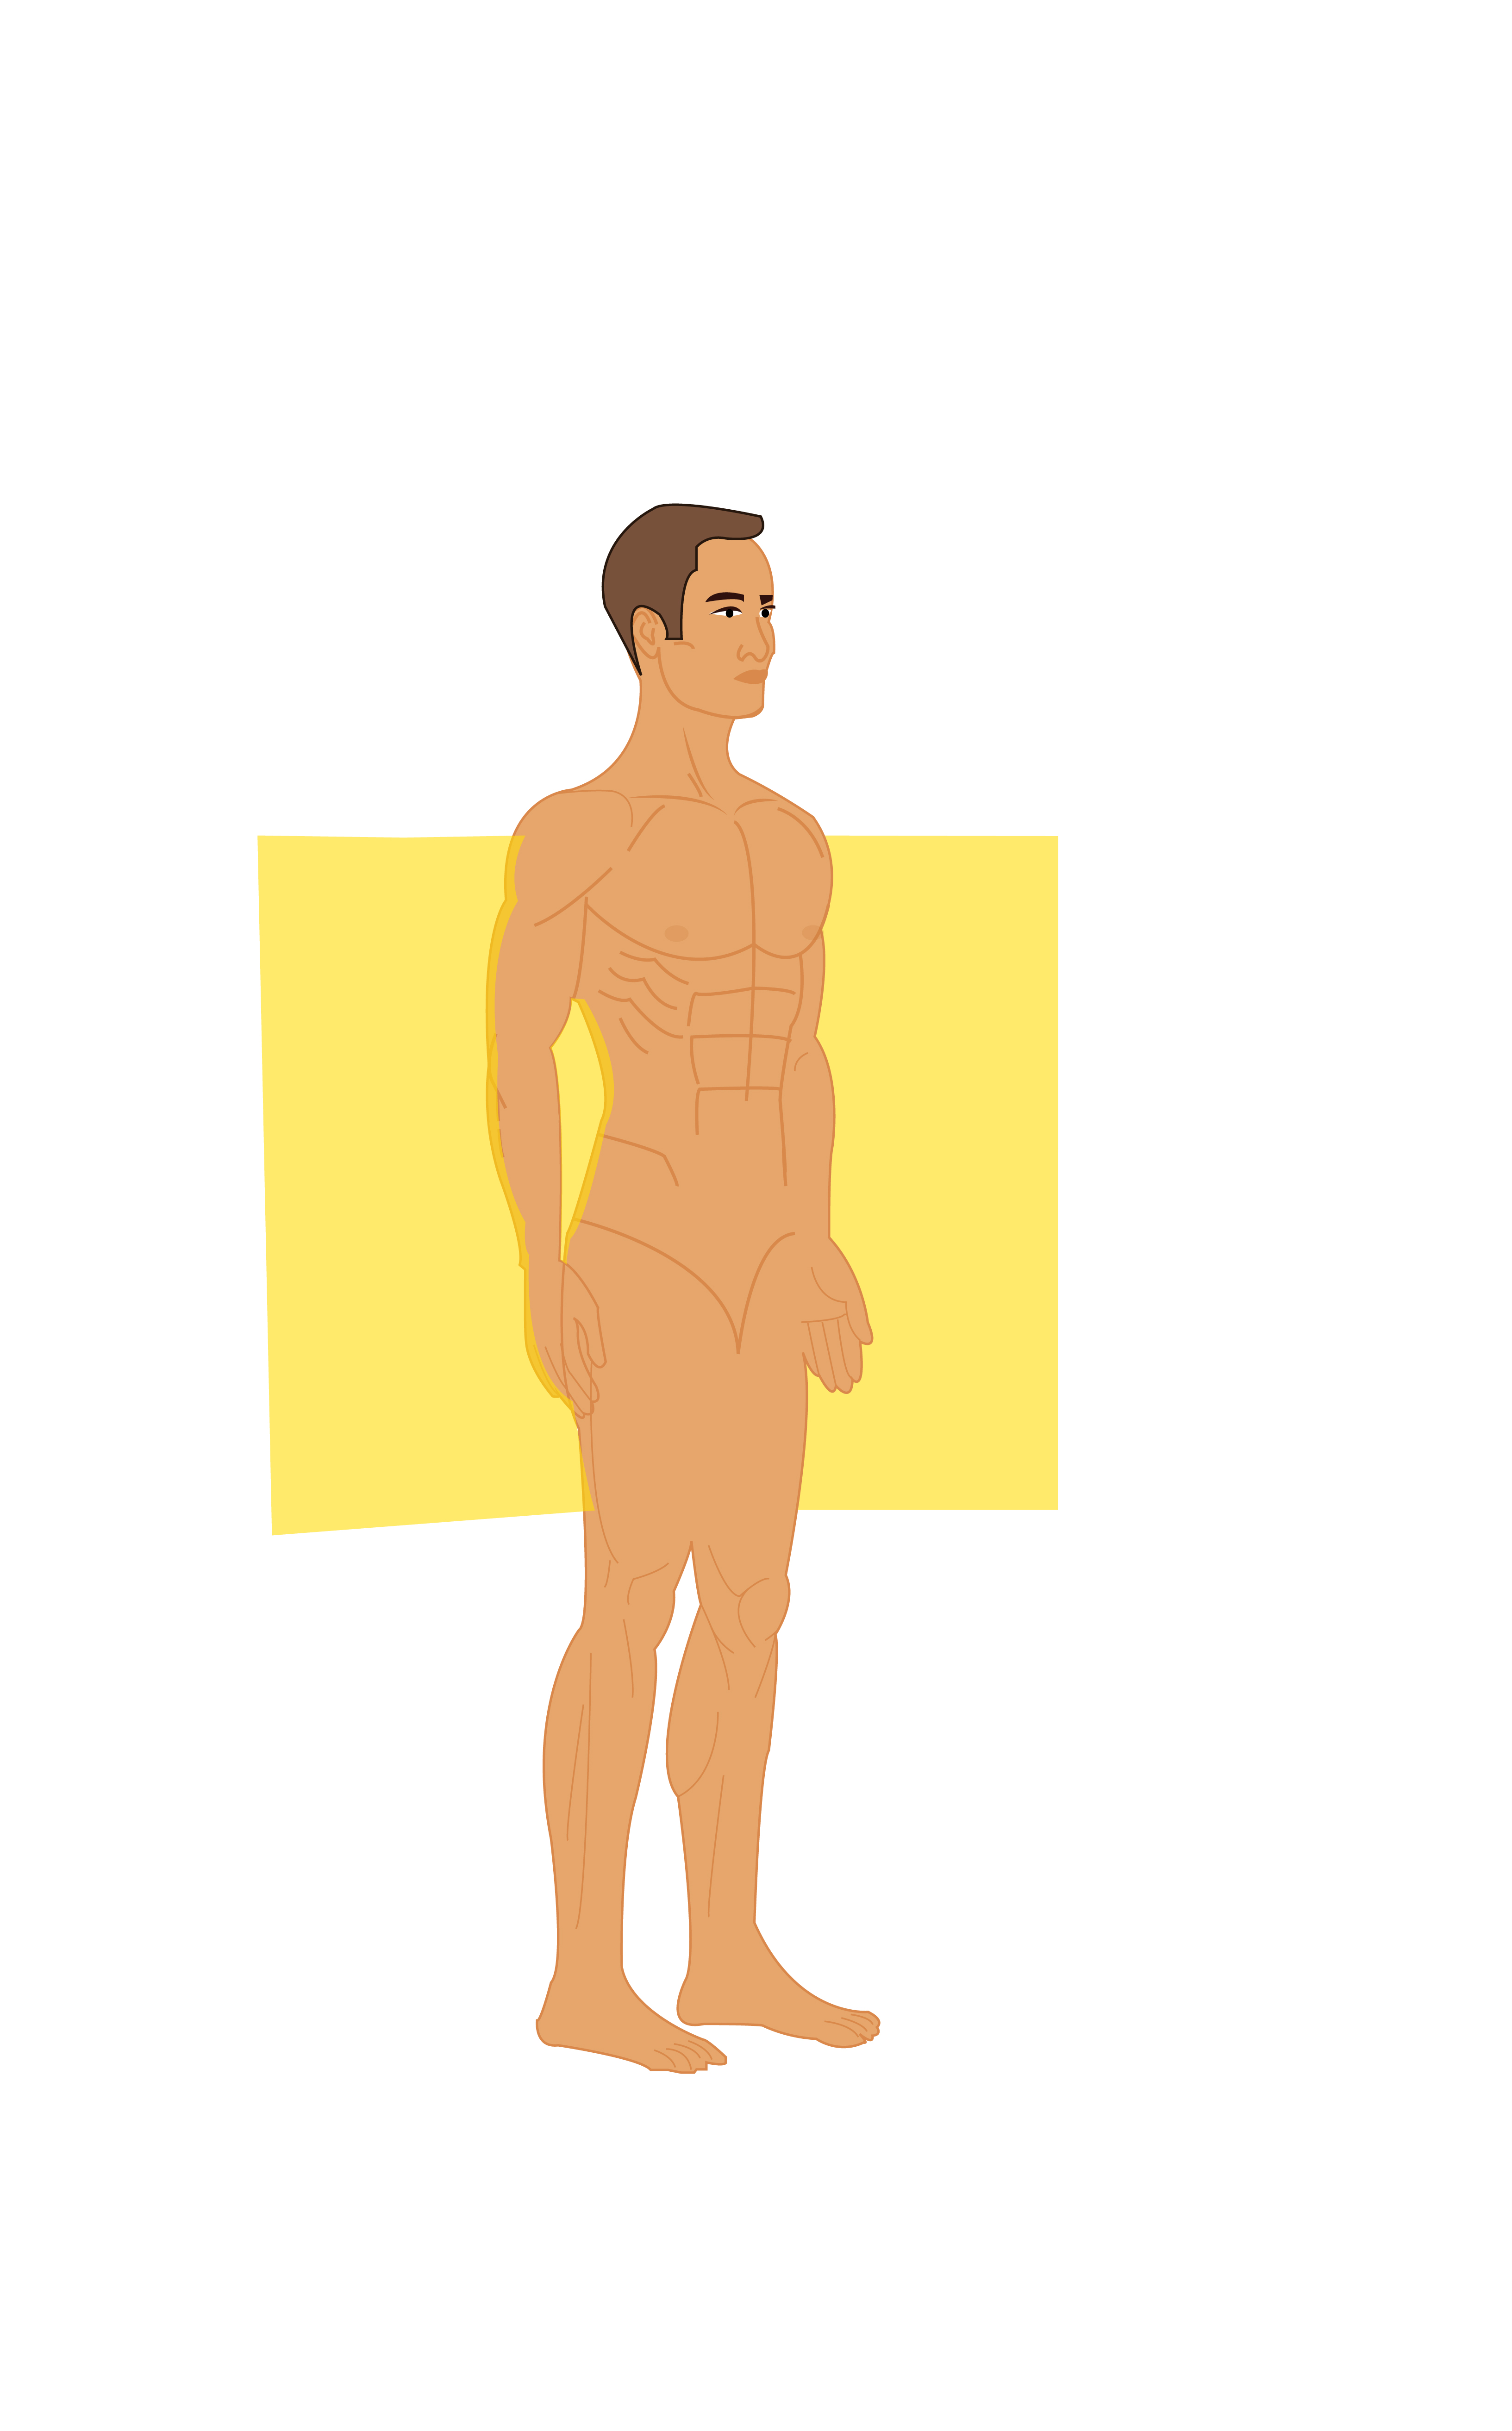
The Sagittal (Median) Plane divides the body into left and right.

As noted, tension in the "soft tissue" of the Core impacts one or more of these planes of motion that creates Core Asymmetry. This Core Asymmetry restricts motion, causes pain and diminished physical performance in the "Planes of Motion." A primary goal of Physical Therapy is to target the "Planes of Motion" through range of motion exercises to increase mobility and reduce pain.
When any one "Plane of the Body" is altered, all 3 Planes are involved.
If the Transverse Plane is rotated due to Core Tension, The Sagittal and Coronal Planes are also impacted. Similarly, if the Coronal or Sagittal Planes are modified by Core Tension, all planes are impacted. as shown in these examples.
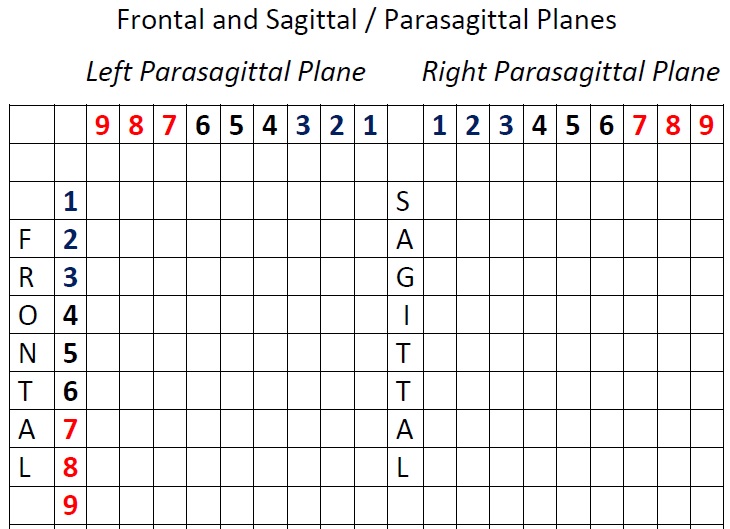
Recall that the Sagittal (Median) Plane is the Left to Right Division of the Body. The Sagittal Plane divides the body vertically into 9 Regions on each side of the Sagittal Plane, totalling 18 Vertical Planes. Each of these 18 Regions are segmented in what is referred to as Parasigittal Planes. Parasagittal means parallel to the Sagittal. This illustration shows 2 of the 18 divisions in the Parasagittal Plane.
During the Wright Balance® Sagittal / Parasagittal exercises, you are able to isolate and observe / experience changes in the Parasagittal Plane, one Region at a time. Through a process of addition of one exercise in one Core Region at at time, you will be able to determine what exercise change what Regions of the Core, one at a time.
Wright Balance® has "mapped" the Core in 9 Horizontal Regions and 18 Vertical Regions front and back. Each of these Core Regions is "recruited" by different Stance Widths in a standing or prone / supine posture. Wright Balance® is able to predict precise recruitment of different Regions of the Core from the Jaw (Bite) to the Pelvic Floor. This precise recruitment facilitates weight bearing gravity driven exercises that balance each region of the Core through use of body weight.
There are a total of 162 precise mapped regions of the Core in the front half of the Coronal Plane (9 Horizontal intersecting 18 Vertical). There are an additional 9 to 162 precise mapped regions on the back side of the Coronal / Frontal Plane.
The GUIDED DISCOVERY part of this EBook will show you how to experience changes in Body Symmetry one Core Region Stance Width at a time via simple tests pre and post the weight bearing exercises. You will observe and experience changes from Symmetry to Asymmetry following exercise in only one Core Region Stance Width at a time. Upon comepletion of all exercises in each Core Region, the net result is a completely balanced Core, from jaw to pelvic floor.
The applications of the exercise specific to these Core Region Stance Widths are exercises for Core Symmetry creating maximum strength, injury prevention and pain, soreness and stiffness relief and mobility. This program includes individuals from Elite Athletes to an aging population that is prone to falls due to issues of Core Imbalance. There are also sport specific applications in these exercises.
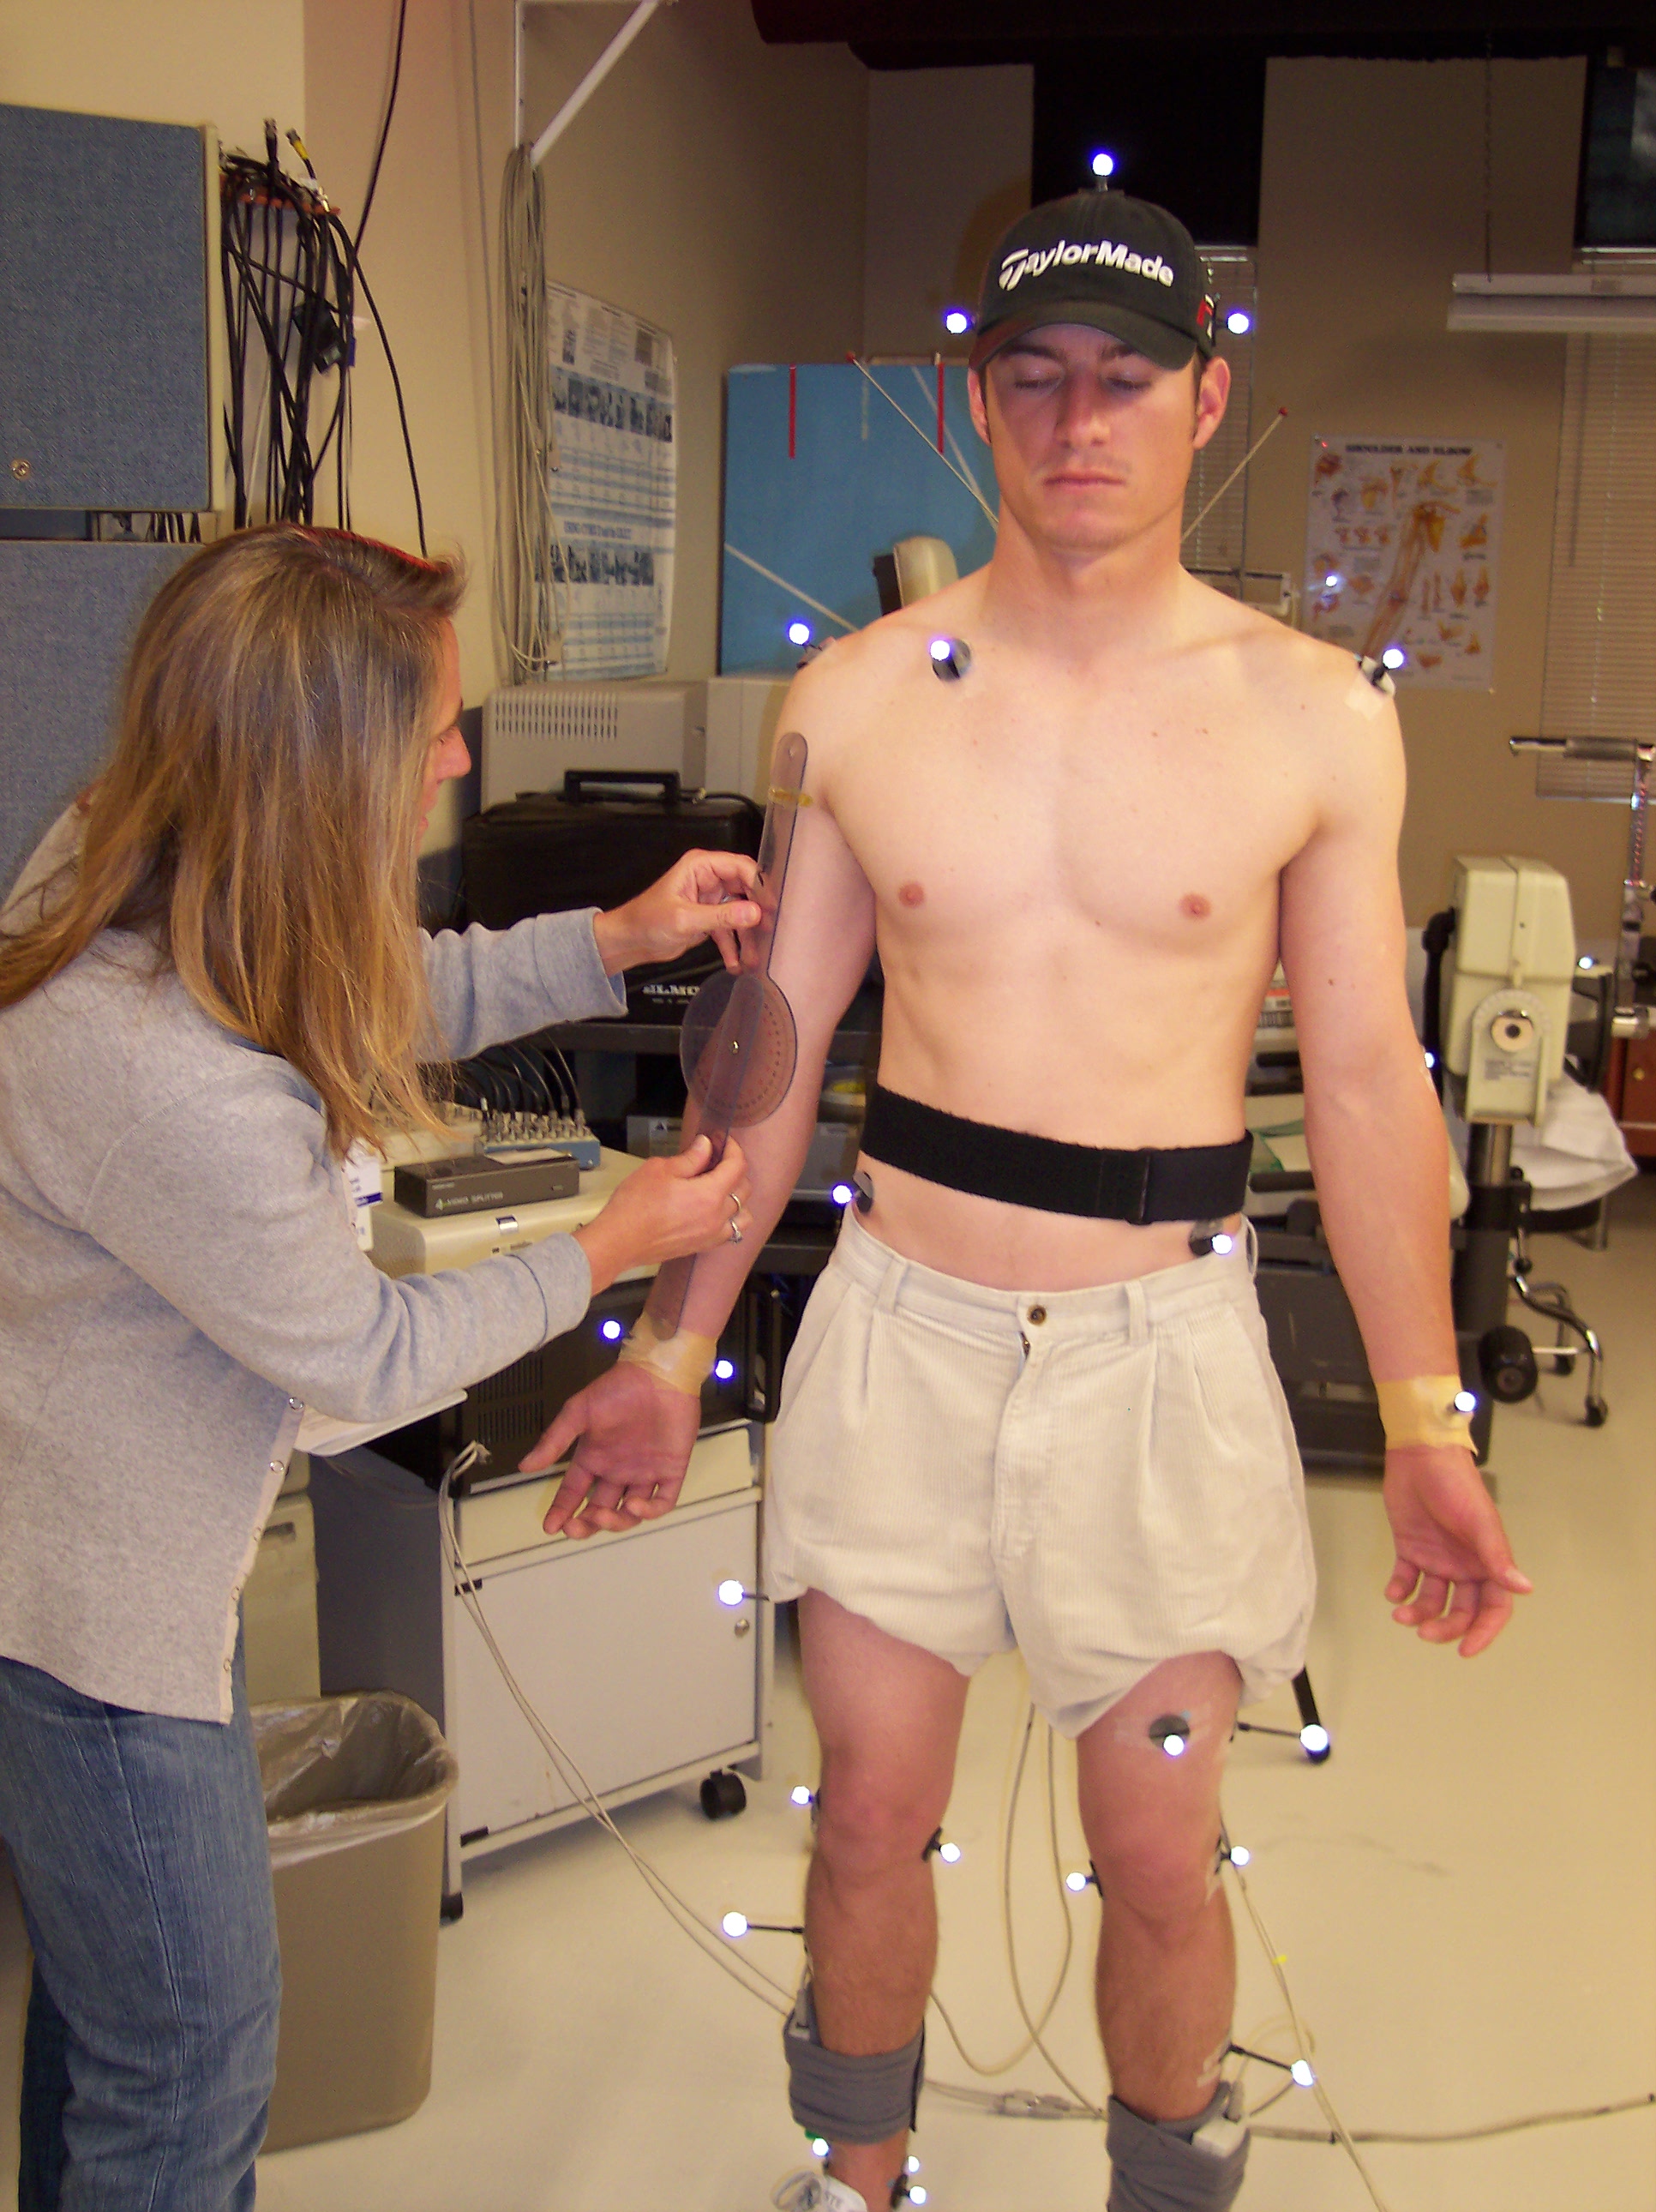
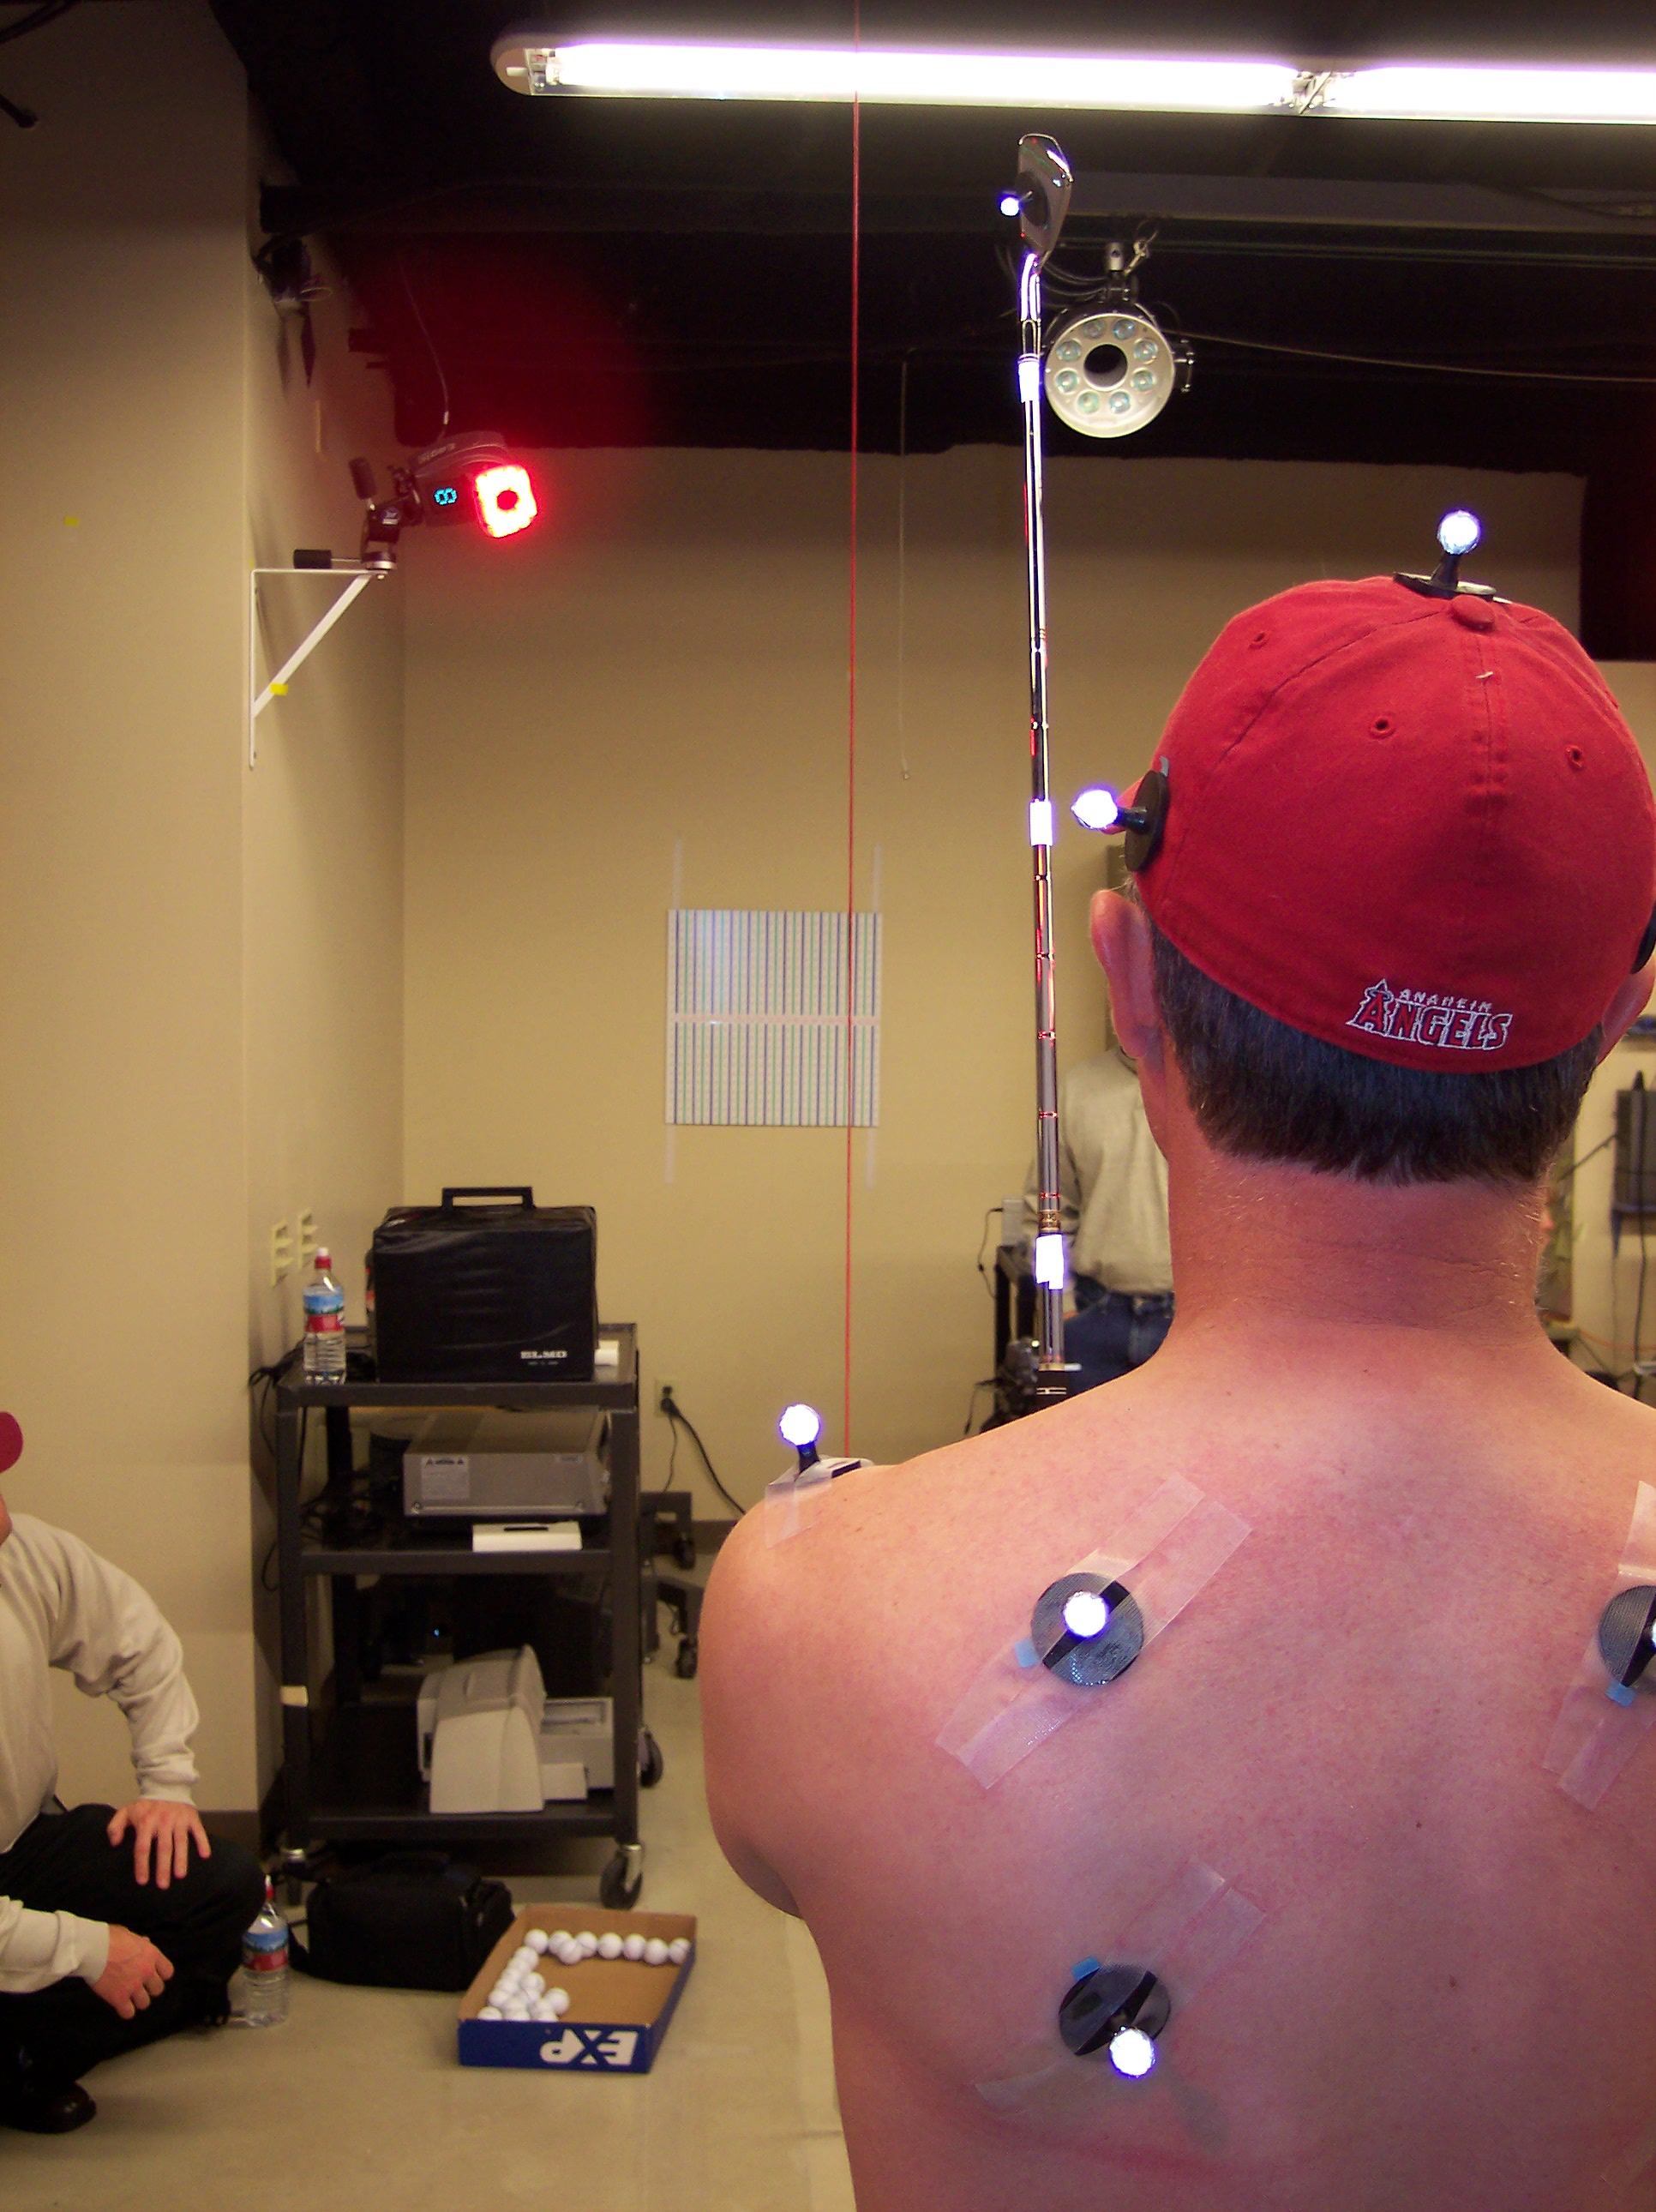
The research from Dr. Frank Jobe's lab showed changes in balance in various Core Region Stance Widths. This illustration shows the early observations of imbalance with 25 sensors per square inch.
(This link is for an EBook that summarizes the original research in Dr. Jobe's Biomechanics lab. If you are not familiar with the research history and the "Brain Trust" involved in the early research, I would suggest that you review this short EBook: http://online.fliphtml5.com/azhq/ulzw/#p=1 )
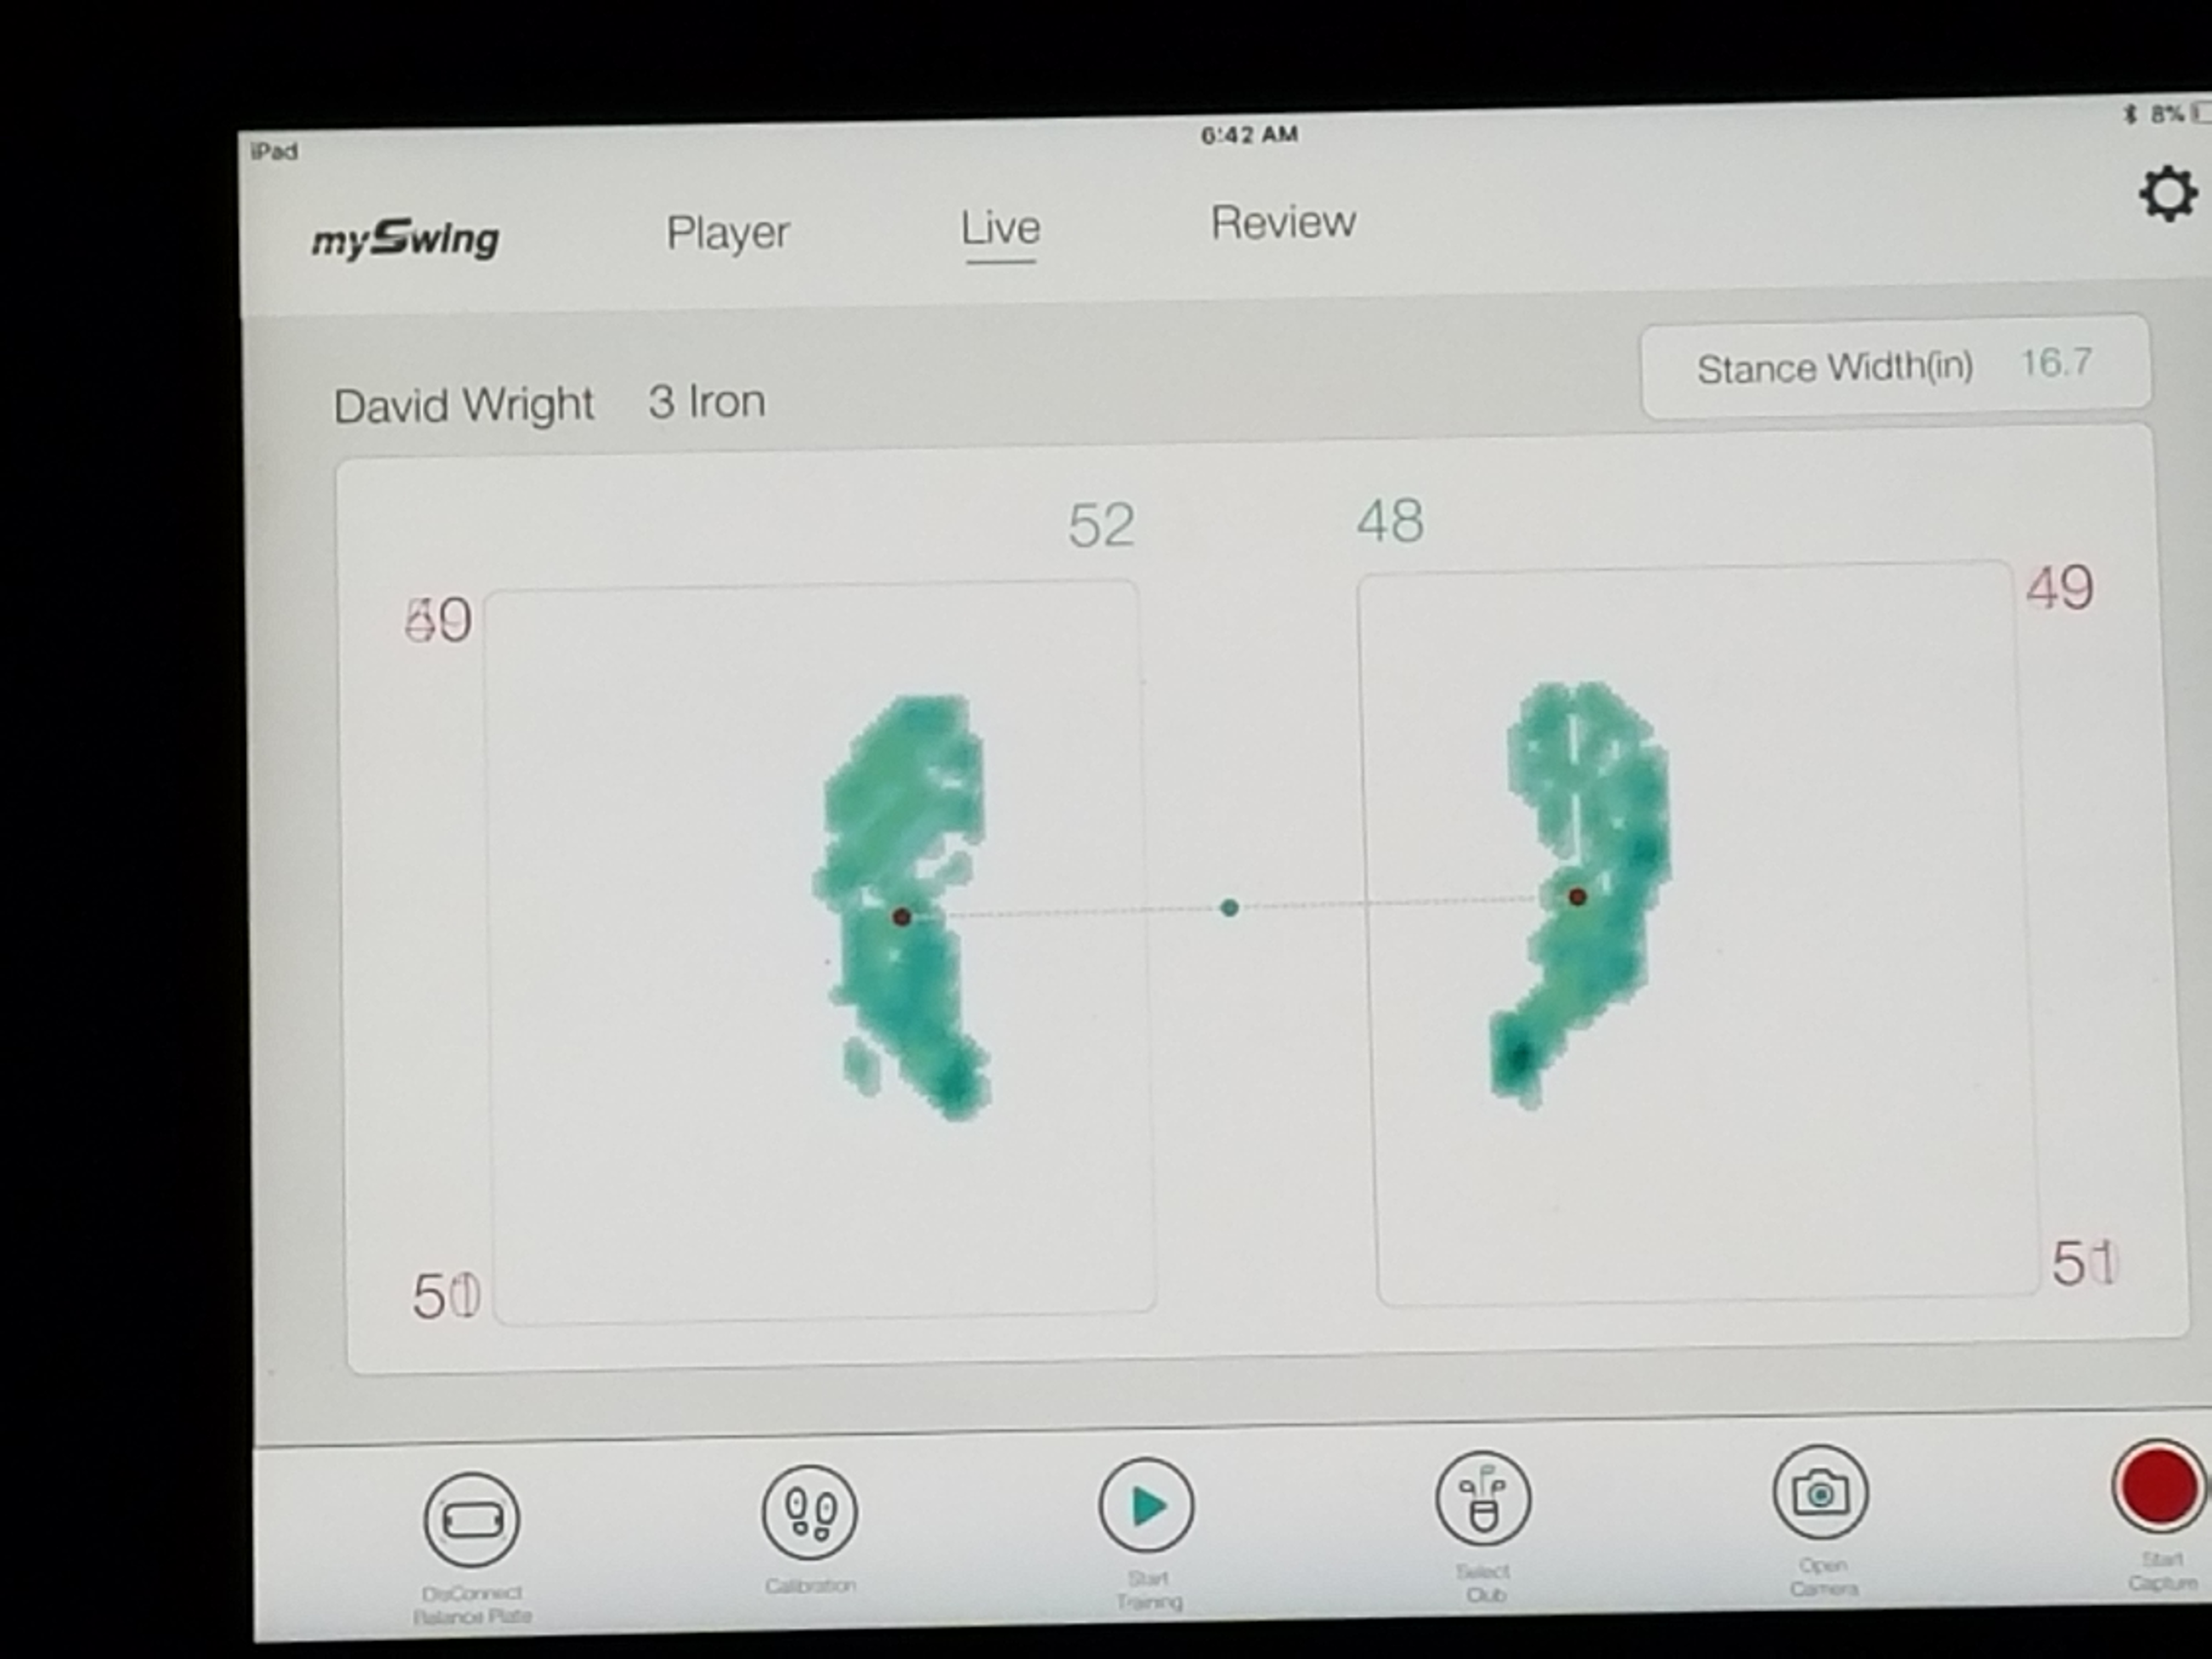
Our current balance system is a wireless MySwing Balance Plate that has 8 sensors per square inch. Here is an illustration of the MySwing balance plate in use. This is the system I use, in additon to the observations you will experience as you explore changes in balance using simple measurements Pre, During and Post exercise.

TRANSVERSE / Frontal PLANE EXERCISES
Transverse / Frontal Plane imbalances are corrected through an exercise (Planks) in each of the 9 Core Region Stance Widths. The Planking Exercise recruits the 9 Horizontal Core Regions by Stance Widths.
There are 2 simple pre- and post-test to observe the effect of the Core Exercises one Core Region Stance Width at a time.
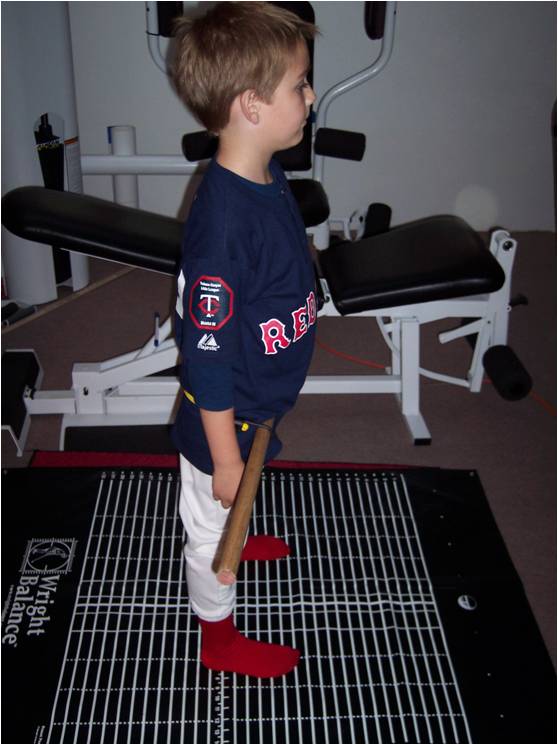
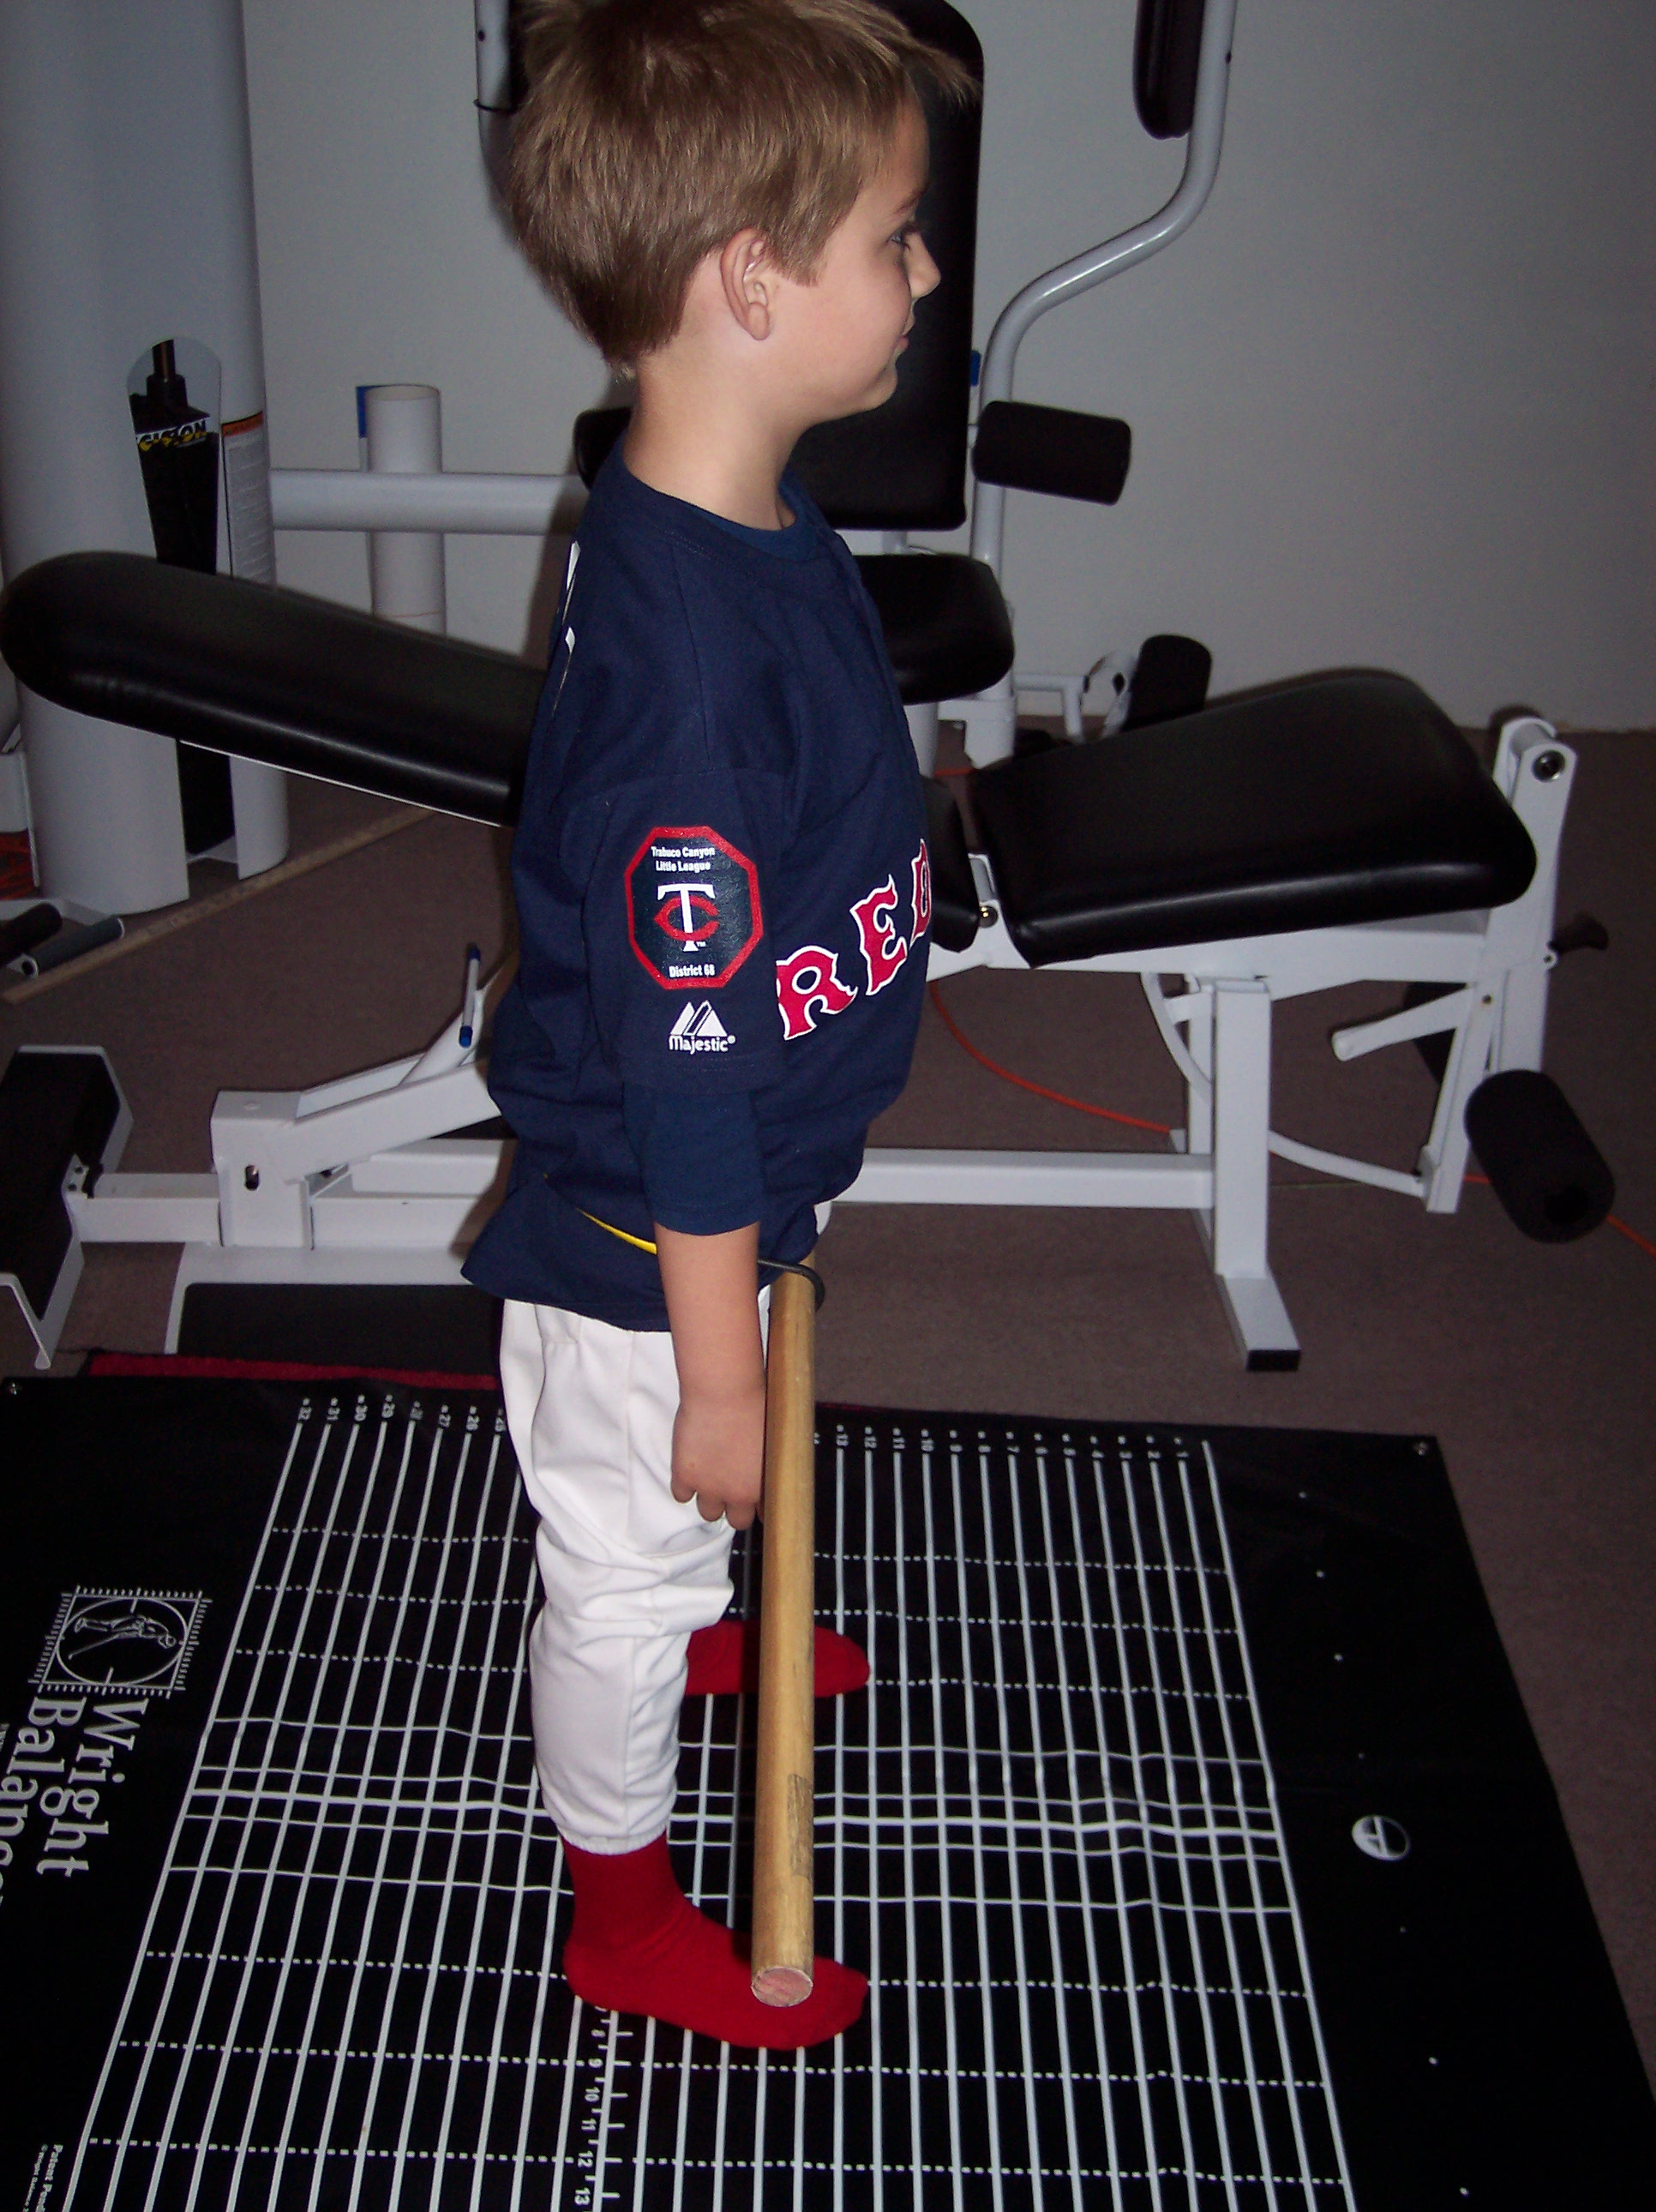
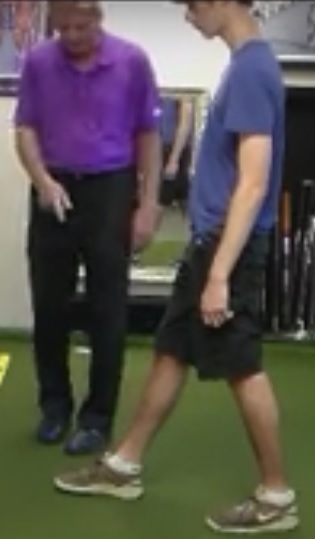
The first pretest is to stand tall and take one short step back as shown in this illustration. Keep your feet flat on the floor at the end of the step back.
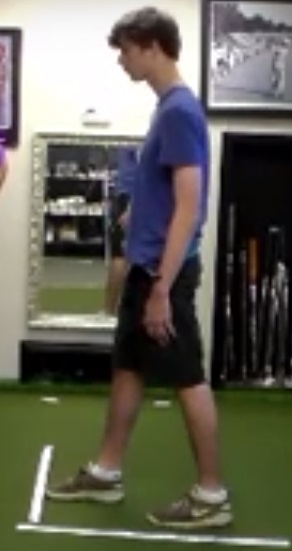
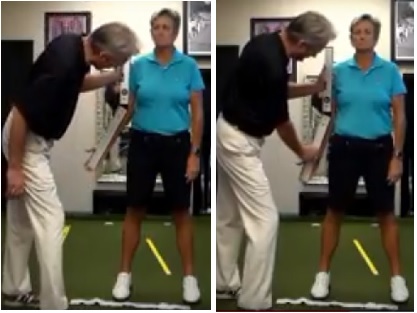
The second pretest is to take one step forward keeping both feet flat on the ground as you do.
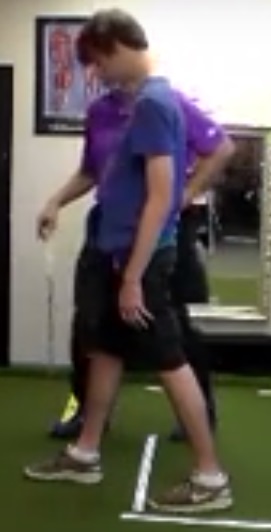
Note that prior to the exercise, when taking a step back or forward, that your hips rotate left or right as shown in the illustration above. The bar on the hips in this illustration shows the rotation of the hips.
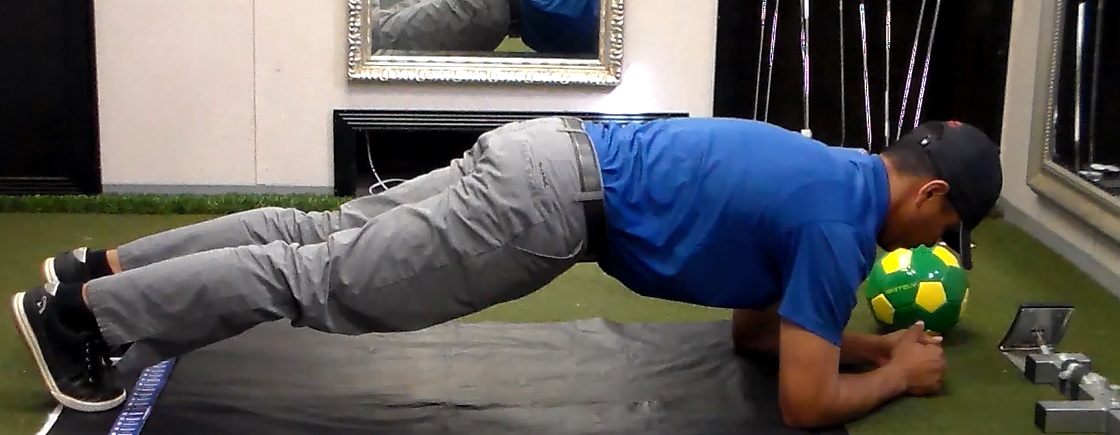
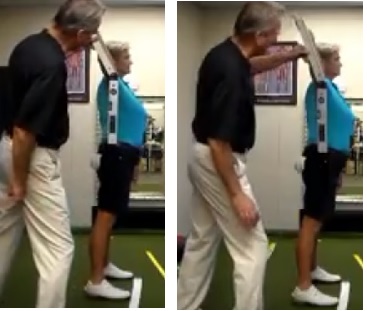
As shown in the following illustrations, the Planks are done in a Static or Dynamic Position. The Static Position is held for a minimum of 30 seconds in each of the 9 Stance Widths. The Dynamic consits of a minimum of 10 wall or floor Push-ups in each of the 9 Stance Widths. This exercise is recruiting each of the 9 Core Regions in the front of the Coronal / Frontal Plane in the Horizontal Plane.
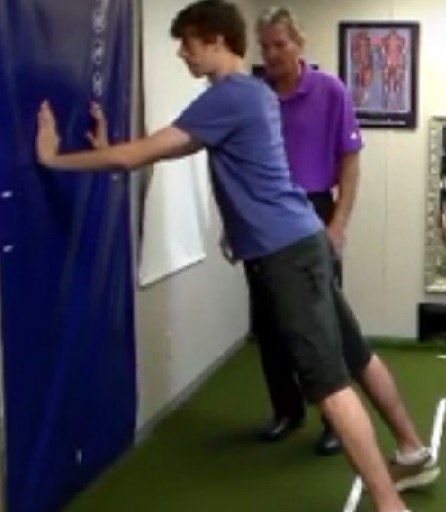

After 30 to 60 seconds in the static position, the width of the feet is moved to a Stance Width that recruits another of the 9 Core Regions. If you have a blue bar and bungee, you will note that your hips square in only the Core Region Stance Widths where you have completed the Core Exercises.

This process continues until each of the 9 Core Regions has been recruited and balanced via a simple gravity driven exercise using the persons body weight. The result is a "squaring" of the Transverse / Coronal Plane in all Stance Widths, not just the 9 Core Region Stance Widths.
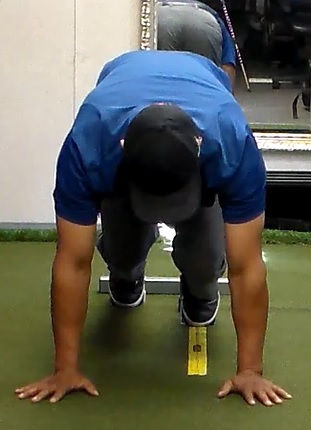
The early application of this exercise was done with the person on their knees in each of the 9 Core Region Stance Widths.
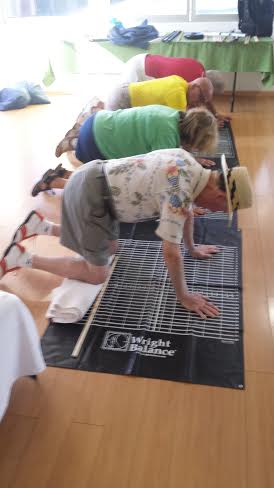
As long as the width of the knees is the same as the 9 Core Region Stance Widths, there is a correction of Asymmetry of the Transverse Plane one Core Region at a time. The "all fours" planks have been tested on a mattress and the Core has been balanced. Research is pending to determine the duration of the impact of this Core Exercise for medical, rehabilitation and assisted living environments.

Pre- and Post-Tests for Transverse & Coronal Plane Correction...The Walker's / Runner's Test
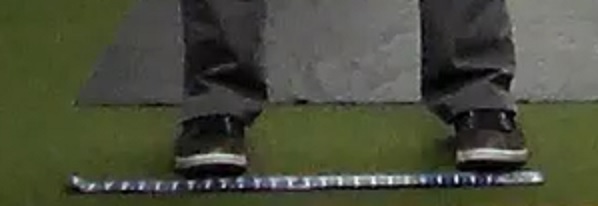
After the exercise in each of the 9 Core Region Stance Widths, the hips remain square when you take a step back. The hips will be square only in the Stance Width that is exercised as shown in this illustration.
You may test this "Step Back" as you complete the exercise in each of the 9 Core Region Stance Widths before proceeding to the next Core Region Stance Width. You will note that the "Step Back" only remains square in the Stance Widths that you Plank. If you fail to Plank one of the 9 Core Region Stance Widths, you will experience a rotation of your hips rotate left or right when you "Step Back" in that Stance Width.
After completing the planks in all 9 Core Region Stance Widths, your hips remain square when you take a step back regardless of Stance Width. However, when you take a step forward in any Stance Width, you will notice that your hips rotate left or right. I will give you another Core Region Exercise to Balance the back side of the Coronal Plane. Once the back side of the Coronal Plane is balanced, your step forward / lunge will result in a square hip line upon landing the left or right foot.
Pre and Post-Test 2
Thumbs Check
You may check Core Imbalance in the Transverse Plane by making a fist and pointing your thumbs toward each other with slight spine tilt forward until your arms hang freely with no knee flex. Close your eyes and relax your shoulders. When you open your eyes, note which hand is closest to your thigh. That is the direction of the rotation of your Transverse Plane.

You will note that your thumbs line up at the end of each of the 9 Core Region Stance Widths following the "planking exercise". The thumbs will not line up in any Stance Width until the "planking exercise" is done in all Core Region Stance Widths.
Pre and Post-test 3
Hands Hang
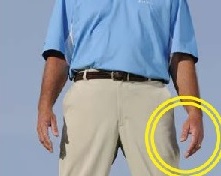
You will note that prior to Transverse / Coronal Plane Planks in each of the 9 Core Region Stance Widths that one of your hands rotates internally more than the other as shown in this illustration.
Following each of the Transverse / Coronal Plane Planks in one of the 9 Core Region Stance Widths your hands will hang exactly the same as shown in this illustration.

In the remaining Core Region Stance Widths, you will note that you still have greater internal rotation of one hand than the other. Once the Transverse Coronal Plank exercise is done in any one of the 9 Core Region Stance Widths, your arms and hands will hang the same in that Stance Width.
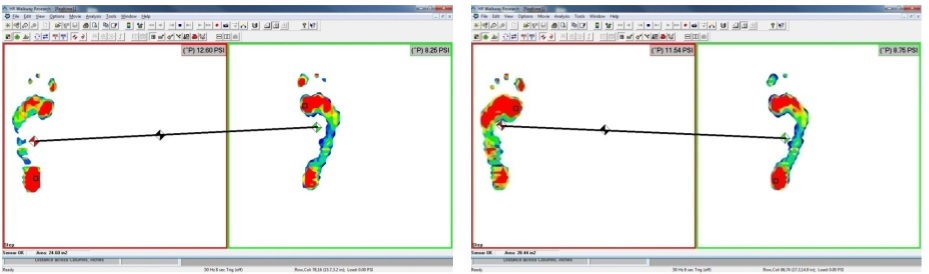
When there is imbalance in the Transverse and Coronal / Frontal Planes and you stand on the MySwing Balance Plate, the balance configuration looks something like this illustration.
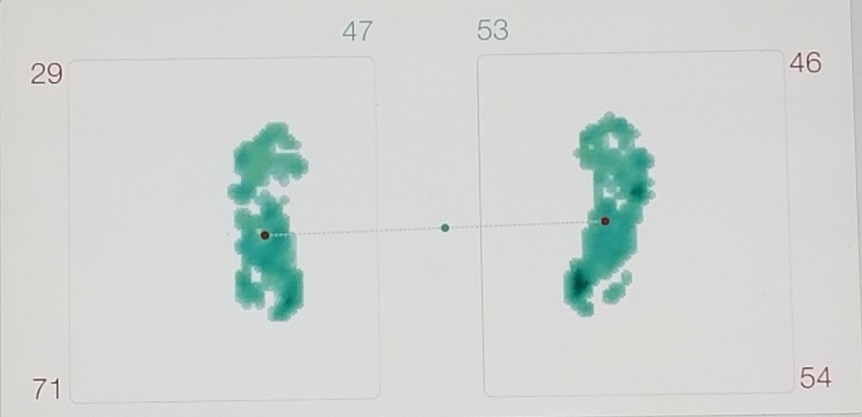
The green numbers at the top represent percentages of Left to Right Balance. The red numbers on the left and right top and bottom represent percentages toe to heel. The Line of Pressure is toe to heel suggesting a Transverse Plane that is rotated right to left.
(Note: Following the Wright Balance® Core 360 Exercises when standing on the MySwing Balance Plate, there is balance in all quadrants in ALL STANCE WIDTHS and the Line of Pressure is a straight line.)
Coronal Plane Back Side Pretest
The Pretest for the Back Side of the Coronal Plane is to take one step forward (Walking / Runner's Test). You will note that prior to exercise, there is a rotation of the hips left or right when taking one step forward regardless what stance width you start from.

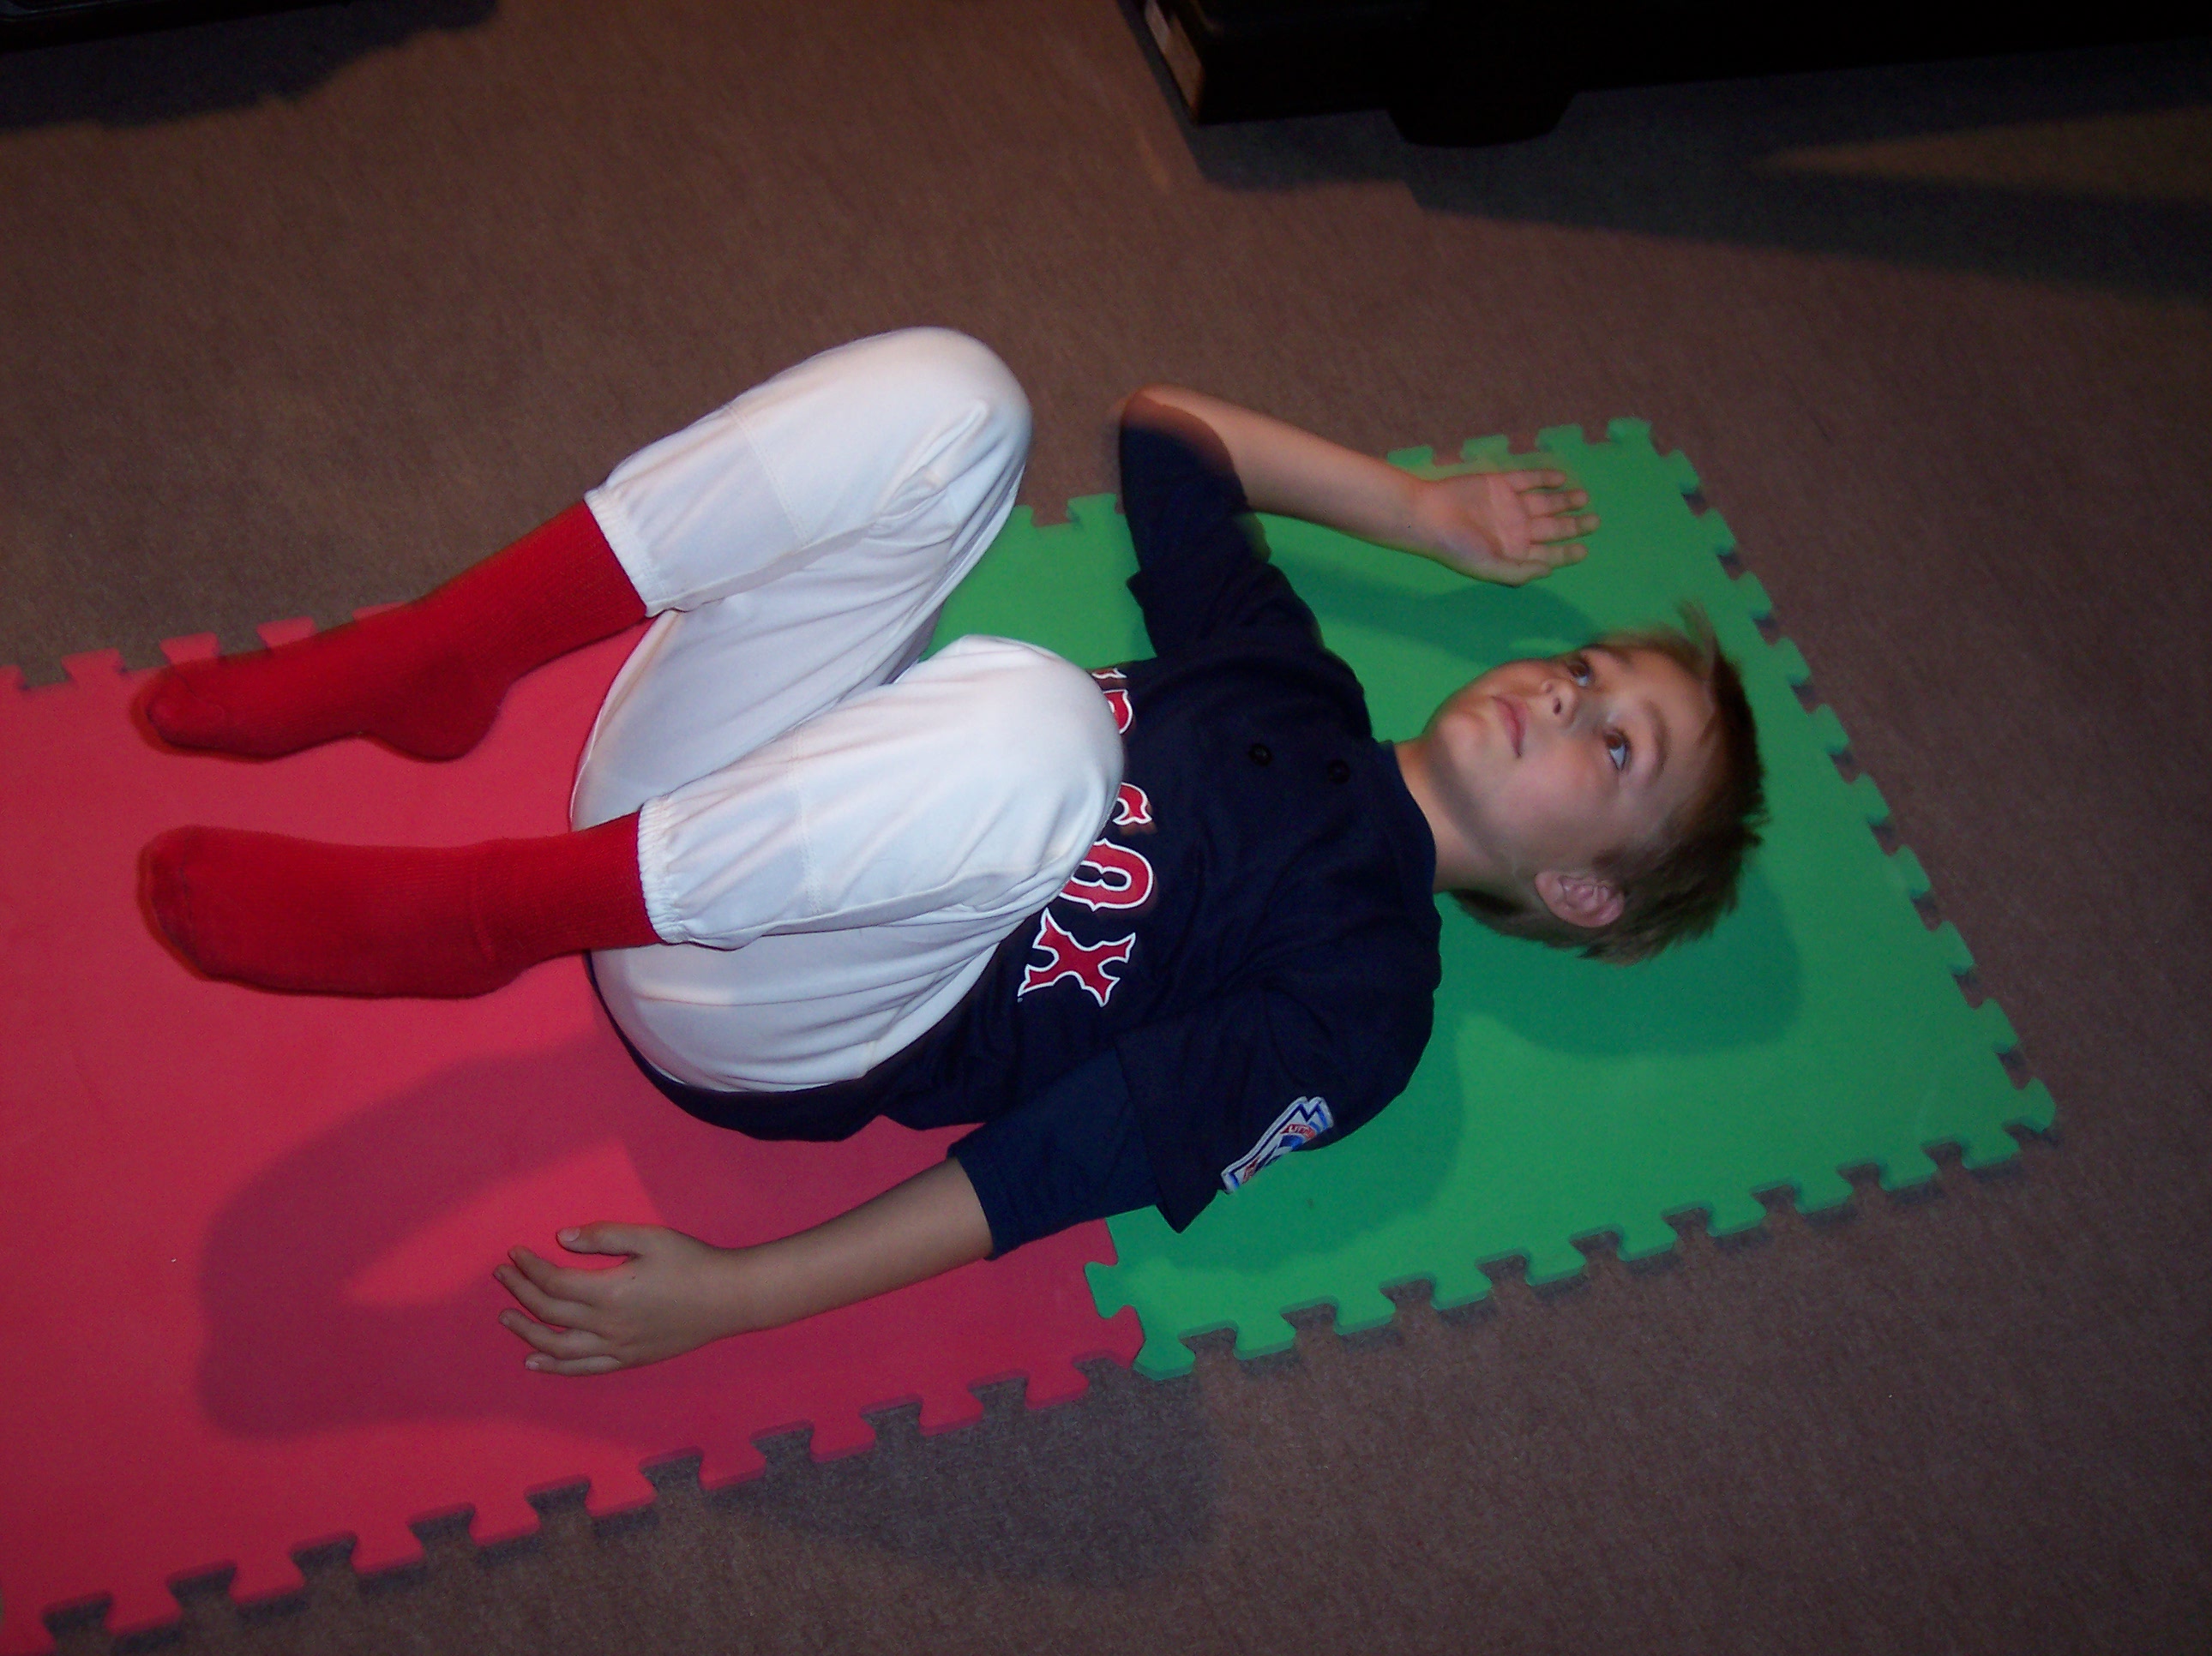
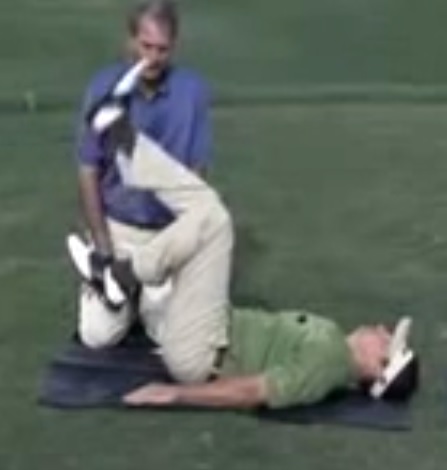
The exercise to correct the Back of the Coronal Plane imbalance is done in a Supine position. There are 9 sets of a brief exercises in the 9 Core Region Stance Widths. A variation of this exercise was part of the original research in Dr. Jobe's Biomechanics Lab as shown in this illustration.
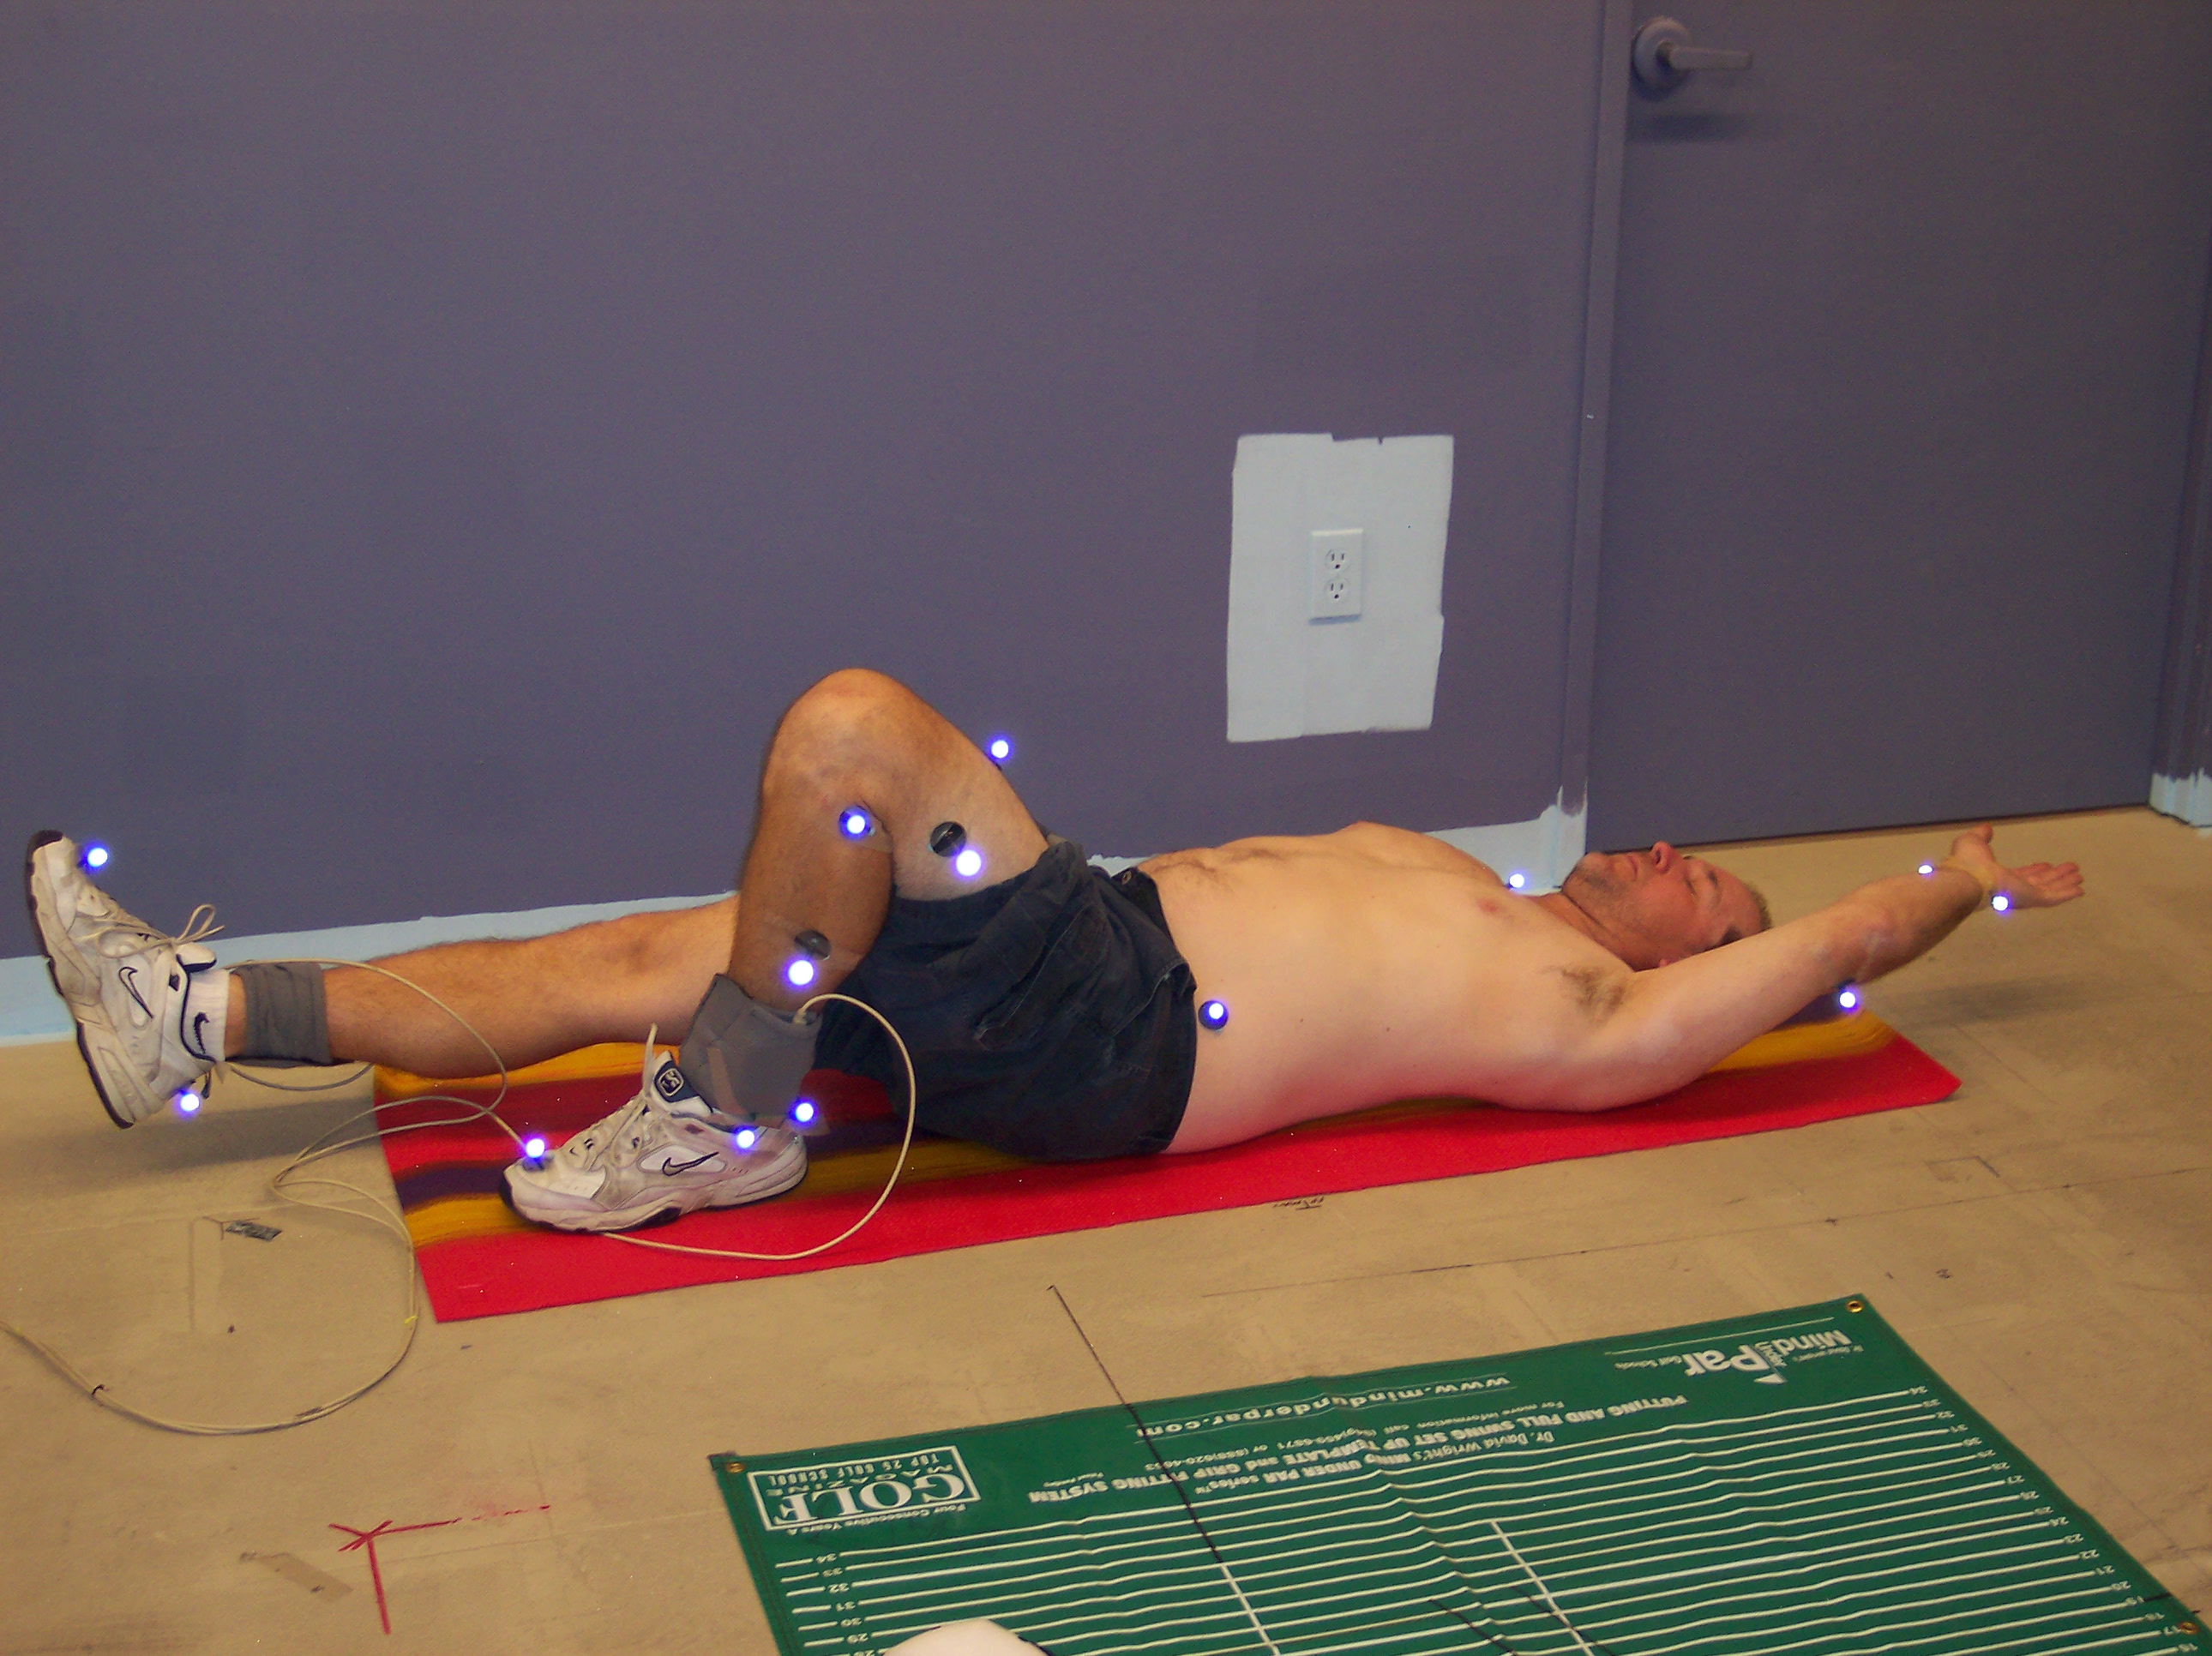
The feet are placed the width of each of the 9 Core Region from the Wright Balance Stance Widths sequentially as you do the exercises in each Stance Width.
You will notice "pressure" in your back at the level of the Core Region being recruited by the width of your feet. For example, when you do this exercise from an Upper Core Region Stance Width (7, 8 or 9), you will notice pressure just above your lower sternum up to your shoulders blades and your Upper Shoulders.
When you recline with your feet flat and you rest your elbows on the floor with your hands pointing straight up as shown in this picture, you will note the same internal rotation of one of your hands. Your hands do not visually appear Symmetrical as shown in this illustration.
INSERT PHOTO OF ROTATION Of HANDS IN THE DEAD BUG POSITION.
END EDIT May 27, 2018
This is an important observation as it will validate and differentiate the impact of this exercise and those that follow. The internal external hand rotation will also validate the "squaring" of each Core Region as this exercise progreses through the different Core Region Stance Widths.
In this exercise set your feet at Raise both feet at the same time holding them off the floor until you have completed the entire set of exercises.
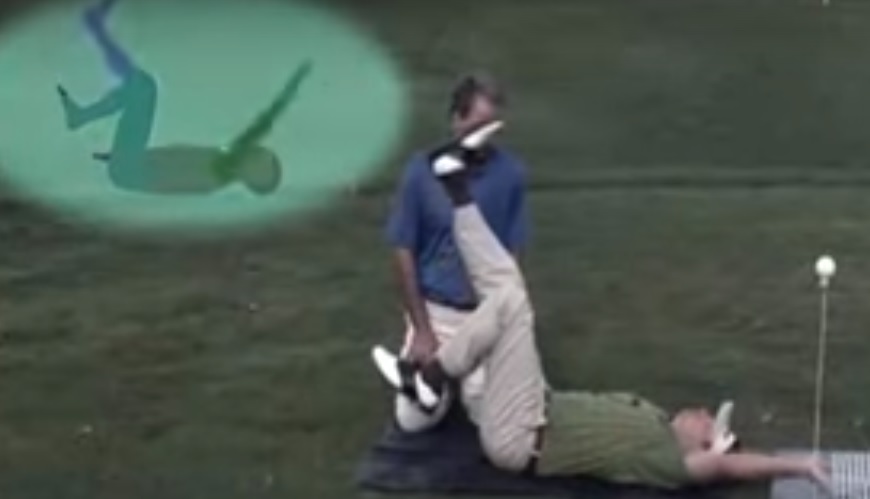
The first series is extending one leg at a time a total of 3 times with each leg. Raise first one leg, returning to the starting position and then the other leg for a total of 6 repetition as shown in the following illustration.
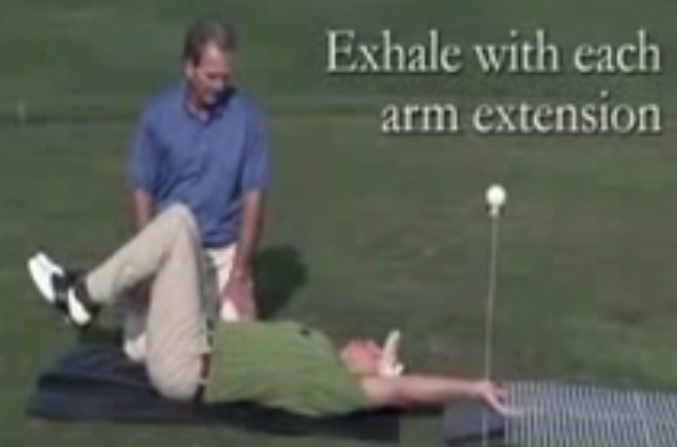
With your feet still off the floor, continue to focus on the Core Region being recruited by the width of your feet. Extend one arm over your head, then return to the start position at your side. Extend the other arm and again return to the start position. Do this exercise for a count of 6 or 3 repetition with each arm and breathe as shown in the following illustration.
The last series in this set is opposite arms and legs. Leave your feet off the ground and continue to focus on the Core Region being recruited. The last segment of this set is opposite legs and arms: right arm and left leg, return to starting position and then left arm and right leg. Repeat this exercise to a count of 6 or 3 repetitions on each side as shown in this illustration.
Upon completion of the first set, while in the supine position, move your feet to the width of the next marked 9 Core Region Stance Width and repeat the set as shown above. Each time you change the width of your feet, note the changes in pressure in your back as you recruit different regions of your Core on the Horizontal Plane.
Coronal Plane Back Side Post-Test
The Post-Test is a repeat of the Pretest. Stand tall and take a Step Forward. Upon completion of all 9 Stance Widths, you will note that your hips are square as you take a Step Forward as shown in this illustration regardless what Stance Width you are in, even a Stance Width that is not marked as one of your 9 Core Region Stance Widths. Once you have completed each exercise in all 9 Core Region Stance Widths, you will have Core Symmetry in all Stance Widths.

If you do this post test upon completion of each set, you will note that your hips stay square only in the Stance Widths where you completed the exercise but not in those you have not exercised. Use this "elimination test" strategy on each exercise you do.
Sagittal and Parasagittal Planes
The Sagittal Parasagittal is in the Vertical Plane with 9 Core Regions on the left side of the Sagittal Plane and 9 Core Regions on the right side of the Sagittal Plane. Each Core Region Left and Right of the Sagittal Plane are the Parasagittal Planes as shown in this illustration.

As shown in the above illustration Sagittal Parasagittal Plane imbalances impact all Regions of the Core.
The Pretest for the Sagittal / Parasagittal plane is done after each Core Region Stance Width Oblique Exercise.
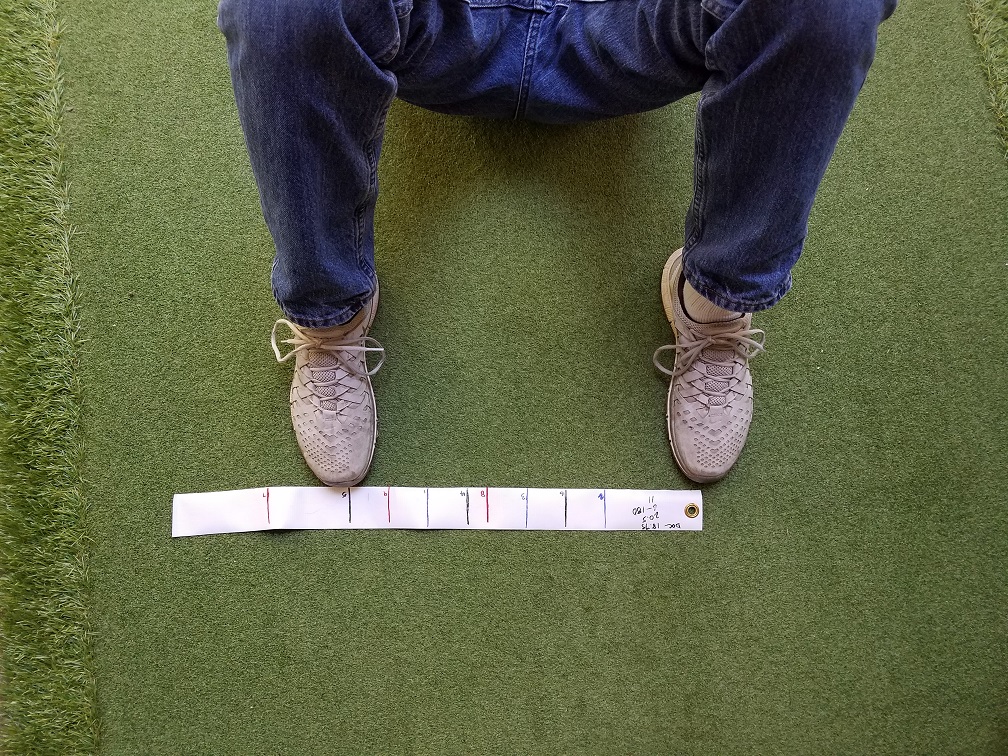
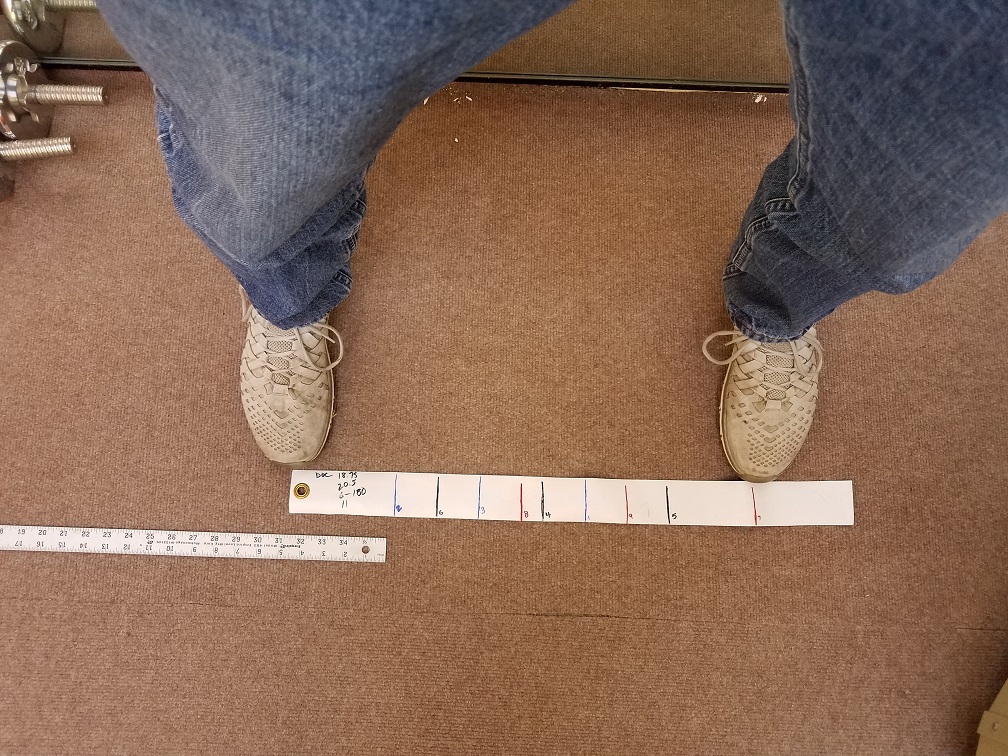
Find a comfortable distance from the Wall with your right side toward the wall. Place the middle of your right foot on the "0" of your Plank Strip and the middle of your Left foot on the furthest Core Region number on your Plank Strip.
As you Stand with your Right shoulder toward the wall, look straight ahead, add knee flex, note the location of your balance in your feet, raise your Left leg and bring it next to your right leg holding it off the floor for 15 to 20 seconds (as a starting time for each exercise.)
When you begin the side plank exercise, be certain you are a comfortable distance from the wall and progressively increase your distance from the wall as you exercise over several days. The greater the distance from the wall the more you will use your body weight.

Lower your Left leg at the end of the timed period (15 to 20 seconds) and note that your weight is more on your Left side than your Right, that your bite touches only on the Left side of your mouth and that your Left arm measures longer than your left.
*Guided Discovery: Notice when you step to a Core Region Stance Width where you have not Planked your Obliques that your bite returns to normal as does your arm lengths and balance sensation in your feet.
*Bend Forward, make a fist and point your thumbs toward each other. Note that one hand is significantly lower than the other in this one Stance Width after this 15 to 20 second exercise.
Note the progressive changes in your arm length and weight changes in your feet and bite on one side as you move from one of the 9 Core Region Stance Widths to the next as a Pre and Post Test of each Stance width.
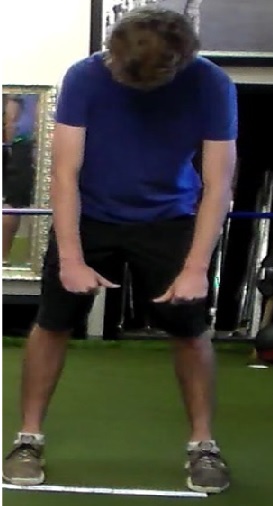
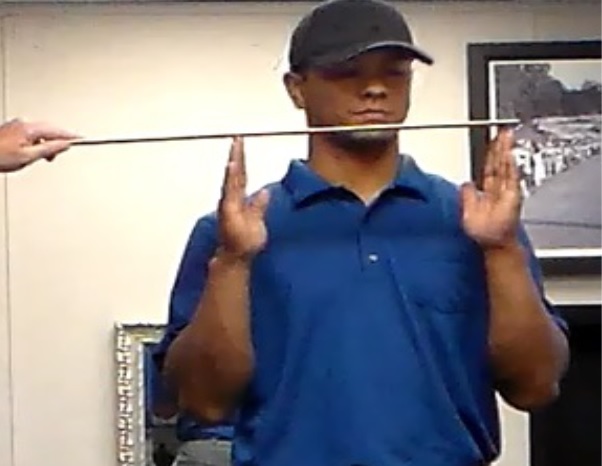
If you are near a mirror, you will also notice the progressive changes in your shoulder height one Core Region at a time. When you finish all 9 Core Region Oblique exercise for 15 to 20 seconds in each Stance Width you will notice that one shoulder is lower than the other similar to this illustration.

Notice Justin's right shoulder is lower in this illustration. A simple way to measure changes in arm length and shoulder width before and following each oblique exercise is to take a straight edge or carpenter's level, extend the fingertips with the hands pointed upward and you will notice the difference in the height of the hands after each exercise as shown here.
Next, step to the other side of the Plank Strip so that your right shoulder is facing the wall, your right foot is on "0" and your left foot is on the widest of the 9 Core Region Stance Widths. Add knee flex, note the balance position in your feet as related to the Core Region being recruited. Hold that balance position in your right foot as you raise your left foot off the floor. With your left foot raised move it next to your right leg and hold that position with your left foot off the floor for 15 to 20 seconds in each Core Region Stance Width, exactly as you did on the left side.
Note how balanced you are left to right from your bite to feet as you complete each of the 9 Core Region Stance Widths. This is your Post Test. You will experience complete balance on both sides only in the Stance Widths you have done the Oblique Planks on both sides.
Also note that your thumbs line up, your bite is symmetrical as it moves from one side to both sides of your mouth and your shoulders are level. Note that if you skip one of the 9 Core Region Stance Widths, when you return to that 1 Stance Width, you still have Asymmetry of that Region of your Core.
The 18 Vertical Parasagittal Planes combine with the 9 Horizontal Coronal Planes to make up 162 Core Region segments. Each of the 162 Core Region Segments has been balanced following the front planking exercise and the Sagittal Parasagittal Plane (Obliques) exercises. Add the back exercise in all 9 Core Regions and you have balanced your Core from your Pelvic Floor to the Roof of your Mouth.
GUIDED DISCOVERY
There are numerous ways to observe Core Symmetry. Below are observations I have made in our Biomechanics Lab over the past 10 years. These are repeatable observations made pre and post exercise in every subject who has been measured by a Wright Balance® Professional.
**Pre and Post Exercise Correction Observations of the Transverse Plane
**
Hands Hang
When there is Core imbalance in the Transverse Plane, you will notice that your hands do not hang in Symmetry in 8 of the 9 Stance Widths that recruit one of the 9 Core Regions. Each person has Symmetry in 1 of the 9 Core Region Stance Widths.

In testing via the elimination process, you will note that your hands hang exactly the same in the Stance Widths you have Planked in the front and back of the Coronal Plane. However, you will note an external or internal rotation of one hand in the hands you have not planked.
Additionally, following the "planking" exercise in each of the 9 Core Region Stance Widths, the hands hang exactly the same in all Stance Widths within a Core Region, but differently between Core Regions.

If the hands are checked immediately following each Plank Region, the player's hands hang the same only in the Stance Widths where the planks were completed. If one of the 9 Stance Widths is omitted in the exercise, the hands will not hang the same only in that single Stance Width. Otherwise, the hands will hang the same in any Stance Width.
The internal rotation of one hand is a result of Core Tension creating rotation of the Pelvis in the Transverse Plane. Following the "Exercise Induced" Symmetry, stand tall looking in a mirror. Subtly turn your hips left or right and note the change in the internal / external rotation and Asymmetry of your hands. This observation will show you that the internal external rotation of your hands is a function of your Transverse Plane rotation.
NOTE: If you are doing the Left and Right Oblique exercises, there is rotation of the Transverse Plane in all Stance Widths until a Core Region Stance Width has been "Planked" on both the left and right sides.
Hip Rotation
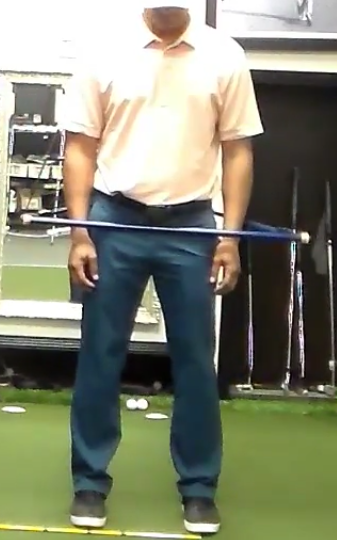
Hip rotation may be observed with a bar placed flat on the pelvis and secured by a bungee cord. This procedure was validated in the original Wright Balance® research in Dr. Frank Jobe's biomechanics Lab in 2003 as shown in this illustration.
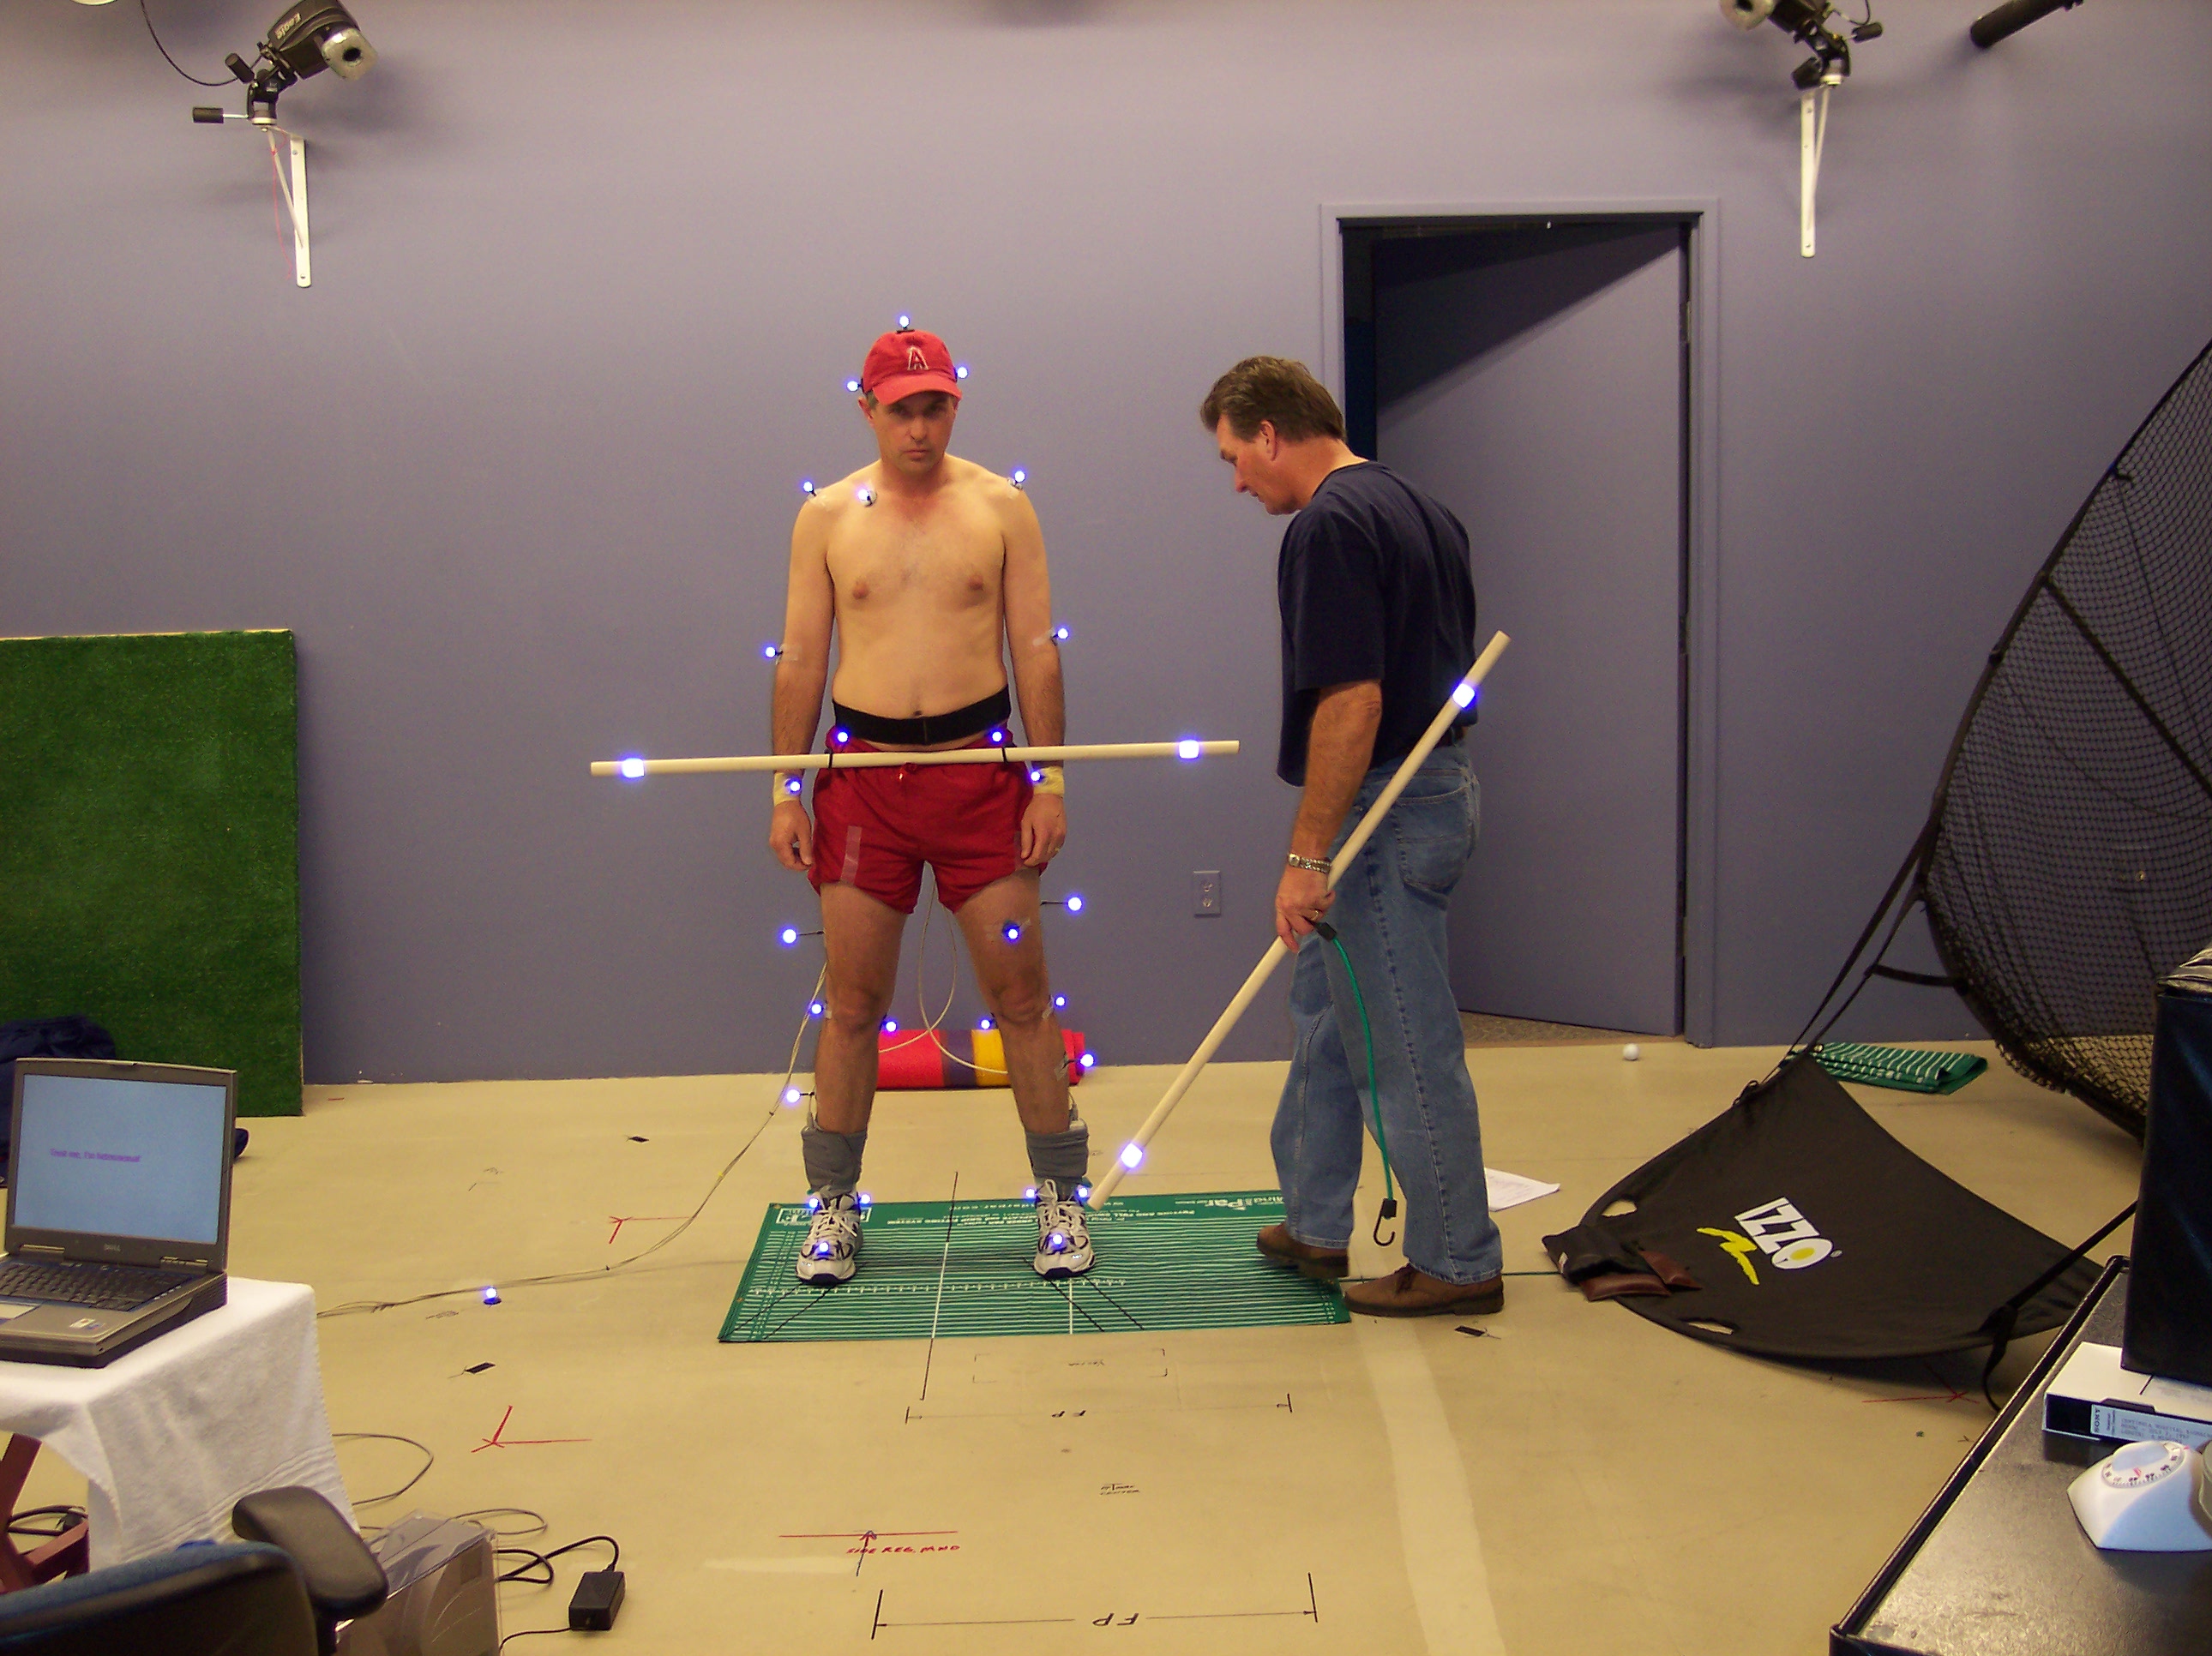
The bar and bungee placed flat on the Pelvis shows rotation in 8 of the 9 Core Region Stance Widths. Following the wall planks in each of the 9 Core Regions, the bar is parallel to the client's stance line in all stance widths.
If the bar is checked immediately following each Plank Region, the player's hips will be square only in the Stance Widths where the front or back of the Coronal Plane planks were completed. If one of the 9 Stance Widths is omitted in the exercise, your Pelvis will be rotated only in the single Stance Width that has not been exercised.
Thumbs Check
Instead of the bar, you may check your Core Tension by making a fist and pointing your thumbs toward each other with a slight bit of spine tilt. Close your eyes and relax your shoulders. When you open your eyes, note which hand is closest to your thigh. if you are totally relaxed, that is the direction of the rotation of your Transverse Plane.
Note that your thumbs line up only in 1 of the 9 Core Region Stance Widths. In the elimination process, you will note that your thumbs line up at the end of each front or back of the Coronal Plane "planking exercise". The thumbs will not line up in any other Stance Widths until the "planking exercise" is done validating both the "Thumbs Check" and the impact of the "planking exercise".
Strength / Force / Power Test
We know that Strength / Force / Power is recruited from the ground. The greater the body Symmetry, the greater the recruitment of Strength / Force / Power from the ground.
Structural Engineers design buildings for equal application of force on the perimeter of the building. Strength is present in only 1 of 9 Stance Widths prior to the 9 Core Region Stance Width Plank exercise.
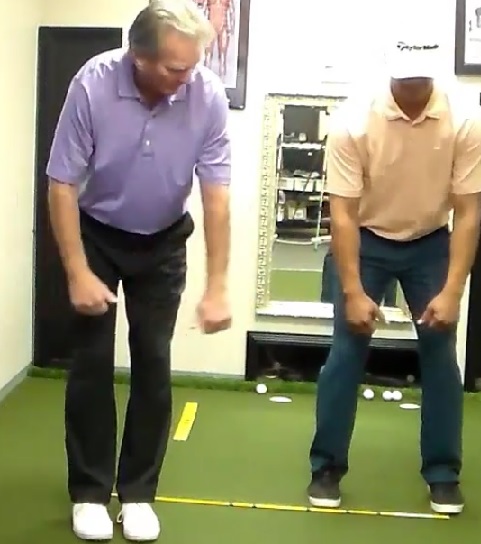
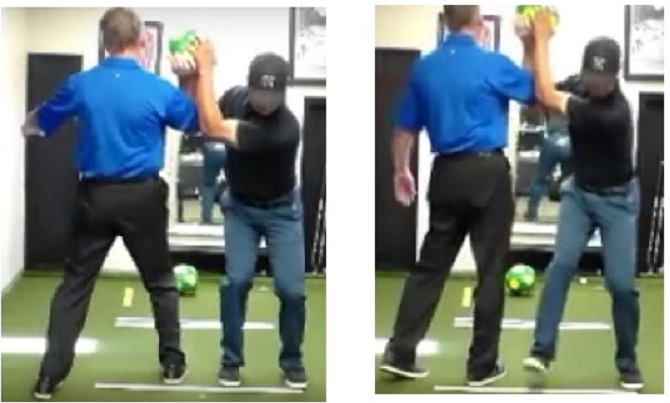
When a person assumes the 1 of 9 Stance Widths of Symmetry and Strength is tested, they have connection to the ground that gives them maximum strength as shown in this illustration (left photo). WHen you assume any Stance Width of the other 8 Core Regions, their is less connection to the ground and a loss of Power as shown in the illustration on the right.
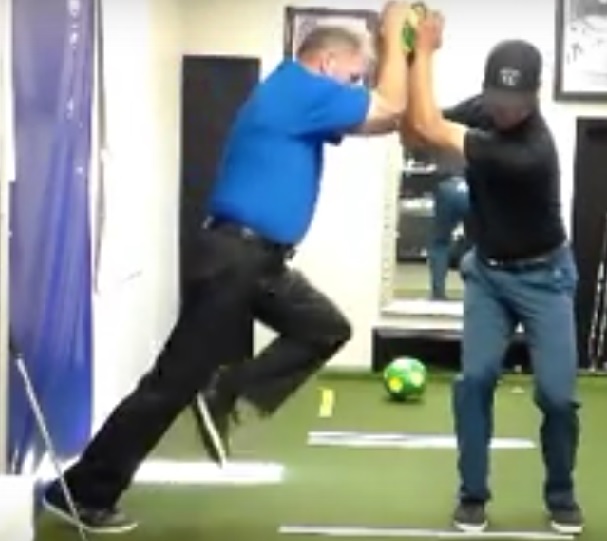
Following the Plank Exercise in each of the other 8 Core Region Stance Widths, Power will be demonstrated in all Stance Widths as shown in this illustration.
In the elimination test, if Power is tested in each of the Core Region Stance Widths as the Planking is completed, it is easy to see the acquisition of Power 1 Core Region at a time.
Jaw Symmetry
The front side of the "Coronal / Frontal Plane" goes into the Jaw Line and is demonstrated with changes in Core Region Stance Width changes by bite. Changes in heel to toe balance change the orientation of the bite front to back.
Stand tall and move your weight toward your toes, close your mouth and notice that your bite goes to the front of your mouth. Next move your weight to your heels. Notice that your bite moves to the back of your mouth. This same process happens with each change in Upper to Lower Core Stance Widths.
This illustration shows the mapping of the bite by Stance Widths.
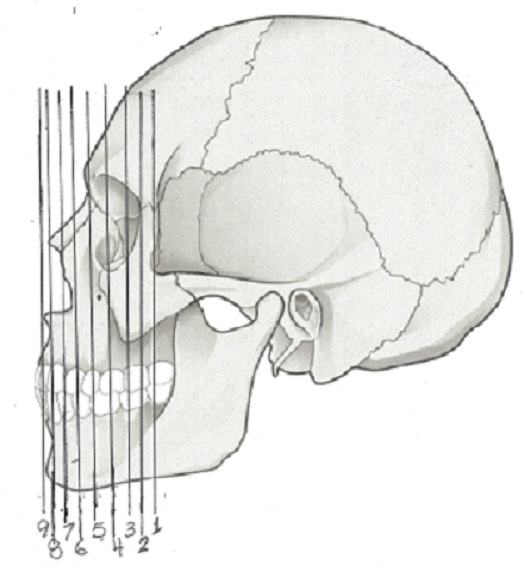
In the Upper Core Stance Widths the bite will move forward in your mouth. In the Lower Core Stance Widths, your bite will move toward the back of your mouth. In Middle Core Stance Widths, your bite will be in the middle of your mouth.
If there is a rotation of the Transverse Plane in, for example, a Middle Core Stance Width, your bite will be in the Middle of your mouth and touch only on one side.
You will be able to track your Core correction with the "planking exercise" by changes in your bite. Following each of the 9 Core Region Stance Width "Planking Exercise" you will note that your bite is even on both sides and corresponds precisely with the Core Region Stance Width that you Planked.
Carrying / Power Angle
The Carrying Angle was measured on every subject in the original study in Dr. Jobe's lab.
The Carrying Angle is the angle of range of motion through every joint in the body. This angle changes by Core Region. Prior to the "planking exercise, the Carrying Angle is different on both sides.

Following the "planking exercise" the Carrying Angle is the same on both sides only after the exercise.
The following illustration shows the difference in the measurement of the Carrying Angle in Upper (right) and Lower Core (left) Stance Widths in LPGA / Legends Tour Player Laurie Rinker. The Middle Core Stance Width Carrying Angle always measures between the Upper and Lower Core.
Notice that the external shoulder rotation measures exactly the same as the Carrying Angle in the Lower Core Stance Width (left) and the Upper Core Stance Width (right).
The Carrying Angle is directly related to balance. To experience the changes in your Carrying Angle as related to balance, Stand tall and gently rotate your palms forward in setting your Carrying Angle on both your left and right side. From this position, move your weight toward your heels and then toward your toes. You will note that as you move your balance toward your heels (Lower Core Balance) your Carrying Angle increases on both sides. As you move your weight toward your toes (Upper Core Balance) your Carrying Angle becomes more shallow on both sides. These are the subtle changes that occur as you move your stance width from one Core Region to another.
Visual Perception
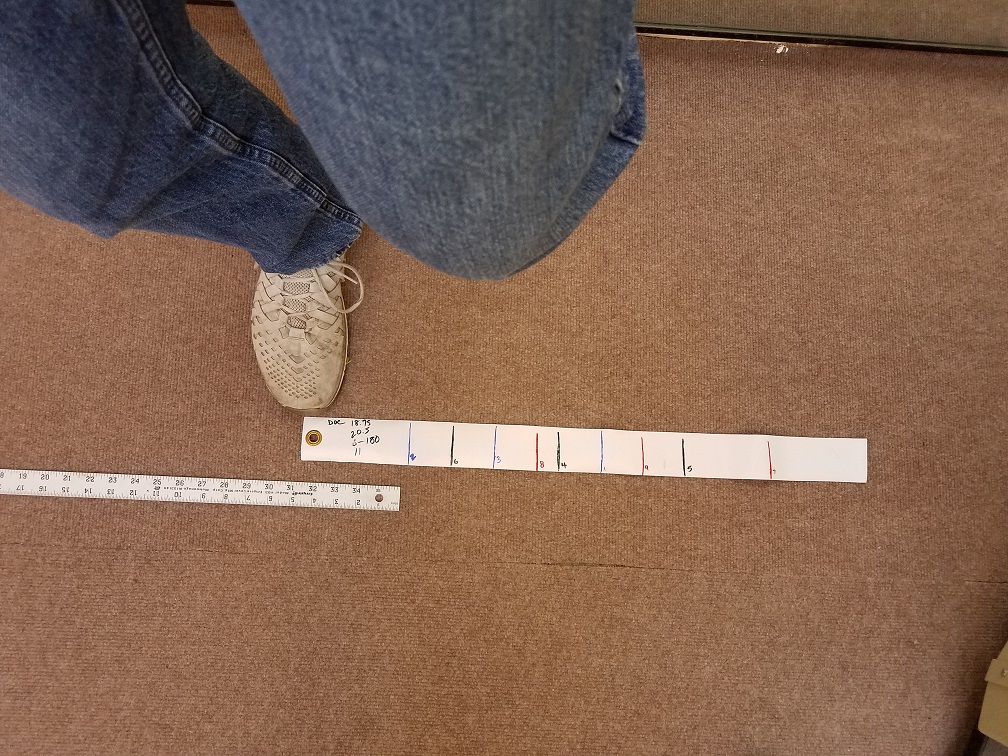
Accurate visual perception of known points on a line are perceived as accurate in only one of the 9 Stance Widths of the Wright Balance results. Visual perception was one part of the total Balance Research in Dr. Jobe's Biomechanics Lab as shown in the following illustrations.
When a line on a golf ball is aimed at toothpick, it is perceived as intersecting the toothpick in only one of the 9 Stance Widths prior to exercise...
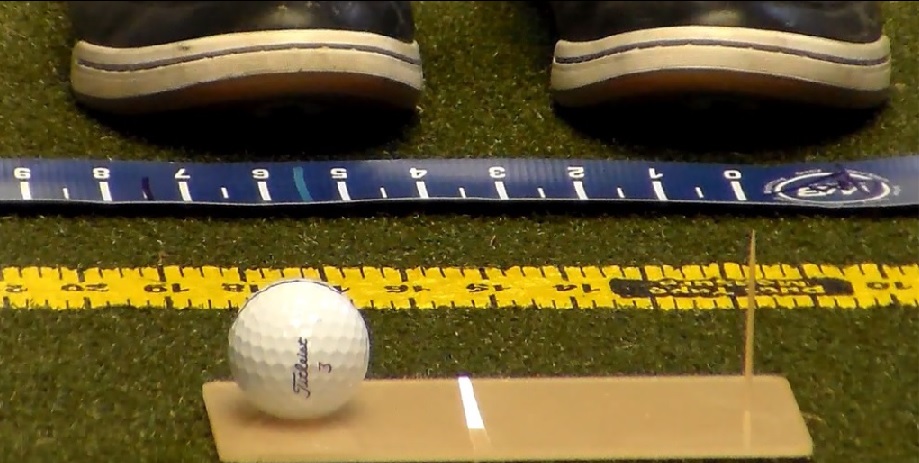

Following the Wright Balance® Core 360 Exercise Program, the line on the ball is perceived as intersecting the toothpick in all 9 Stance Widths. Using the elimination process, changes in visual perception of the line is experienced with each front Planking exercise. When a Stance Width is omitted in the exercise process, the line on the ball will appear left or right of the toothpick.
In the following illustration, MLB 11 time Gold GLove Winner Omar Vizquel is "Fit" for bat size and Stance Width in the Wright Balance® Biomechanics Lab in 2012. Omar was testing his vision in and out of balance in these illustrations.
![baseball-Omar-checking-ball-line-vision-with-bar-on-from-the-left-side]
When 6 baseballs with a line on each is aimed down the middle of a plate, the line looks like it will bisect the middle of the plate in 1 of the 9 Stance Widths and then in all Stance Widths after planks have been completed.

When one of the Planes of Motion are compromised by Core Tension, all of the Planes of Motion become involved. The Parasagittall Plane becomes tilted and rotated as it interfaces with the other Planes of Motion.
Shoulder, neck, hip and other aches and pains based upon "soft tissue" imbalances come from our Core. Research shows that 540 million people worldwide suffer from Back Pain. The number 1 reason for disability in the world today is Back Pain. The Origin of this "soft tissue" pain comes from the Core Muscles.
The correction of Core Imbalance is a simple Wright Balance® Core 360 Exercise Program done in the 9 Core Region Stance Widths. Ask your Wright Balance® Professional to do your body measurements and show you the simple exercises to balance your Core. This exercise program will strengthen your Core and minimize the chance of injury.
Longevity: After doing the Wright Balance® Core 360 Exercises for a week, you will be able to take a break for a day or 2 and your Core will remain square for that period. After a month of the Wright Balance® Core 360 exercises, your Core will stay square for 5 to 6 days without exercising. You will also be able to do 1/2 the Core Exercises one day and the other 1/2 the next and your Core will remain square.
There are over 90 applications of the Wright Balance® programs. Below are a few of those 90 plus we have explored with small sample sizes.
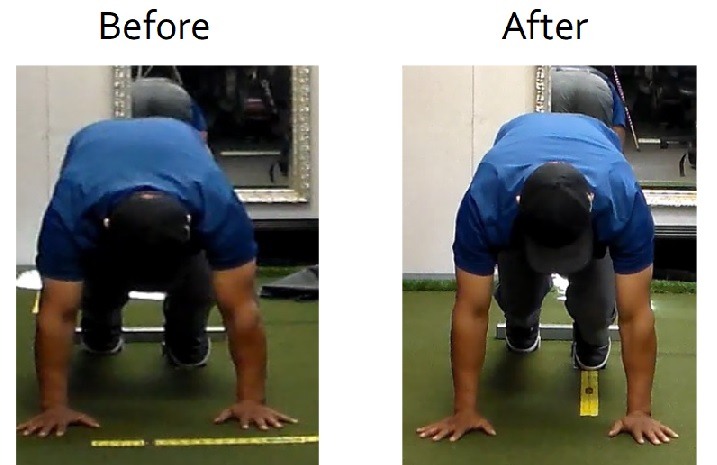
For example, the illustration below shows the impact of the Wright Balance® Core 360 Exercises on Starting Blocks. Note that in the before photo, Jai's right shoulder is lower than his left. He described a sensation of feeling as though he was going to "launch" into the lane to his right. Follwoing the Wright Balance® Core 360 Exercises, his shoulders are level and, by his report, he is ready to "launch" in a straight line.
There is another caveat related to both Starting Blocks and Cycling. Both of these sports have a set Stance Width at address. Bicycle pedal widths from the center of 1 pedal to the center of the other are between 10.5 and 11 inches on the majority of bicycles, exercise bikes included. Starting Blocks are not adjustable in width, only depth. Thus, these preset stance widths recruit different Regions of the Core across individuals. If the Lower Core recruitment is the most desirable for both of these activities, not all participants will be recruiting those regions given the static nature of foot placement and variability in individuals. If that is the case, some individuals have an unwitting advantage in competition in these activities.
Determining maximum explosiveness and the Stance Widths / Core Regions that are being recruited needs to be researched.
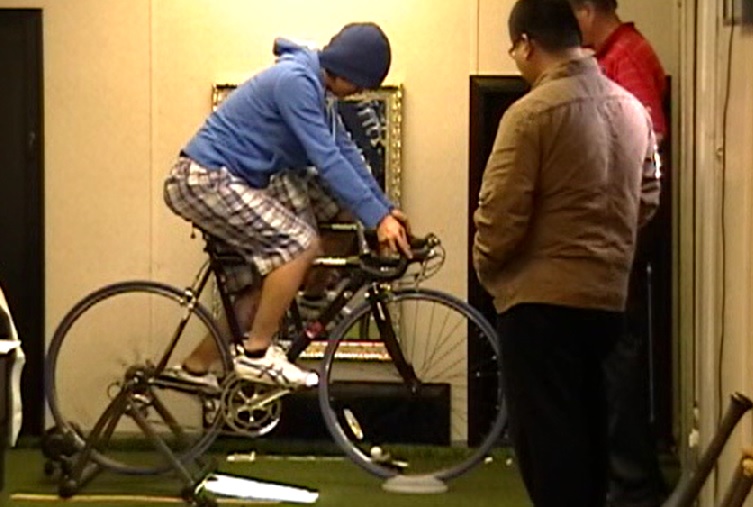
I began this research on cycling in our biomechanics lab in 2012. However, the research is incomplete. The following illustration is from that early research.
The same is true of vertical leap as shown in this illustration.
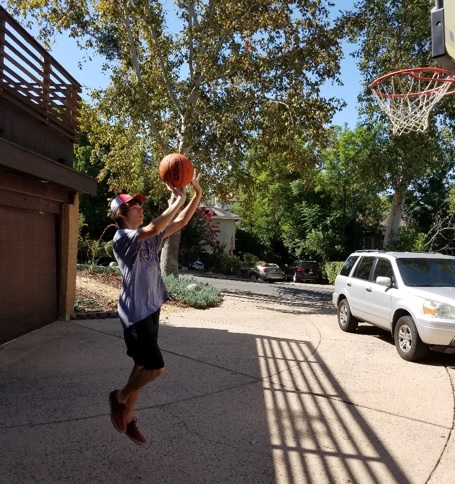
When the Transverse Plane is rotated, vertical leap will be impeded. Testing to determine the best Core Region for explosiveness in Vertical Leap would be a simple research project as well with pre and post test using the Wright Balance® Core 360 Exercise Program.
Any person in an activity that requires enhanced vision, lateral motion or freedom of movement in all directions is a candidate for the Wright Balance® Core 360 Program.
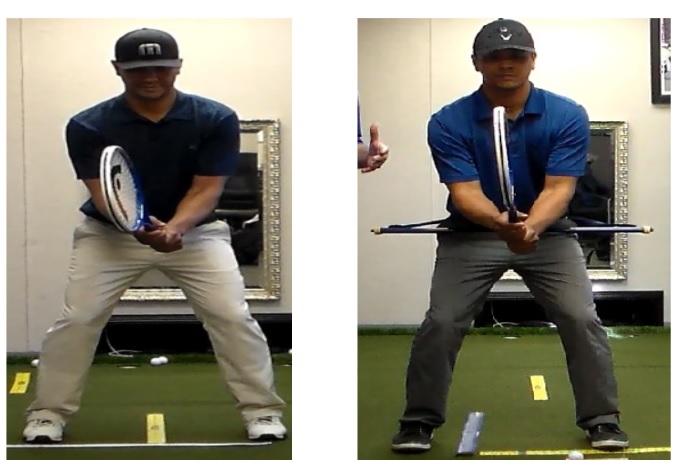
The illustration below was shot on separate days. Jai is pictured on the left with his tennis racquet on a day without doing the Wright Balance® Core 360 Exercise Program. The right illustration is after having done the exercise. Jai has freedom of motion in all directions in the right photo. The left photo suggests that Jai is going to have restricted motion on his right and compromised balance when moving to his left.
There is also consideration for treatment of Dental issues of malocclusion. What you experienced in testing your bite has significant consideration for Exercise treatment of malocclusion.
The recent research on the deleterious affects of long term use of Calcium in the treatment of Osteoporosis states that the single most important treatment is weight bearing exercise. As a pre and post measurement, a Bone Density Scan followed by The Wright Balance® Core 360 program for a year plus with Bone Density scans at intervals to assess the impact of Core Specific weight bearing exercise. A research project such as this would be best conducted in a setting where there is observation of regular exercise and pre, mid research and post bone density scans during and following the research period.
David F. Wright, Ph.D., PGA
Coto de Caza, CA April 12, 2018